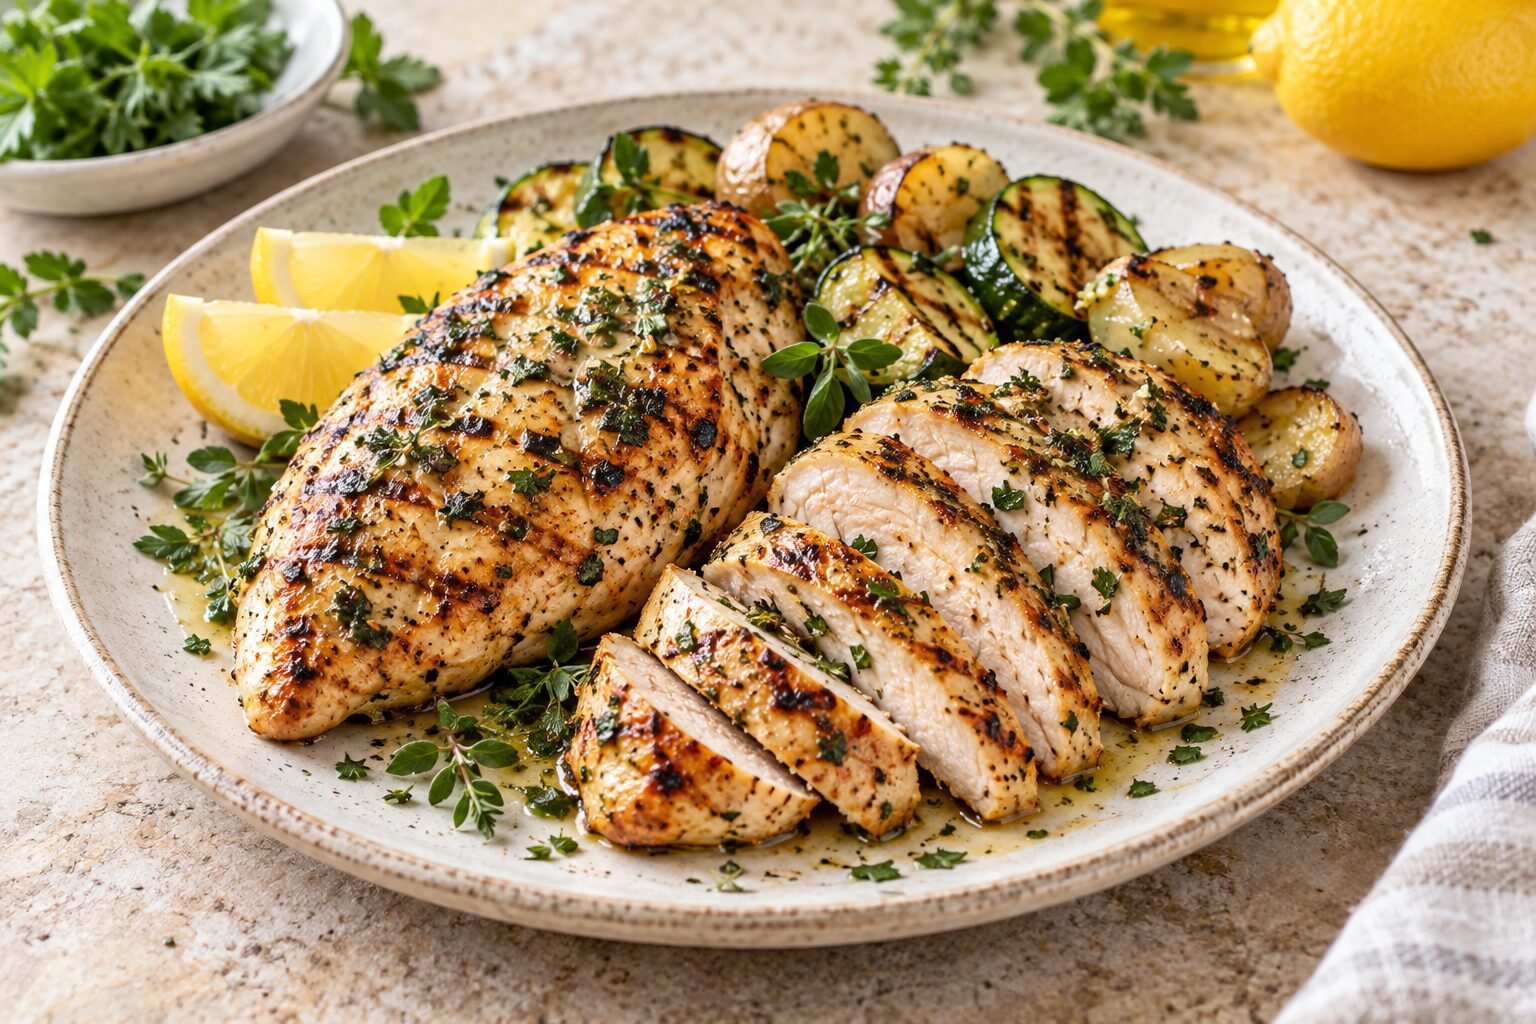
Chicken breast has a habit of dividing home cooks into two groups. Some see it as a dependable starting point for almost any meal, while others remember one too many dry and disappointing dinners. The truth is that chicken breast does not need complicated ingredients or restaurant-level techniques to taste wonderful. It simply needs the right cooking method, enough seasoning, and a little attention at the right moments.
These easy chicken breast recipes were chosen to bring genuine variety to the dinner table. You will find bright lemon and herb flavors, a quick honey garlic stir-fry, a comforting Tuscan-style sauce, colorful Mediterranean skewers, and several other meals that fit naturally into everyday life. Some are ready quickly enough for a busy weeknight, while others are ideal for a relaxed weekend dinner with family or friends.
What I appreciate most about chicken breast is how easily it adapts to different occasions. A simple grilled version can become part of a light summer meal, while creamy chicken served with pasta or mashed potatoes feels much more comforting on a cooler evening. Chicken skewers are fun to place in the center of the table for everyone to share, and a teriyaki rice bowl is perfect when each person wants to assemble dinner in a slightly different way.
How to Keep Chicken Breast Juicy
The most important step often happens before the chicken reaches the pan. Chicken breasts can vary considerably in thickness, which means the thin end may become dry before the thickest section is fully cooked. Gently pounding the meat to a more even thickness helps it cook at the same rate. For larger pieces, slicing the breasts horizontally into thinner cutlets can also make cooking faster and more predictable.
Marinades add flavor, but they should not be expected to rescue badly overcooked chicken. A short marinade containing oil, herbs, garlic, spices, or citrus can season the surface beautifully. When using plenty of lemon or another acidic ingredient, avoid leaving the chicken in the marinade for an excessively long time because the outside may develop an unpleasant texture.
A meat thermometer is one of the most useful tools for these chicken breast recipes. Insert it into the thickest part of the meat without touching the pan or baking tray. The chicken is safely cooked when its internal temperature reaches 165°F or 74°C. After removing it from the heat, let it rest for a few minutes before slicing. This short pause allows the juices to settle instead of immediately running onto the cutting board.
Another simple rule is to match the method to the shape of the meat. Thin cutlets work especially well for quick pan-frying and breaded recipes. Evenly cut cubes are best for stir-fries and rice bowls, while thicker breasts can be carefully opened and filled for a stuffed chicken dinner. Skewers require pieces of a similar size so that every cube finishes cooking at approximately the same time.
Eight Recipes, Eight Different Dinner Ideas
This collection is designed to be useful rather than repetitive. Instead of presenting several recipes that produce almost the same result, each one has its own purpose.
The Lemon Herb Grilled Chicken Breast is light and fresh enough for warm-weather meals. Honey Garlic Chicken and Broccoli Stir-Fry provides a quick all-in-one dinner with a sweet and savory sauce. Creamy Tuscan Chicken offers something richer, while Garlic Parmesan Baked Chicken Cutlets deliver a lightly crisp exterior without deep-frying.
Mediterranean Chicken Skewers With Lemon Rice are made for sharing, and the Teriyaki Chicken and Pineapple Rice Bowls combine sweet, salty, and tangy flavors in one colorful serving. Sheet Pan Chicken Fajitas keep washing up to a minimum, while Spinach and Cream Cheese Stuffed Chicken Breast is an excellent choice when you want dinner to look a little more special.
These are approachable chicken breast recipes rather than rigid formulas. You can change the side dishes, adjust the seasoning, or substitute vegetables according to what is already in the refrigerator. Broccoli can become green beans, rice can be exchanged for couscous, and a fresh salad can lighten one of the creamier dishes.
It is worth making a little extra chicken when time allows. Properly stored cooked chicken can become the foundation of tomorrow’s lunch: slice it over a salad, tuck it into a wrap, add it to a grain bowl, or serve it with roasted vegetables. This makes the recipes useful beyond a single dinner and can reduce the temptation to order food on an especially busy day.
Most importantly, do not be intimidated by chicken breast. A dependable thermometer, even thickness, confident seasoning, and careful timing make a much greater difference than elaborate ingredients. Choose the recipe that best matches your evening, prepare the side dishes while the chicken cooks, and enjoy a meal that feels considered without turning dinner into an exhausting project.
1. Lemon Herb Grilled Chicken Breast
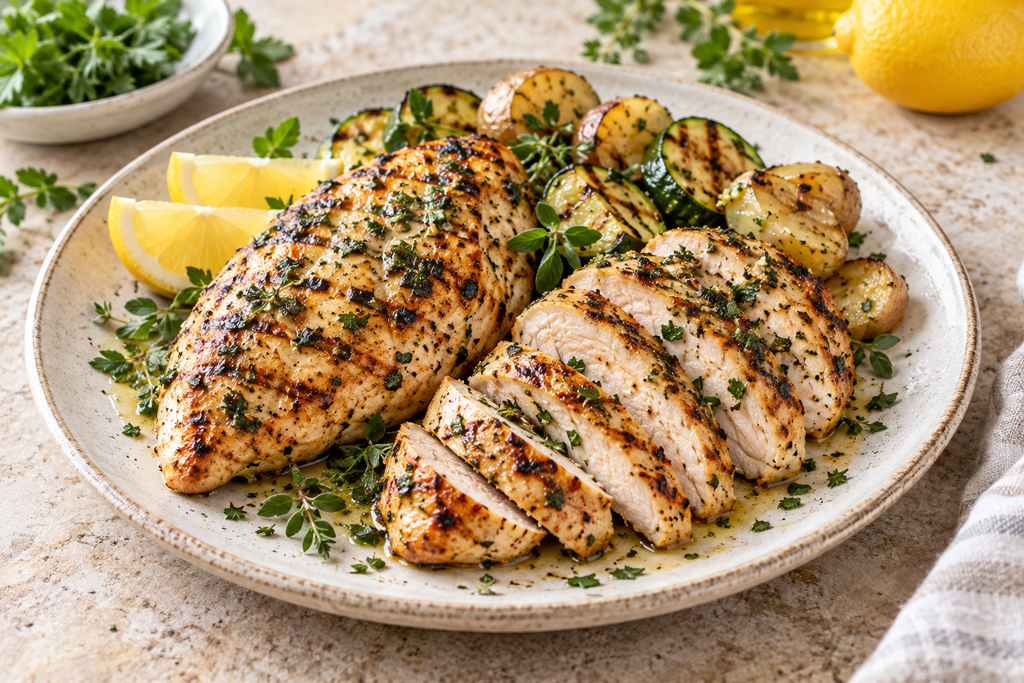
Fresh, juicy, and pleasantly uncomplicated, this Lemon Herb Grilled Chicken Breast is the kind of meal that makes an ordinary evening feel a little more like summer. The marinade combines lemon, garlic, olive oil, and fresh herbs without overwhelming the natural flavor of the chicken.
It is a dependable choice for a garden lunch, a relaxed family dinner, or a meal-prep afternoon. Serve it straight from the grill with seasonal vegetables, or prepare an extra portion to use in salads and wraps during the week.
Servings: 4
Preparation time: 15 minutes
Marinating time: 30 minutes to 4 hours
Cooking time: 12–16 minutes
Resting time: 5 minutes
Total time: Approximately 1 hour, including the shortest marinating time
Ingredients
- 4 boneless, skinless chicken breasts, approximately 6 oz or 170 g each
- 3 tablespoons olive oil
- 2 tablespoons freshly squeezed lemon juice
- 1 teaspoon finely grated lemon zest
- 3 garlic cloves, finely minced
- 1 tablespoon chopped fresh parsley
- 2 teaspoons chopped fresh oregano
- 1 teaspoon chopped fresh thyme
- 1 teaspoon fine salt
- ½ teaspoon freshly ground black pepper
- ½ teaspoon mild paprika
- Lemon wedges, for serving
- Additional fresh parsley, for garnish
Instructions
- Place each chicken breast between two sheets of parchment paper. Gently pound the thicker sections until the meat has a relatively even thickness of about ¾ inch. This helps the chicken cook evenly and reduces the risk of dry edges.
- In a medium bowl, whisk together the olive oil, lemon juice, lemon zest, garlic, parsley, oregano, thyme, salt, black pepper, and paprika.
- Place the chicken in a resealable food-safe bag or shallow nonreactive dish. Pour the marinade over it and turn each piece until evenly coated. Cover and refrigerate for at least 30 minutes and no longer than 4 hours.
- Remove the chicken from the refrigerator approximately 15 minutes before cooking. Preheat an outdoor grill or grill pan over medium-high heat. Clean and lightly oil the grill grates if necessary.
- Lift the chicken from the marinade and allow the excess liquid to drip away. Discard the marinade that has been in contact with the raw chicken.
- Place the chicken on the hot grill. Cook without repeatedly moving it for approximately 5–7 minutes, depending on its thickness. Turn it over and cook the second side for another 5–7 minutes.
- Check the thickest part with an instant-read thermometer. The chicken is ready when it reaches an internal temperature of 165°F or 74°C.
- Transfer the grilled chicken to a clean plate and let it rest for 5 minutes. Garnish with parsley and serve with fresh lemon wedges.
Tips for the Best Result
Do not skip the step of evening out the chicken breasts. One very thick section and one thin end will rarely finish cooking at the same moment. If the breasts are especially large, slice them horizontally into cutlets instead of pounding them.
Although lemon brings brightness to the marinade, more time is not always better. Leaving chicken in a strongly acidic mixture overnight can make its exterior soft or slightly mushy. A marinating time of 30 minutes to 4 hours provides plenty of flavor for this recipe.
Avoid pressing the chicken against the grill with a spatula. It does not make the meat cook faster, but it can force flavorful juices out of it. Turn each piece only when it releases fairly easily from the grill surface.
What to Serve With It
Lemon Herb Grilled Chicken Breast works especially well with roasted baby potatoes, grilled zucchini, steamed green beans, or a simple tomato and cucumber salad. For a more substantial dinner, serve it over rice, couscous, or buttered orzo and spoon any resting juices over the top.
One of my favorite ways to enjoy it is outdoors with a large shared salad and warm bread. The scent of lemon and herbs coming from the grill creates that unmistakable feeling of a meal that should not be rushed.
Storage and Reheating
Allow leftover chicken to cool, then refrigerate it in an airtight container for up to 3–4 days. Keep the breasts whole when possible and slice them only before serving, as this helps preserve moisture.
Reheat the chicken gently in a covered skillet with a tablespoon of water or chicken stock. It can also be warmed in the microwave at a reduced power setting. Avoid prolonged reheating, which can dry out the lean meat.
Cold leftover Lemon Herb Grilled Chicken Breast is also excellent sliced over salad, folded into a wrap, or added to a Mediterranean-style grain bowl.
2. Honey Garlic Chicken and Broccoli Stir-Fry
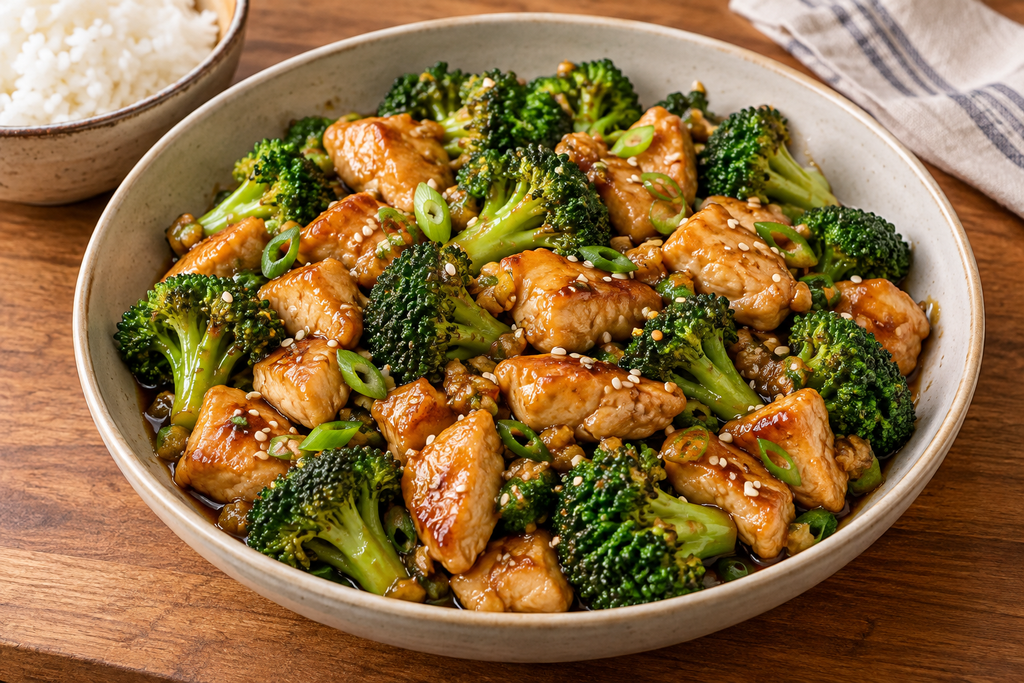
Some evenings call for a dinner that comes together quickly but still tastes as though you gave it proper attention. This Honey Garlic Chicken and Broccoli Stir-Fry fills that role beautifully. Tender pieces of chicken breast, crisp broccoli, and a glossy homemade sauce create a colorful meal with a satisfying balance of sweet, savory, and gently tangy flavors.
The recipe is particularly useful when time is short. Once the ingredients have been prepared, everything cooks in approximately 15 minutes. Have the sauce mixed and the rice ready before heating the skillet—the cooking moves quickly once it begins.
Servings: 4
Preparation time: 15 minutes
Cooking time: 15 minutes
Total time: 30 minutes
Ingredients
For the stir-fry
- 1½ lb or 680 g boneless, skinless chicken breasts
- 1 tablespoon cornstarch
- ½ teaspoon fine salt
- ¼ teaspoon freshly ground black pepper
- 2 tablespoons neutral cooking oil, divided
- 4 cups small broccoli florets
- 3 tablespoons water
- 3 garlic cloves, finely minced
- 1 teaspoon finely grated fresh ginger
- 3 green onions, thinly sliced
- 1 teaspoon sesame seeds, for serving
- Cooked rice or noodles, for serving
For the honey garlic sauce
- ⅓ cup low-sodium soy sauce
- ¼ cup water
- 3 tablespoons honey
- 1 tablespoon rice vinegar
- 1 teaspoon toasted sesame oil
- 2 teaspoons cornstarch
- ¼ teaspoon red pepper flakes, optional
Instructions
- Slice the chicken breasts into evenly sized, bite-sized pieces. Keeping the pieces similar in size helps them cook at the same rate.
- Place the chicken in a bowl and sprinkle it with 1 tablespoon of cornstarch, the salt, and black pepper. Toss until every piece has a thin, even coating.
- Prepare the sauce before beginning to cook. In a small bowl, whisk together the soy sauce, water, honey, rice vinegar, sesame oil, 2 teaspoons of cornstarch, and the optional red pepper flakes. Continue whisking until no visible lumps remain.
- Heat 1 tablespoon of oil in a large skillet or wok over medium-high heat. Add the broccoli and stir-fry for approximately 2 minutes.
- Pour 3 tablespoons of water into the pan and immediately cover it with a lid. Steam the broccoli for 2–3 minutes, until it turns bright green and becomes crisp-tender. Transfer it to a clean plate. Carefully wipe excess water from the skillet if necessary.
- Return the skillet to medium-high heat and add the remaining tablespoon of oil. Arrange the chicken in a single layer. Cook it without stirring for approximately 2 minutes so that the first side can develop some color.
- Continue stir-frying the chicken for another 4–5 minutes. Add the garlic and ginger during the final 30 seconds and stir continuously so they become fragrant without burning.
- Whisk the prepared sauce once more because the cornstarch may have settled at the bottom. Pour it into the skillet and reduce the heat to medium.
- Return the broccoli to the pan. Toss everything together for 1–2 minutes, until the sauce thickens and evenly coats the chicken and vegetables.
- Check a larger piece of chicken to ensure its center has reached 165°F or 74°C. Remove the skillet from the heat, scatter the green onions and sesame seeds over the top, and serve immediately with rice or noodles.
Tips for a Better Stir-Fry
Cutting the chicken against the grain can make each piece noticeably more tender. Look for the direction of the muscle fibers and slice across them rather than running the knife in the same direction.
Avoid crowding a small skillet. Too many pieces packed closely together release moisture and begin to steam instead of browning. If your pan is not large enough, cook the chicken in two batches and combine everything when adding the sauce.
The cornstarch serves two different purposes. The light coating on the chicken encourages browning and helps protect its surface, while the cornstarch in the sauce gives the finished dish its glossy consistency. Measure it carefully: too much can make the sauce pasty as it cools.
Honey burns more readily than ordinary savory liquids, which is why the sauce is added only after the chicken has nearly finished cooking. Keep the heat moderate once it enters the pan.
Easy Variations
Broccoli is a natural companion to this dish, but it is not the only option. Thinly sliced bell pepper, sugar snap peas, mushrooms, green beans, or a small amount of shredded carrot can also be included. Add firm vegetables earlier and delicate ones closer to the end.
For additional heat, increase the red pepper flakes or serve the stir-fry with sliced fresh chili. If you prefer a less sweet sauce, reduce the honey to 2 tablespoons and add another tablespoon of water.
Serving Experience
Honey Garlic Chicken and Broccoli Stir-Fry is especially enjoyable served in wide bowls over freshly steamed jasmine rice. The rice absorbs the extra sauce, while the green onions and sesame seeds bring freshness and texture to every serving.
It is also a good meal to place in the center of the table and share directly from the skillet. There is something inviting about bringing the still-sizzling pan to dinner and allowing everyone to spoon the chicken, broccoli, and sauce over their own rice.
Storage and Reheating
Transfer cooled leftovers to an airtight container and refrigerate them for up to 3–4 days. Store the rice separately when possible so it does not absorb all the sauce.
Reheat the stir-fry in a skillet over medium-low heat with 1–2 tablespoons of water. Stir gently until thoroughly heated. A microwave can also be used, but heat it in short intervals and stir between each one to prevent the chicken from becoming tough.
The sauce will thicken considerably when refrigerated. Adding a small splash of water during reheating will return it to a smoother consistency.
3. Creamy Tuscan Chicken
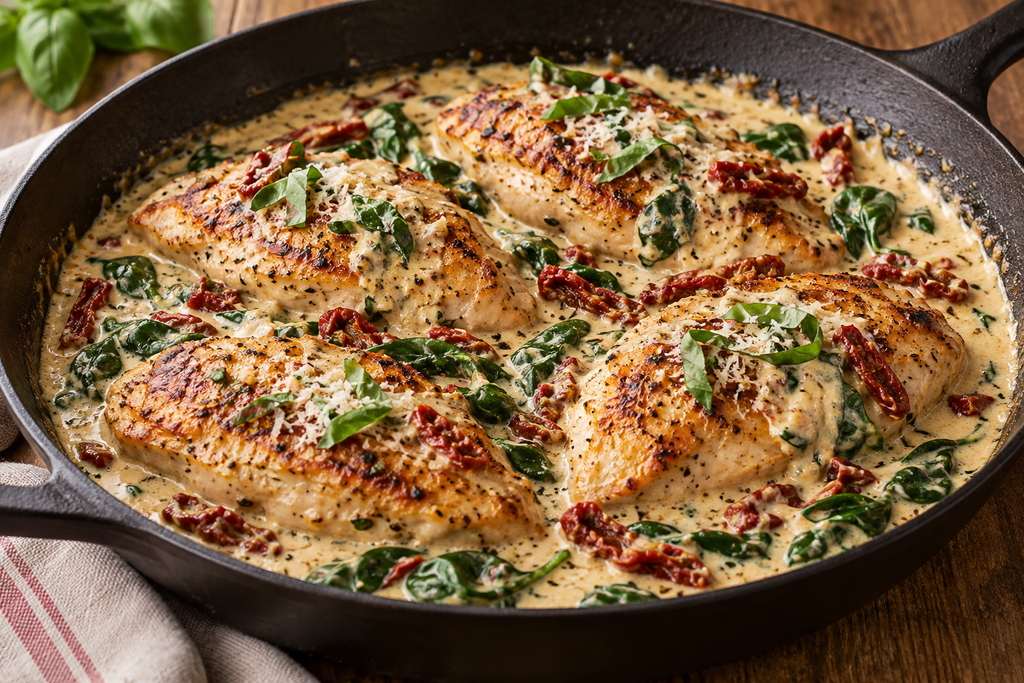
Creamy Tuscan Chicken is made for evenings when you want something comforting without spending hours in the kitchen. Golden chicken breasts rest in a velvety garlic and Parmesan sauce filled with sun-dried tomatoes and tender spinach. The finished dish looks special enough for guests, yet everything comes together in a single large skillet.
The sauce is rich but balanced. Sun-dried tomatoes bring a concentrated sweet-tart flavor, while spinach adds freshness and color. A small amount of chicken stock loosens the cream and helps the sauce coat the chicken without becoming excessively heavy.
Servings: 4
Preparation time: 15 minutes
Cooking time: 25 minutes
Total time: 40 minutes
Ingredients
- 4 small boneless, skinless chicken breasts, approximately 5–6 oz or 140–170 g each
- 1 teaspoon fine salt, divided
- ½ teaspoon freshly ground black pepper
- ½ teaspoon Italian seasoning
- 2 tablespoons all-purpose flour
- 1 tablespoon olive oil
- 1 tablespoon unsalted butter
- 3 garlic cloves, finely minced
- ½ cup sliced sun-dried tomatoes, drained if packed in oil
- ¾ cup low-sodium chicken stock
- 1 cup heavy cream
- ½ cup finely grated Parmesan cheese
- ½ teaspoon Italian seasoning
- ⅛ teaspoon red pepper flakes, optional
- 3 packed cups baby spinach
- 1 teaspoon freshly squeezed lemon juice
- Fresh basil or parsley, for serving
Instructions
- Place the chicken breasts between two sheets of parchment paper and gently pound their thicker sections until each piece has a relatively even thickness of approximately ¾ inch.
- Pat the chicken dry with a paper towel. Season both sides with ¾ teaspoon of the salt, the black pepper, and ½ teaspoon of Italian seasoning. Lightly dust the chicken with flour and shake away any excess.
- Heat the olive oil and butter in a large skillet over medium-high heat. Once the butter begins to foam, add the chicken breasts in a single layer.
- Cook the first side for approximately 4–5 minutes without moving the chicken unnecessarily. Turn each breast and cook for another 3–4 minutes. The chicken does not need to be completely cooked at this point because it will finish in the sauce.
- Transfer the chicken to a clean plate and reduce the heat to medium. Do not wipe out the skillet; the browned pieces on its surface will add flavor to the sauce.
- Add the garlic and sun-dried tomatoes. Cook for approximately 30 seconds, stirring continuously, until the garlic becomes fragrant.
- Pour in the chicken stock. Use a wooden spoon to loosen the flavorful browned bits from the bottom of the pan. Let the liquid simmer for 2–3 minutes and reduce slightly.
- Lower the heat to medium-low and stir in the heavy cream, Parmesan, the remaining ¼ teaspoon salt, ½ teaspoon Italian seasoning, and optional red pepper flakes.
- Cook the sauce gently for 2–3 minutes, stirring frequently. Do not allow it to boil vigorously because excessive heat may cause the cream to separate and the cheese to become grainy.
- Add the spinach in two batches, allowing the first portion to wilt before adding the rest.
- Return the chicken and any juices collected on the plate to the skillet. Spoon some sauce over each piece and simmer gently for approximately 4–6 minutes.
- Check the thickest section of each chicken breast. It should reach an internal temperature of 165°F or 74°C. Remove the skillet from the heat and stir the lemon juice into the sauce.
- Taste and adjust the seasoning if necessary. Garnish the Creamy Tuscan Chicken with fresh basil or parsley and serve while the sauce is warm.
How to Keep the Sauce Smooth
Finely grated Parmesan melts much more easily than thick pre-shredded cheese. Packaged grated cheese may contain ingredients that prevent clumping in the bag but can also produce a less smooth sauce.
Keep the temperature moderate after adding the cream and cheese. A gentle simmer is enough to thicken the sauce. If it becomes thicker than you prefer, add chicken stock one tablespoon at a time until the desired consistency is reached.
If the sauce still seems thin after the chicken is cooked, remove the meat to a plate and let the sauce simmer gently for another minute or two. Remember that it will continue to thicken slightly as it cools.
Practical Variations
For a lighter sauce, replace up to half of the heavy cream with additional chicken stock. The result will be thinner and less rich but will retain the garlic, tomato, and Parmesan flavors.
Mushrooms also work well in this recipe. Slice approximately 8 oz or 225 g of mushrooms and brown them after removing the chicken from the pan. Let their released liquid evaporate before adding the garlic and sun-dried tomatoes.
Sun-dried tomatoes packed in oil generally have a softer texture. Drain them well before slicing, but reserve a teaspoon of their flavorful oil if you would like to use it in place of some of the olive oil.
What to Serve With Creamy Tuscan Chicken
Mashed potatoes, pasta, or rice are excellent choices because they capture the creamy sauce. For a lighter dinner, serve the chicken with steamed green beans, roasted asparagus, or a crisp salad dressed simply with lemon and olive oil.
Warm crusty bread is also useful for gathering the last traces of sauce from the plate. This is one of those meals that encourages everyone to linger at the table for a few extra minutes.
The skillet can be brought directly to the table on a heat-safe trivet. The contrast between the golden chicken, deep red tomatoes, green spinach, and pale Parmesan sauce gives the meal an inviting, generous appearance.
Storage and Reheating
Allow leftovers to cool before transferring them to an airtight container. Store Creamy Tuscan Chicken in the refrigerator for up to 3 days.
Reheat it gently in a covered skillet over low heat. Add a small splash of chicken stock or cream and stir the sauce occasionally. Avoid high heat, which may cause the sauce to separate and the chicken to become tough.
Freezing is not the preferred option because cream-based sauces can change texture after thawing. If you do freeze the dish, thaw it overnight in the refrigerator and reheat it slowly while stirring the sauce to help restore its consistency.
4. Garlic Parmesan Baked Chicken Cutlets
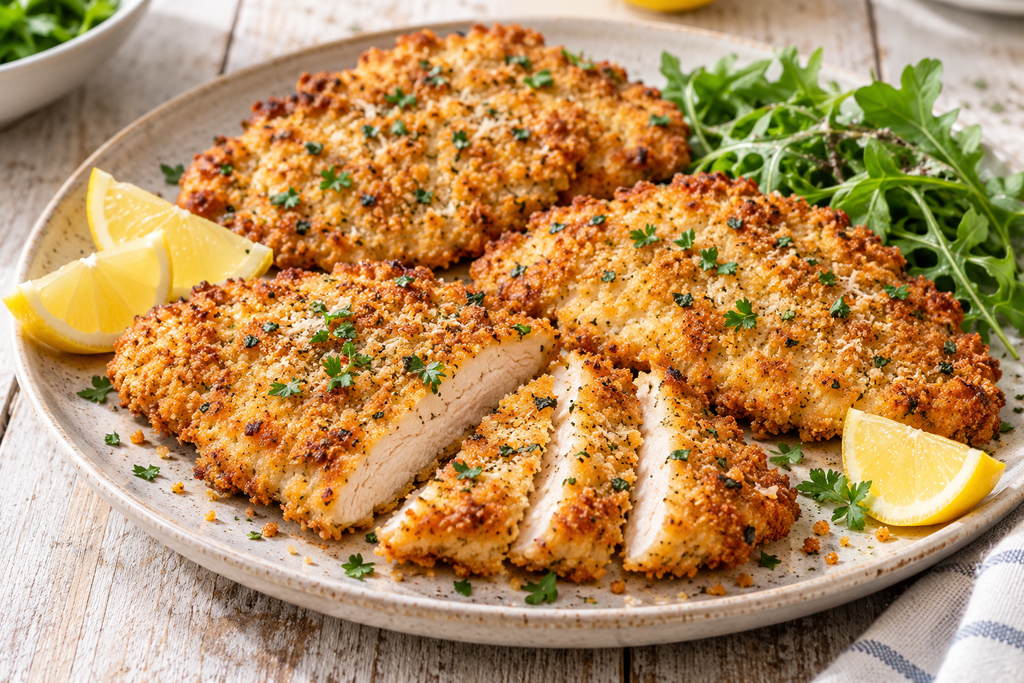
These Garlic Parmesan Baked Chicken Cutlets offer the crisp, golden coating of breaded chicken without the splatter and extra oil that come with deep-frying. Thin chicken breast cutlets are covered with a savory mixture of panko breadcrumbs, Parmesan, garlic, and herbs, then baked until the coating is crunchy and the center remains juicy.
This is a practical recipe for busy evenings because the oven handles most of the work. While the chicken bakes, there is enough time to prepare a salad, steam some vegetables, or warm a simple tomato sauce. The cutlets are also versatile enough to serve in sandwiches or slice over pasta the following day.
Servings: 4
Preparation time: 15 minutes
Cooking time: 16–20 minutes
Total time: 35 minutes
Ingredients
- 2 large boneless, skinless chicken breasts, approximately 1½ lb or 680 g in total
- ½ teaspoon fine salt
- ¼ teaspoon freshly ground black pepper
- ⅓ cup all-purpose flour
- 2 large eggs
- 1 tablespoon water
- 1 cup panko breadcrumbs
- ½ cup finely grated Parmesan cheese
- 1 teaspoon garlic powder
- 1 teaspoon Italian seasoning
- ½ teaspoon mild paprika
- 2 tablespoons olive oil
- Cooking spray or additional oil, for the baking rack
- Chopped fresh parsley, for serving
- Lemon wedges, for serving
Instructions
- Preheat the oven to 425°F or 220°C. Place an oven-safe wire rack over a rimmed baking sheet and lightly coat the rack with cooking spray or oil. The rack allows hot air to circulate underneath the cutlets, helping both sides become crisp.
- Slice each chicken breast horizontally to produce two thinner cutlets. If necessary, place them between sheets of parchment paper and gently pound them to an even thickness of approximately ½ inch.
- Pat the chicken dry with a paper towel. Season both sides with salt and black pepper.
- Prepare three shallow dishes. Add the flour to the first one. In the second, whisk the eggs with 1 tablespoon of water. In the third dish, combine the panko, Parmesan, garlic powder, Italian seasoning, and paprika.
- Drizzle the olive oil over the breadcrumb mixture. Rub and toss it through the crumbs with a fork or clean fingertips until the mixture is evenly moistened. This small amount of oil helps the coating develop an attractive golden color in the oven.
- Working with one piece at a time, coat the chicken lightly in flour and shake away the excess. Dip it into the egg mixture, allowing any extra egg to drip back into the dish.
- Place the cutlet in the breadcrumb mixture. Press the coating gently but firmly onto both sides. Avoid repeatedly turning the chicken, as this can loosen the crumbs.
- Arrange the breaded cutlets on the prepared rack, leaving space between them. Lightly mist their surfaces with cooking spray if any areas of the coating still appear completely dry.
- Bake for 12 minutes, then carefully turn the cutlets using a thin spatula or tongs. Continue baking for approximately 4–8 minutes.
- The Garlic Parmesan Baked Chicken Cutlets are ready when the coating is crisp and golden and the thickest part of the chicken reaches 165°F or 74°C.
- Let the cutlets rest on the rack for 3–5 minutes. Sprinkle them with fresh parsley and serve with lemon wedges.
How to Make the Coating Stay in Place
Drying the surface of the chicken is an important first step. Excess moisture makes it difficult for the flour to adhere evenly. The flour then gives the egg something to grip, while the egg acts as the adhesive for the breadcrumb mixture.
Use one hand for the flour and breadcrumbs and the other hand for the egg. This keeps the dry ingredients from collecting into sticky clumps on your fingers and produces a more even coating.
After breading, allow the cutlets to sit on the rack for approximately 5 minutes before placing them in the oven. This short rest helps the layers settle. When turning the chicken, slide the utensil fully underneath rather than gripping only the crumb coating.
Tips for a Crispier Result
Panko breadcrumbs have a lighter, more irregular structure than fine traditional breadcrumbs, so they become especially crisp in the oven. Mixing a little oil directly into the crumbs encourages browning more evenly than spraying only the finished cutlets.
Do not place the chicken directly on an unlined, cold baking tray if a wire rack is available. The underside can trap steam and become soft. If you do not have a rack, preheat the baking tray in the oven and carefully place the cutlets on a lightly oiled sheet of parchment paper.
The precise cooking time depends on the thickness of the meat. Start checking thinner cutlets early instead of leaving them in the oven merely to darken the coating. A brief minute under the broiler can add color if necessary, but watch continuously to prevent the Parmesan from burning.
Serving Ideas
Serve Garlic Parmesan Baked Chicken Cutlets with roasted potatoes, steamed green beans, or a crisp arugula salad dressed with lemon. They also pair naturally with spaghetti and warm tomato sauce for a simple Italian-inspired dinner.
For a casual lunch, place a cutlet in a toasted roll with lettuce, sliced tomato, and a spoonful of garlic mayonnaise. The chicken can also be sliced into strips and arranged over a Caesar-style salad.
There is something especially satisfying about cutting through the crisp exterior and finding tender chicken underneath. Serving the cutlets on a large board with lemon wedges and a bowl of salad creates an easy, relaxed meal that everyone can help themselves to.
Storage and Reheating
Allow leftover cutlets to cool completely before placing them in an airtight container. Refrigerate them for up to 3–4 days. Separate stacked pieces with parchment paper to protect the coating.
For the best texture, reheat the chicken in a 375°F or 190°C oven or air fryer until thoroughly hot and crisp. A microwave will warm it, but the breadcrumb coating will become soft.
The breaded cutlets can also be frozen after baking. Freeze them separately on a tray before transferring them to a freezer-safe container. Reheat directly from frozen in the oven, allowing additional time for the center to become fully hot.
5. Mediterranean Chicken Skewers With Lemon Rice
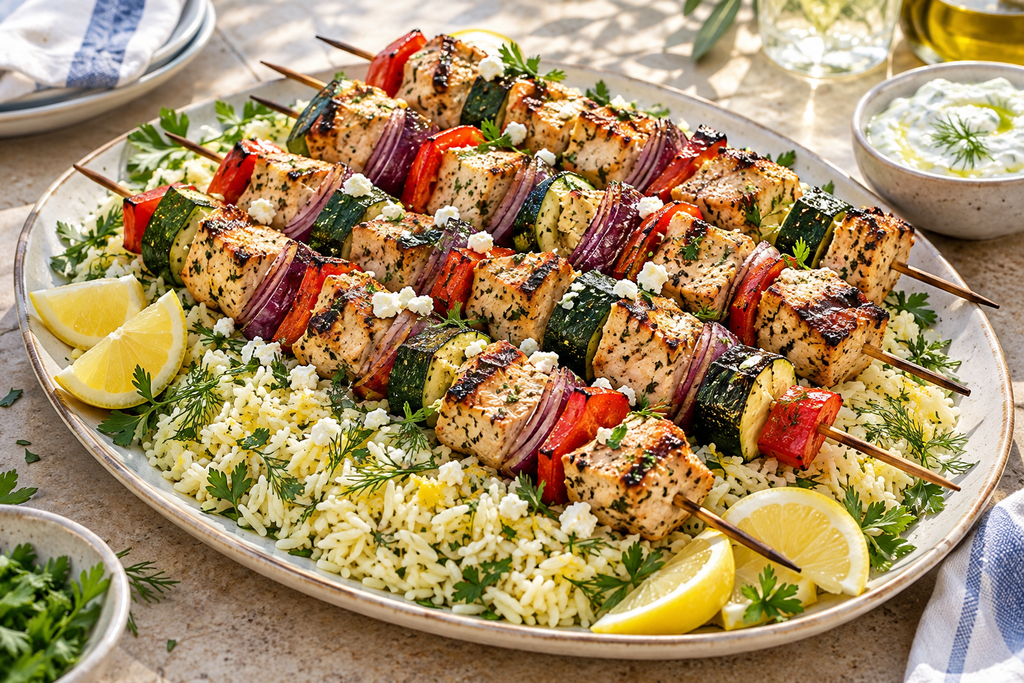
Mediterranean Chicken Skewers With Lemon Rice bring the easygoing feeling of an outdoor meal to the table. The chicken is marinated with lemon, garlic, oregano, and olive oil, then threaded onto skewers with colorful vegetables and cooked until lightly charred. Served over fluffy rice scented with lemon and herbs, the skewers become a complete and satisfying dinner.
This recipe works equally well on an outdoor grill, a stovetop grill pan, or under the oven broiler. It is especially suited to relaxed family meals because the platter can be placed in the center of the table, allowing everyone to choose a skewer and add rice, salad, or yogurt sauce to their plate.
Servings: 4
Preparation time: 25 minutes
Marinating time: 30 minutes to 4 hours
Cooking time: 25 minutes
Total time: Approximately 1 hour 20 minutes, including the shortest marinating time
Ingredients
For the chicken skewers
- 1½ lb or 680 g boneless, skinless chicken breasts
- 1 medium red bell pepper
- 1 small zucchini
- 1 small red onion
- 3 tablespoons olive oil
- 2 tablespoons freshly squeezed lemon juice
- 1 teaspoon finely grated lemon zest
- 3 garlic cloves, finely minced
- 2 teaspoons dried oregano
- 1 teaspoon mild paprika
- ¾ teaspoon fine salt
- ½ teaspoon freshly ground black pepper
- 2 tablespoons chopped fresh parsley
- Cooking oil, for the grill grates
For the lemon rice
- 1½ cups long-grain white rice
- 1 tablespoon olive oil
- 1 small shallot or ½ small yellow onion, finely chopped
- 1 garlic clove, finely minced
- 2½ cups low-sodium chicken stock
- ½ teaspoon fine salt, or to taste
- 1 teaspoon finely grated lemon zest
- 2 tablespoons freshly squeezed lemon juice
- 2 tablespoons chopped fresh parsley
- 1 tablespoon chopped fresh dill, optional
For serving
- Lemon wedges
- Plain Greek yogurt or tzatziki
- Crumbled feta cheese, optional
- Additional fresh parsley
Instructions
- Cut the chicken breasts into even pieces approximately 1¼ inches in size. Uniform pieces are important because very small cubes can dry out before larger ones are safely cooked.
- Cut the bell pepper, zucchini, and red onion into pieces similar in size to the chicken. Keep the onion layers in small groups so they remain attached to the skewers.
- In a large bowl, whisk together the olive oil, lemon juice, lemon zest, garlic, oregano, paprika, salt, black pepper, and parsley.
- Add the chicken and toss until every piece is well coated. Cover the bowl and refrigerate for at least 30 minutes and no longer than 4 hours.
- If using wooden skewers, soak them in water for approximately 30 minutes before cooking. This will not make them completely fireproof, but it can reduce scorching.
- While the chicken marinates, rinse the rice under cool water until the water runs mostly clear. Drain it thoroughly.
- Heat 1 tablespoon of olive oil in a medium saucepan over medium heat. Add the shallot and cook for 2–3 minutes, until softened. Stir in the garlic and cook for another 30 seconds.
- Add the drained rice and stir for approximately 1 minute. Pour in the chicken stock and add the salt. Bring the liquid to a gentle boil.
- Cover the saucepan, reduce the heat to low, and cook the rice for approximately 15 minutes, or according to the timing on its package. Remove it from the heat and leave it covered for another 10 minutes.
- Preheat an outdoor grill or grill pan to medium-high heat. Lightly oil the grates.
- Thread the marinated chicken, bell pepper, zucchini, and red onion alternately onto the skewers. Leave a tiny amount of space between the pieces so heat can reach their sides.
- Discard the marinade that has been in contact with the raw chicken. Place the skewers on the hot grill.
- Cook for approximately 10–14 minutes, turning the skewers every few minutes so the chicken and vegetables develop color on several sides.
- Check a thick piece of chicken near the center of a skewer. It should reach an internal temperature of 165°F or 74°C.
- Fluff the rested rice with a fork. Fold in the lemon zest, lemon juice, parsley, and optional dill. Taste and adjust the salt if needed.
- Spoon the lemon rice onto a large serving platter and arrange the Mediterranean Chicken Skewers over it. Garnish with additional parsley and serve with lemon wedges, yogurt or tzatziki, and optional feta.
Oven and Broiler Method
If outdoor grilling is not practical, arrange the skewers across the edges of a rimmed baking dish or place them on a wire rack set over a foil-lined baking sheet.
Cook them in a preheated 425°F or 220°C oven for approximately 15–18 minutes, turning once. For additional color, place them under the broiler for the final 1–2 minutes. Watch closely, as the vegetables and wooden skewers can darken quickly.
Always confirm the chicken’s internal temperature rather than relying only on the color of its exterior.
Tips for Evenly Cooked Skewers
Avoid packing the pieces tightly together. A crowded skewer may look generous, but the touching surfaces receive less direct heat. A small space between the ingredients encourages more even cooking and browning.
Cut the zucchini into fairly thick half-moons rather than thin slices. Thin pieces can soften and fall from the skewer before the chicken is ready.
If you prefer firmer vegetables, place the chicken and vegetables on separate skewers. This allows each ingredient to be removed from the grill at its ideal time. It is also useful when cooking for someone who enjoys softer peppers but more lightly cooked zucchini.
The Experience of Serving This Meal
Mediterranean Chicken Skewers With Lemon Rice are at their best when served on one large platter rather than divided in the kitchen. The colors of the grilled vegetables, fresh herbs, lemon, and golden chicken create an inviting centerpiece without complicated presentation.
This is an enjoyable meal for a warm evening outdoors, but it can bring some of that atmosphere indoors as well. Place small bowls of tzatziki, crumbled feta, cucumber salad, and extra lemon around the platter and allow everyone to build a plate in their own way.
Removing the chicken and vegetables from the skewers and folding them into the lemon rice is part of the fun. Any remaining yogurt sauce can be spooned over the top for a cool contrast to the warm, smoky ingredients.
Storage and Reheating
Remove leftover chicken and vegetables from the skewers before storing them. Place them in an airtight container and refrigerate for up to 3–4 days. Keep the lemon rice in a separate container when possible.
Reheat the chicken and vegetables gently in a covered skillet or in a 350°F or 175°C oven. Add a small splash of water to the rice before reheating it so the grains regain some moisture.
Leftovers can also be enjoyed cold in a Mediterranean-style lunch bowl with cucumber, tomatoes, olives, greens, and a spoonful of yogurt sauce.
6. Teriyaki Chicken and Pineapple Rice Bowls
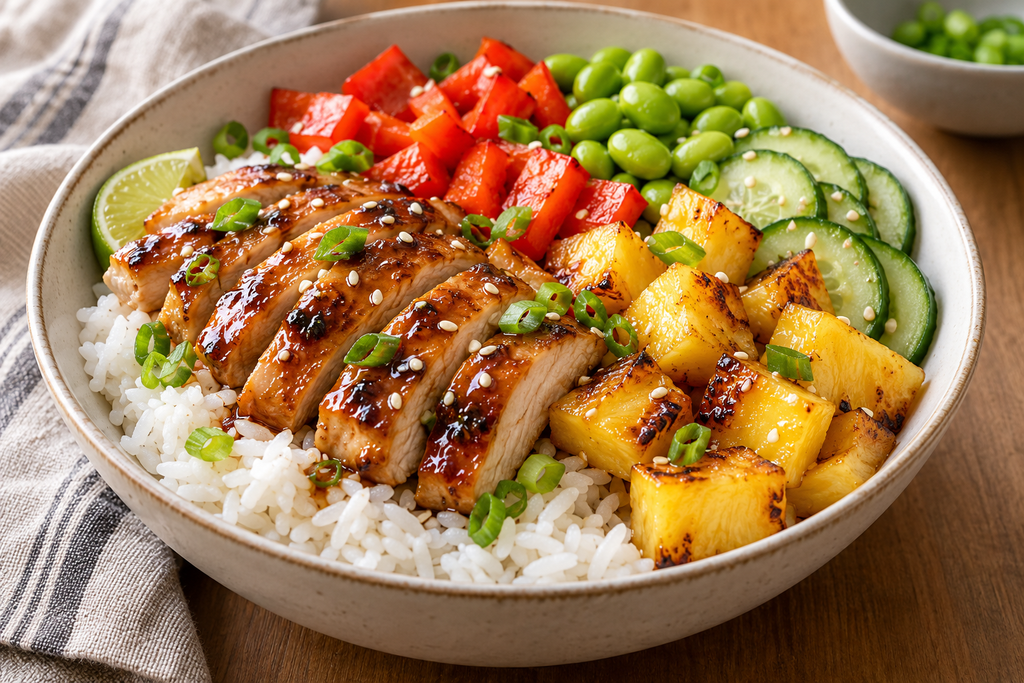
Teriyaki Chicken and Pineapple Rice Bowls combine savory glazed chicken, caramelized fruit, fresh vegetables, and fluffy rice in one colorful meal. The homemade teriyaki sauce is sweet, salty, and gently tangy, while fresh ginger and garlic keep its flavor lively rather than simply sugary.
Each part of the bowl is cooked separately and brought together at the end. This allows the chicken breast to brown properly, the bell pepper to retain some bite, and the pineapple to develop lightly caramelized edges. It also lets everyone assemble a bowl according to their own taste.
Servings: 4
Preparation time: 20 minutes
Cooking time: 20 minutes
Total time: 40 minutes
Ingredients
For the teriyaki sauce
- ⅓ cup low-sodium soy sauce
- ⅓ cup water
- 3 tablespoons honey or packed light brown sugar
- 2 tablespoons rice vinegar
- 1 teaspoon toasted sesame oil
- 2 garlic cloves, finely minced
- 2 teaspoons finely grated fresh ginger
- 1 tablespoon cornstarch
- 2 tablespoons cool water, for mixing with the cornstarch
For the chicken and pineapple
- 1½ lb or 680 g boneless, skinless chicken breasts
- ½ teaspoon fine salt
- ¼ teaspoon freshly ground black pepper
- 1 tablespoon neutral cooking oil
- 2 cups fresh pineapple chunks
- 1 large red bell pepper, cut into bite-sized pieces
- 1 cup shelled edamame, thawed if frozen
- 3 green onions, thinly sliced
- 1 teaspoon sesame seeds
For the bowls
- 4 cups cooked jasmine or long-grain rice
- 1 small cucumber, thinly sliced
- Lime wedges, optional
Instructions
- Begin by preparing the sauce. In a small saucepan, combine the soy sauce, ⅓ cup water, honey or brown sugar, rice vinegar, sesame oil, garlic, and ginger.
- Bring the mixture to a gentle simmer over medium heat, stirring occasionally until the sweetener has completely dissolved.
- In a small cup, whisk the cornstarch with 2 tablespoons of cool water to create a smooth slurry. Slowly pour it into the simmering sauce while whisking.
- Cook the sauce for approximately 1–2 minutes, until it becomes glossy and lightly coats the back of a spoon. Remove it from the heat. It should remain pourable because it will thicken further as it cools.
- Pat the chicken breasts dry and slice them horizontally if they are particularly thick. Gently pound the pieces to an even thickness of approximately ¾ inch. Season with salt and black pepper.
- Heat a large skillet over medium-high heat and add the neutral oil. Place the chicken in the hot pan and cook for approximately 5–7 minutes on the first side.
- Turn the chicken and cook for another 4–6 minutes, depending on its thickness. Check the thickest section with an instant-read thermometer. It should reach 165°F or 74°C.
- Transfer the chicken to a clean cutting board and allow it to rest for 5 minutes before slicing.
- Return the skillet to medium-high heat. Add the pineapple chunks in a single layer and cook for 2–3 minutes without moving them excessively. Turn and cook for another 1–2 minutes, until several sides are lightly caramelized. Transfer the pineapple to a plate.
- Add the bell pepper to the skillet and cook for 3–4 minutes, until slightly softened but still colorful. Add the edamame and cook for another 1–2 minutes, until heated through.
- Slice the rested chicken into strips. Brush or spoon a small amount of the warm teriyaki sauce over the chicken and turn the pieces gently to coat them.
- Divide the cooked rice among four bowls. Arrange the teriyaki chicken, caramelized pineapple, bell pepper, edamame, and cucumber in separate sections over the rice.
- Spoon additional sauce over each bowl. Finish with sliced green onions, sesame seeds, and optional lime wedges.
Why the Ingredients Are Cooked Separately
Adding all the ingredients to the skillet at once may seem faster, but it usually produces more liquid than the pan can evaporate. The chicken then steams instead of browning, while the pineapple softens before it has a chance to caramelize.
Cooking the ingredients in stages builds more flavor and preserves their individual textures. The method also makes the finished rice bowls more attractive because the vegetables remain colorful instead of becoming uniformly coated in dark sauce.
The sauce is added to the chicken after cooking rather than used as a raw marinade. This keeps the preparation simple and means the remaining sauce is ready to serve without having contacted raw poultry.
Tips for a Balanced Teriyaki Sauce
Low-sodium soy sauce gives you better control over the saltiness. If you use regular soy sauce, begin with a little less and increase the water by one or two tablespoons.
Taste the sauce before thickening it. Add another teaspoon of rice vinegar if it seems too sweet, or a small amount of honey if you prefer a sweeter finish.
If the sauce becomes too thick, whisk in warm water one tablespoon at a time. If it remains thinner than desired, let it simmer briefly before adding more cornstarch. Too much starch can create a gel-like texture as the sauce cools.
Bowl Variations
Brown rice, quinoa, or cauliflower rice can replace the jasmine rice. The latter produces a lighter bowl but will not absorb the sauce in quite the same way.
Other vegetables can be added according to what is available. Steamed broccoli, shredded carrots, sugar snap peas, or sautéed mushrooms all work well. Try to retain several different colors and textures rather than cooking everything until completely soft.
For a touch of heat, add red pepper flakes to the sauce or serve the bowls with thinly sliced fresh chili.
A Relaxed Way to Serve Dinner
Teriyaki Chicken and Pineapple Rice Bowls are enjoyable to assemble at the table. Place the rice, sliced chicken, vegetables, pineapple, and sauce in separate serving dishes and allow everyone to build their own combination.
This approach is particularly useful when cooking for people with different preferences. Someone may want extra pineapple, another person might prefer more vegetables, and the amount of sauce can be adjusted individually.
The bright yellow pineapple, red pepper, green edamame, and glossy chicken create a cheerful meal that feels more elaborate than its preparation actually is.
Storage and Meal Preparation
Store the cooked rice, chicken, vegetables, and sauce in separate airtight containers when possible. Refrigerate them for up to 3–4 days.
For meal-prep portions, place rice, chicken, bell pepper, and edamame in individual containers. Keep the cucumber and sauce separate and add them after reheating.
Warm the chicken and rice until thoroughly hot, adding a tablespoon of water to the rice to restore moisture. Reheat the teriyaki sauce gently, as it may become considerably thicker in the refrigerator. Add the cucumber, pineapple, green onions, and sesame seeds just before serving.
7. Sheet Pan Chicken Fajitas
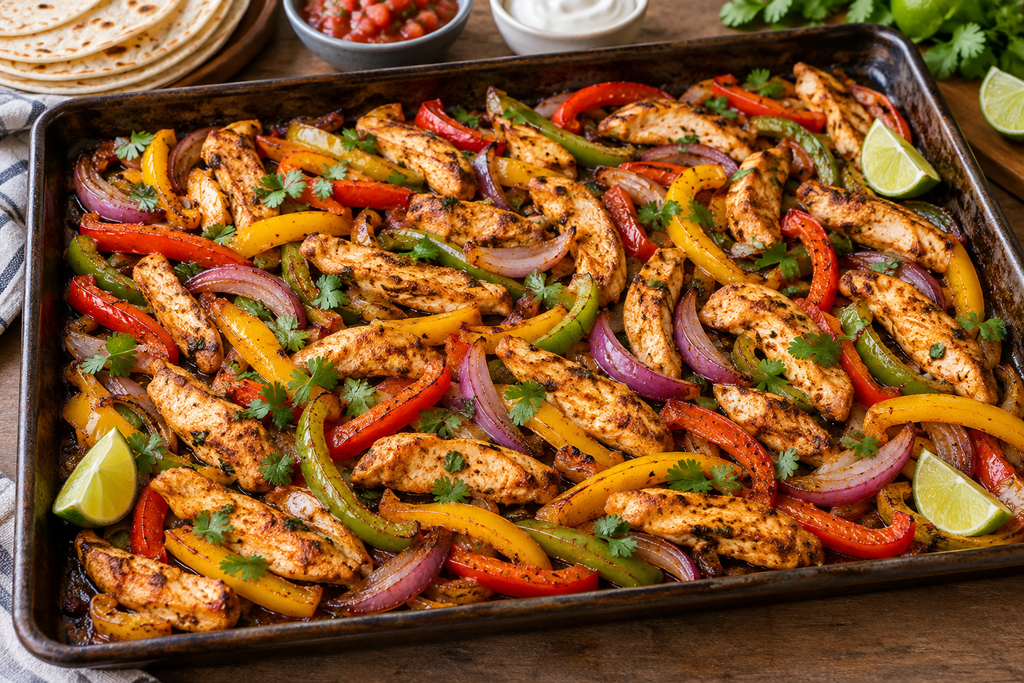
Sheet Pan Chicken Fajitas deliver the sizzling colors and bold seasoning of classic fajitas with very little washing up. Strips of chicken breast, bell peppers, and red onion are tossed with a homemade spice mixture and roasted together until the vegetables soften around the edges and the chicken is tender.
The entire filling is prepared on one large baking sheet, making this an especially useful recipe for a busy evening. Place the hot tray in the center of the table with warm tortillas and several toppings, and everyone can assemble their fajitas exactly as they like.
Servings: 4
Preparation time: 15 minutes
Cooking time: 18–22 minutes
Total time: Approximately 40 minutes
Ingredients
For the fajita filling
- 1½ lb or 680 g boneless, skinless chicken breasts
- 1 large red bell pepper
- 1 large yellow bell pepper
- 1 large green bell pepper
- 1 medium red onion
- 3 tablespoons olive oil
- 1 tablespoon freshly squeezed lime juice
- 2 teaspoons chili powder
- 1½ teaspoons ground cumin
- 1 teaspoon smoked paprika
- 1 teaspoon garlic powder
- ½ teaspoon dried oregano
- ¾ teaspoon fine salt
- ¼ teaspoon freshly ground black pepper
- ⅛–¼ teaspoon cayenne pepper, optional
For serving
- 8 small flour or corn tortillas
- 1 lime, cut into wedges
- Fresh cilantro leaves
- Sliced avocado
- Sour cream or plain Greek yogurt
- Salsa or pico de gallo
- Crumbled cheese, optional
Instructions
- Preheat the oven to 425°F or 220°C. Position one rack in the upper third of the oven. Line a large, rimmed sheet pan with parchment paper or lightly coat it with oil.
- Slice the chicken breasts across the grain into strips approximately ½ inch thick. Try to keep the strips similar in size so they cook evenly.
- Remove the seeds and membranes from the bell peppers. Slice them into strips about the same thickness as the chicken. Cut the red onion into thin wedges.
- In a small bowl, combine the chili powder, cumin, smoked paprika, garlic powder, oregano, salt, black pepper, and optional cayenne.
- Arrange the chicken, peppers, and onion on the prepared sheet pan. Drizzle them with olive oil and lime juice, then sprinkle the seasoning mixture evenly over everything.
- Toss the ingredients directly on the pan until they are evenly coated. Spread them into a single layer, leaving a little room between the pieces wherever possible.
- Roast for approximately 10 minutes. Remove the tray from the oven and carefully turn the chicken and vegetables with a wide spatula or kitchen tongs.
- Return the pan to the oven and continue roasting for another 8–12 minutes. The vegetables should be tender with lightly browned edges, and the chicken should reach an internal temperature of 165°F or 74°C at its thickest point.
- For additional browning, place the sheet pan under the broiler for 1–2 minutes. Watch continuously during this step because the vegetables can darken quickly.
- Remove the tray from the oven and squeeze a little additional lime juice over the filling. Let the chicken rest on the pan for approximately 3 minutes while warming the tortillas.
- Warm the tortillas in a dry skillet, microwave, or wrapped in foil in the oven. Fill them with the roasted chicken, peppers, and onion.
- Finish the Sheet Pan Chicken Fajitas with cilantro, avocado, salsa, sour cream, or your preferred toppings. Serve immediately with lime wedges.
How to Avoid Watery Fajitas
Use the largest sheet pan available and spread the ingredients into one layer. When chicken and vegetables are piled on top of one another, the released moisture becomes trapped and the ingredients steam rather than roast.
Pat the chicken dry before slicing it. Water on its surface dilutes the oil and seasoning and makes browning more difficult.
Do not add salsa or other wet toppings to the baking tray. Serve them separately after roasting so the fajita filling keeps its concentrated flavor and lightly caramelized edges.
If your pan is small, divide the mixture between two baking sheets. Rotate the trays halfway through cooking so they brown evenly.
Cutting the Chicken and Vegetables
The strips should be narrow enough to fit comfortably inside a tortilla but not so thin that they dry out before the vegetables soften. Approximately ½ inch is a reliable width.
Cutting across the grain shortens the chicken’s muscle fibers and produces more tender bites. The grain may run in a slightly different direction in each breast, so take a moment to inspect the meat before slicing.
Pepper strips can be slightly wider than the chicken because they shrink and soften during roasting. Keep the onion in narrow wedges rather than separating every layer, as slightly larger pieces are less likely to burn.
Adjusting the Heat
The chili powder used in everyday spice blends is generally mild, while cayenne provides most of the heat in this recipe. Omit the cayenne for a family-friendly version or increase it gradually if you prefer spicier fajitas.
Hot sauce and sliced jalapeños can be offered at the table. This lets each person control the heat without making the entire tray too spicy.
Smoked paprika does not necessarily make the dish hot. Its main purpose is to add a subtle smoky character that complements the roasted vegetables.
Making Dinner an Experience
Sheet Pan Chicken Fajitas are more enjoyable when the ingredients are brought to the table separately. Keep the chicken and vegetables warm on the baking tray, stack the tortillas in a clean kitchen towel, and arrange the toppings in small bowls.
Everyone can build a different fajita: one loaded with avocado and salsa, another with extra peppers and lime, or a simpler version with chicken and yogurt. This makes the meal feel relaxed and interactive without creating extra work for the cook.
Any filling that falls from the tortillas is not wasted. Spoon it over rice or gather it with tortilla chips at the end of the meal.
Storage and Reheating
Allow leftover chicken and vegetables to cool before transferring them to an airtight container. Refrigerate for up to 3–4 days. Keep the tortillas and cold toppings in separate containers.
Reheat the fajita filling in a hot skillet for several minutes or spread it on a baking sheet and warm it in a 375°F or 190°C oven. A skillet provides the best opportunity for the edges to regain some color.
Leftovers can be used in rice bowls, quesadillas, salads, or omelets. They can also be portioned with rice and black beans for an easy prepared lunch.
8. Spinach and Cream Cheese Stuffed Chicken Breast
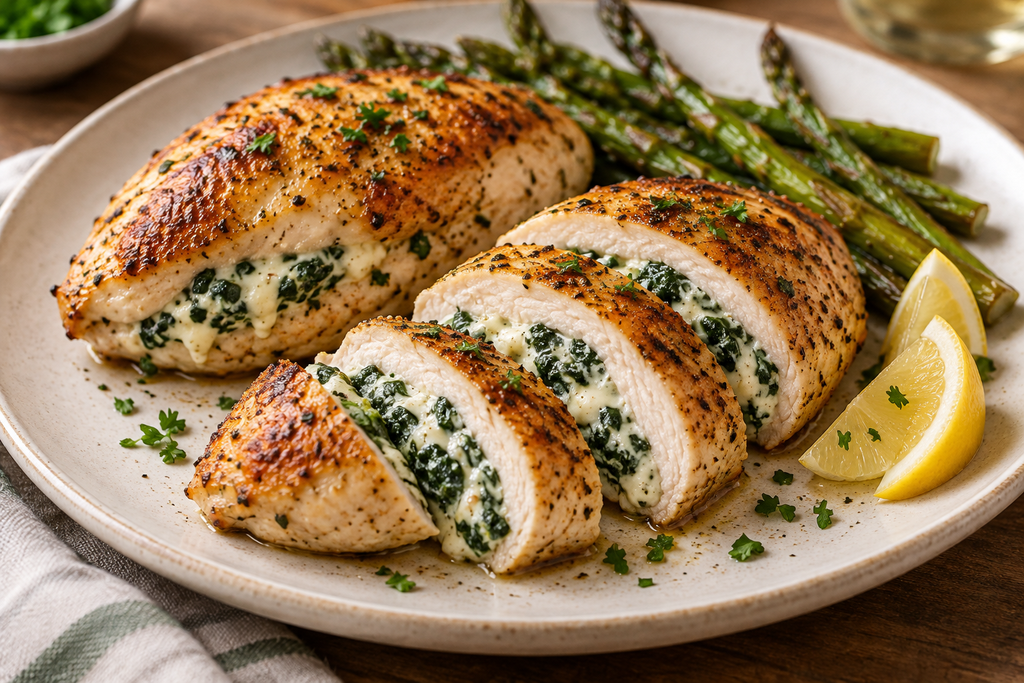
Spinach and Cream Cheese Stuffed Chicken Breast turns a familiar ingredient into a dinner that feels genuinely special. Each chicken breast is filled with a savory mixture of spinach, cream cheese, Parmesan, garlic, and herbs, then seared briefly and finished in the oven.
When sliced, the golden chicken reveals its creamy green filling, making this a lovely choice for a small celebration or a relaxed dinner with guests. Despite its impressive appearance, the preparation relies on straightforward ingredients and techniques.
Servings: 4
Preparation time: 20 minutes
Cooking time: 25–30 minutes
Resting time: 5 minutes
Total time: Approximately 55 minutes
Ingredients
- 4 medium boneless, skinless chicken breasts, approximately 6–7 oz or 170–200 g each
- 1 tablespoon olive oil
- 3 packed cups baby spinach, roughly chopped
- 1 garlic clove, finely minced
- 4 oz or 115 g cream cheese, softened
- ⅓ cup finely grated Parmesan cheese
- ½ cup shredded mozzarella cheese
- ½ teaspoon dried Italian seasoning
- ¼ teaspoon freshly grated nutmeg, optional
- ¾ teaspoon fine salt, divided
- ½ teaspoon freshly ground black pepper, divided
- ½ teaspoon garlic powder
- ½ teaspoon mild paprika
- 1 tablespoon neutral cooking oil, for searing
- Chopped fresh parsley, for serving
- Lemon wedges, optional
Instructions
- Preheat the oven to 375°F or 190°C.
- Heat the olive oil in a large oven-safe skillet over medium heat. Add the chopped spinach and cook for approximately 1–2 minutes, stirring until just wilted.
- Add the minced garlic and cook for another 20–30 seconds. Transfer the spinach mixture to a cutting board and allow it to cool slightly.
- Once cool enough to handle, gather the spinach in a clean kitchen towel or several layers of paper towel and gently squeeze out the excess liquid. Chop it more finely if any large leaves remain.
- Place the softened cream cheese in a bowl. Add the spinach, Parmesan, mozzarella, Italian seasoning, optional nutmeg, ¼ teaspoon salt, and ¼ teaspoon black pepper. Mix until the filling is evenly combined.
- Pat the chicken breasts dry. Place one breast flat on a cutting board and hold it steady with your non-cutting hand.
- Using a small, sharp knife, carefully cut a deep pocket into the thickest side of the chicken. Keep the knife parallel to the cutting board and avoid slicing through the opposite side, top, or bottom. Repeat with the remaining breasts.
- Divide the filling into four equal portions. Spoon one portion into each pocket, gently pressing it toward the back. Do not overfill the chicken, as the mixture will expand and soften during cooking.
- Secure the opening of each chicken breast with one or two toothpicks if necessary.
- In a small bowl, combine the remaining ½ teaspoon salt, ¼ teaspoon black pepper, garlic powder, and paprika. Season the outside of each stuffed chicken breast on both sides.
- Wipe the oven-safe skillet clean and return it to medium-high heat. Add the neutral cooking oil.
- Place the stuffed chicken breasts in the hot skillet. Sear the first side for approximately 3–4 minutes, until golden brown. Carefully turn and sear the second side for 2–3 minutes.
- Transfer the skillet to the preheated oven. Bake for approximately 15–20 minutes, depending on the thickness of the chicken.
- Check the meat rather than the cheese filling with an instant-read thermometer. Insert the probe into the thickest solid portion of the chicken. It should reach an internal temperature of 165°F or 74°C.
- Remove the skillet from the oven and allow the chicken to rest for 5 minutes. Remember that the handle will remain extremely hot; keep an oven mitt over it as a reminder.
- Remove the toothpicks before serving. Garnish the Spinach and Cream Cheese Stuffed Chicken Breast with fresh parsley and optional lemon wedges.
How to Cut the Pocket Safely
Choose chicken breasts that are thick enough to hold a filling. Very thin pieces are better suited to cutlets and may tear when opened.
Keep the knife blade parallel to the cutting board and cut slowly into the thick side. Imagine creating a small envelope rather than splitting the chicken into two separate layers. Leave a border around the edges to contain the cheese.
If a small hole forms, position that side facing upward during searing. A toothpick can help close a larger opening, although a small amount of melted cheese escaping into the skillet is completely normal.
Wash the cutting board, knife, and your hands thoroughly after handling the raw chicken and before preparing any ready-to-eat ingredients.
Preventing a Watery Filling
Spinach releases a surprising amount of moisture. Sautéing it first and squeezing it dry helps prevent the filling from thinning and leaking excessively during baking.
Use softened cream cheese so the ingredients combine without large lumps. However, do not heat it until it melts before filling the chicken.
Freshly grated Parmesan contributes flavor and gives the mixture a little more structure. Mozzarella adds a mild creamy quality, but using substantially more than the stated amount can make the filling difficult to contain.
Serving Suggestions
Roasted baby potatoes, mashed potatoes, or buttered orzo make excellent accompaniments because they balance the savory filling without competing with it. For a lighter plate, serve the chicken with roasted asparagus, green beans, or a lemon-dressed salad.
Letting each breast rest before slicing is especially important. The filling will be extremely hot when it leaves the oven and needs a few minutes to settle.
For an attractive presentation, cut each breast diagonally into two or three thick slices and arrange them slightly overlapping. This reveals the spinach filling while helping the portions remain intact.
Bringing the sliced chicken to the table on a warm platter creates a satisfying final moment for this collection. It looks celebratory, yet the flavors remain familiar and welcoming.
Make-Ahead Option
The filling can be prepared up to one day ahead and refrigerated in a covered container. Allow it to soften slightly before stuffing the chicken so it can be divided easily.
The chicken breasts can also be filled several hours before cooking. Keep them covered in the refrigerator and remove them approximately 15 minutes before searing.
For food-safety and texture reasons, do not leave the stuffed raw chicken at room temperature for an extended period.
Storage and Reheating
Place cooled leftovers in an airtight container and refrigerate them for up to 3 days. Store the breasts whole if possible and slice them only before reheating to help retain moisture.
Warm the chicken in a covered baking dish at 325°F or 165°C until thoroughly heated. Add a tablespoon of water or chicken stock to the dish to create a little steam.
The microwave can also be used at a reduced power setting. Heat in short intervals so the cheese does not become excessively hot before the center of the chicken is warmed.
Freezing is possible, but the cream cheese filling may become slightly grainy after thawing. For the best texture, enjoy this Spinach and Cream Cheese Stuffed Chicken Breast freshly prepared or refrigerated for the following day.
+3 Chicken Breast Recipe You May Know
We have a partner site wich name is Recipesvilla. I hope you don’t mind but we want to make a little promotion for its. So the last 3 chicken breast recipes are avaliable there. I add the links below. You should only click on them. Don’t worry they’ll open in a new window.
Easy Mediterran Chicken Breast Recipe
One Pan Balsamic Chicken
Sheet Pan Hawaiian Chicken
A Note About the Images
The food images featured in this article were created with the assistance of artificial intelligence. Each image was individually developed to reflect the ingredients, preparation method, textures, and expected appearance of the corresponding recipe as realistically as possible. They are intended as helpful visual inspiration rather than photographs of one particular batch. Since ingredients, equipment, cooking times, and individual presentation may vary, your finished dish may naturally look a little different—and that is part of the pleasure of home cooking.