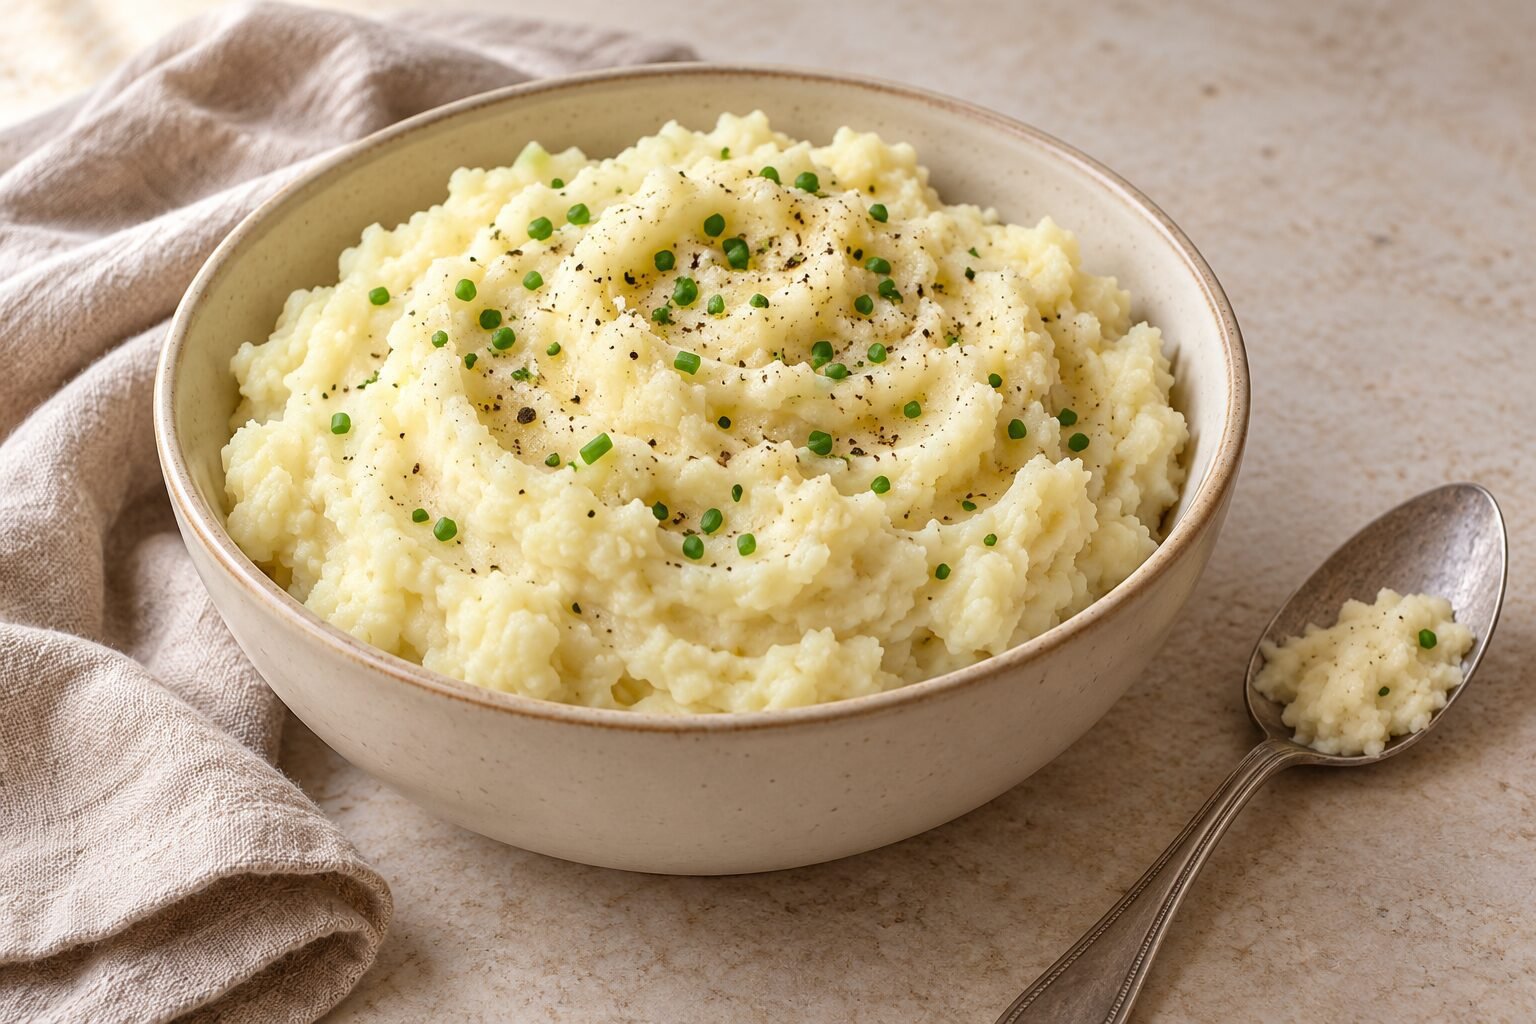
A tin of evaporated milk can be a useful starting point for more than dessert. Its concentrated milk flavour works in savoury dishes too, from mashed potatoes to a smooth cheese sauce.
These three recipes that use evaporated milk cover a side dish, a main course and a dessert: creamy mashed potatoes, stovetop mac and cheese, and chocolate pudding. Each includes measured ingredients, clear instructions and practical tips to help you judge the texture as you cook.
You do not need advanced kitchen skills to get started. The useful details are simple ones: draining the potatoes thoroughly, adding cheese over gentle heat and stirring pudding as it thickens. We will work through those steps in each recipe.
Before You Begin: Choose the Right Milk
Evaporated milk is not the same as sweetened condensed milk. Both are concentrated milk products, but evaporated milk has no added sugar. Sweetened condensed milk is much sweeter and thicker, so it is not a direct substitute in the recipes below.
Look for a tin labelled “evaporated milk.” These recipes use the full-fat version, measured straight from the tin without dilution unless the instructions say otherwise.
Tin sizes vary between brands and countries. Follow the measured quantity in each ingredient list rather than assuming that “one tin” is always the same amount. Where a recipe specifies millilitres, use a measuring jug; the weight printed in grams on the packaging is not an identical volume measurement.
A Note on Storage
An unopened, shelf-stable tin can be stored according to its label instructions. Once opened, evaporated milk needs refrigeration. Keep any unused milk covered in a clean, suitable container and follow the manufacturer’s guidance on how soon to use it.
The finished dishes also need appropriate storage. Each recipe will explain how to handle its leftovers, so you can plan around the amount you actually want to cook.
1. Creamy Mashed Potatoes with Evaporated Milk
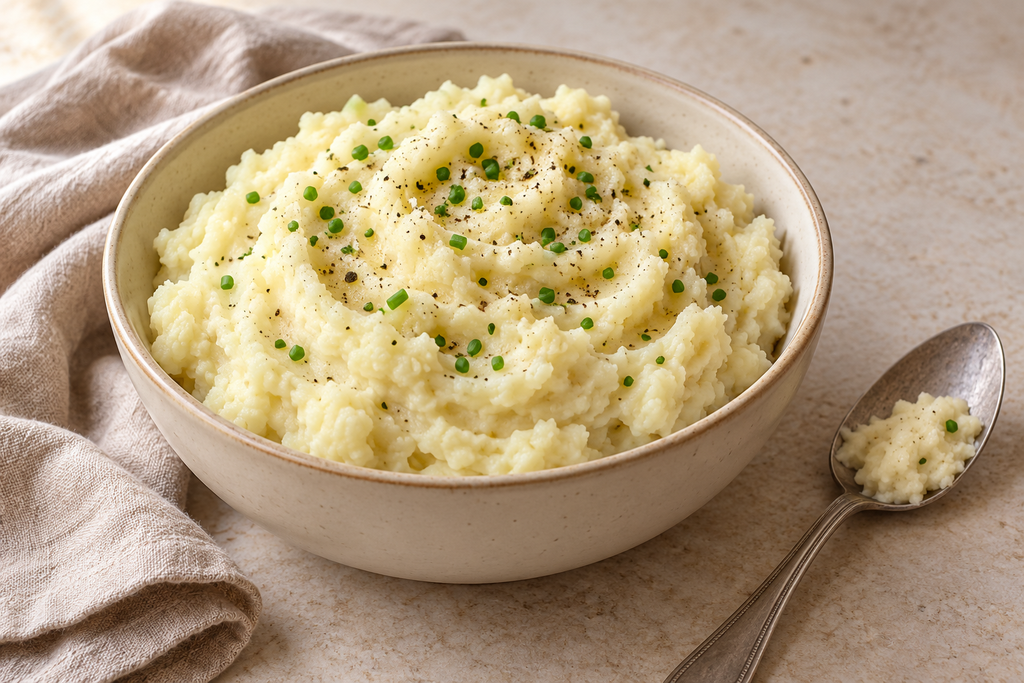
Evaporated milk gives mashed potatoes a concentrated milk flavour without needing cream. Butter adds richness, while adding the milk gradually lets you control the consistency.
The most useful step is draining the cooked potatoes thoroughly. Excess cooking water can make the mash loose, so give the potatoes a brief moment to steam dry before adding anything else.
Servings: 4 as a side dish
Preparation time: approximately 15 minutes
Cooking time: approximately 20–25 minutes
Ingredients
- 900 g floury potatoes, weighed before peeling, such as Maris Piper, King Edward or Russet
- 150 ml full-fat evaporated milk, plus up to 50 ml more if needed
- 40 g unsalted butter, cut into small pieces
- ½ teaspoon fine salt for the cooking water, plus more to taste
- ¼ teaspoon ground black pepper, or to taste
- 1 tablespoon chopped chives, optional
Use unsweetened evaporated milk, not sweetened condensed milk. Do not dilute it before measuring.
Instructions
1. Prepare the potatoes.
Wash and peel the potatoes, then cut them into roughly equal 3 cm pieces. Place in a saucepan and add enough cold water to cover them by approximately 2 cm. Add the salt for the cooking water.
Starting with cold water helps the pieces cook more evenly.
2. Cook until completely tender.
Bring to the boil, then reduce the heat to maintain a steady, gentle simmer. Cook for approximately 15–20 minutes, checking a larger piece with a fork.
The fork should slide through easily, and the potato should break apart when pressed. If the centre feels firm, continue cooking and check again after a few minutes.
3. Drain and steam dry.
Drain thoroughly in a colander. Return the potatoes to the warm saucepan over the lowest heat for 1–2 minutes, gently shaking the pan to release excess moisture.
Remove from the heat before they begin to stick or brown.
4. Warm the evaporated milk.
Meanwhile, gently warm 150 ml evaporated milk in a small saucepan until warm but not boiling. Keep the extra milk separate so you can add it only if needed.
5. Mash and add the butter.
Mash the hot potatoes with a potato masher, or pass them through a potato ricer. Add the butter and gently mix until melted.
Avoid using a blender or food processor, which can overwork the potatoes and produce a gluey texture.
6. Adjust the consistency.
Fold in the warm evaporated milk in two or three additions. Stop when the potatoes are soft and creamy but still hold a gentle mound on the spoon.
If they remain too stiff, warm the reserved milk and add it one tablespoon at a time. You may not need all of it.
Taste, then adjust the salt and pepper. Scatter over the optional chives and serve warm.
Troubleshooting The Texture
Still lumpy? Small lumps are perfectly acceptable. If the potatoes are fully cooked, a little more gentle mashing before adding the milk can help. Extra liquid will not fix undercooked pieces.
Too loose? Return the mash to a low heat briefly and fold gently while some moisture evaporates. Avoid vigorous stirring.
Too thick? Add another spoonful of warm evaporated milk and fold it through before deciding whether more is needed.
Serving and Leftovers
Serve alongside roast chicken, baked fish, beans or vegetables.
Refrigerate leftovers in a shallow, covered container within 2 hours, or within 1 hour if the surrounding temperature exceeds 32°C / 90°F. Keep refrigerated at 4°C / 40°F or below and use within 3–4 days.
Reheat gently, adding a small splash of milk if needed and stirring to distribute the heat. Check that the centre reaches 74°C / 165°F before serving. See the USDA’s guidance on leftovers and food safety for further information.
Recipe development note: This recipe was developed with AI assistance and has not been independently kitchen-tested for this article. Cooking times and serving sizes are estimates.
2. Stovetop Mac and Cheese with Evaporated Milk

Evaporated milk makes a useful base for a creamy cheese sauce. In this recipe, a little cornflour helps thicken the sauce, while adding the cheddar off the heat helps it melt without becoming oily or grainy.
Everything comes together on the hob, with no baking required. Serve promptly, as the pasta will continue absorbing sauce while it stands.
Servings: 3 as a main course or 4 as a side dish
Preparation time: approximately 10 minutes
Cooking time: approximately 15–20 minutes
Ingredients
- 250 g dried elbow macaroni
- 300 ml full-fat evaporated milk, unsweetened
- 100 ml water
- 2 level teaspoons cornflour, approximately 6 g; labelled cornstarch in the US
- 15 g unsalted butter
- 180 g mature cheddar, freshly grated
- ½ teaspoon Dijon mustard, optional
- ¼ teaspoon ground black pepper
- Salt, for the pasta water and to taste
- Up to 100 ml reserved pasta cooking water, as needed
Use a block of cheddar and grate it yourself if possible. Pre-grated cheese can contain anti-caking ingredients that affect the smoothness of the sauce.
Instructions
1. Cook the macaroni.
Bring a saucepan of water to the boil and salt it lightly. Add the macaroni and cook according to the packet instructions until just tender, with a little firmness remaining.
Before draining, reserve a mug of the cooking water. Drain the pasta without rinsing.
2. Mix the sauce base.
While the pasta cooks, whisk the cornflour with the 100 ml cold water in a separate saucepan until no lumps remain. Whisk in the evaporated milk.
Mixing the cornflour into cold liquid first helps prevent lumps when the sauce heats.
3. Gently thicken the sauce.
Add the butter and place the saucepan over a medium-low heat. Cook, stirring continuously and scraping the bottom and corners, until the mixture begins to bubble gently and lightly thickens.
Reduce the heat and cook for approximately 1 minute, continuing to stir. At this stage, the sauce should coat a spoon lightly rather than resemble a thick paste.
4. Melt in the cheese.
Remove the saucepan from the heat. Once the bubbling has stopped, add the grated cheddar in three batches, stirring each batch until melted before adding the next.
Stir in the optional mustard and the black pepper. If the cheese needs a little more warmth to finish melting, return the pan briefly to the lowest heat while stirring. Avoid boiling the cheese sauce.
5. Add the pasta.
Fold the drained macaroni into the sauce. If the mixture looks too thick, add reserved pasta water one tablespoon at a time, stirring between additions.
Aim for a slightly loose, glossy coating: the sauce will thicken as it cools. Taste before adding salt, since both the cheese and pasta water contribute seasoning.
6. Serve promptly.
Divide between bowls and serve while warm and creamy. Add a simple green salad or steamed vegetables alongside if you wish.
Getting the Texture Right
Too thick? Add a little more warm pasta water. Stir thoroughly before deciding whether it needs another spoonful.
Too thin? Let the combined pasta and sauce stand for a minute, then stir again. Avoid boiling it hard to force it to thicken.
Grainy or oily? Excessive heat can cause the cheese sauce to separate. Remove it from the heat and gently stir in a small splash of warm water. This may improve the texture, although a badly split sauce may not become completely smooth again.
Storing and Reheating
Refrigerate leftovers in shallow containers within 2 hours, or within 1 hour if the surrounding temperature exceeds 32°C / 90°F. Keep at 4°C / 40°F or below and use within 3–4 days.
Reheat gently with a splash of milk or water, stirring frequently, until the centre reaches 74°C / 165°F. Expect a softer pasta texture and a thicker sauce than when freshly made.
For further guidance, see the USDA’s advice on leftovers and food safety.
Recipe development note: This recipe was developed with AI assistance and has not been independently kitchen-tested for this article. Cooking times and serving sizes are estimates.
3. Chocolate Pudding with Evaporated Milk
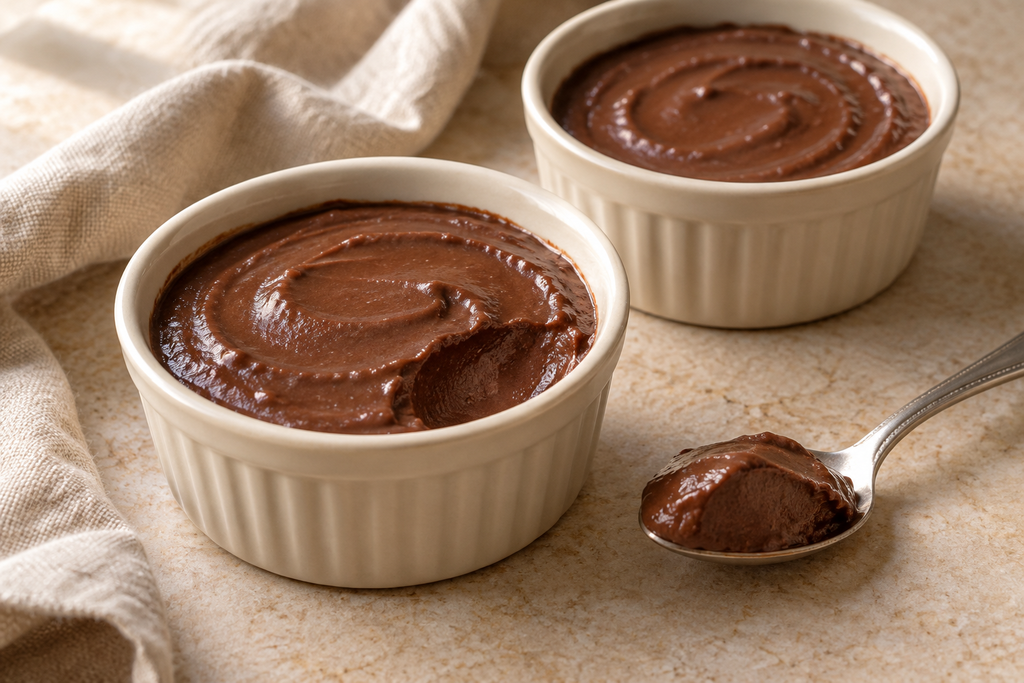
This chocolate pudding uses cocoa powder for flavour and cornflour for thickening, with evaporated milk providing a creamy base. There are no eggs to separate or temper, making the method approachable for beginners.
The pudding thickens on the hob and firms up further in the fridge. Expect a soft, spoonable dessert rather than a firm pudding you can turn out onto a plate.
Servings: 4 small portions
Preparation time: approximately 10 minutes
Cooking time: approximately 8–12 minutes
Chilling time: approximately 3 hours
Ingredients
- 300 ml full-fat evaporated milk, unsweetened
- 200 ml cold water
- 60 g caster or granulated sugar
- 25 g unsweetened cocoa powder
- 25 g cornflour, labelled cornstarch in the US
- A small pinch of salt
- 15 g unsalted butter
- 1 teaspoon vanilla extract
You will also need four heatproof dessert dishes or ramekins, each approximately 150–180 ml in capacity.
Use ordinary unsweetened cocoa powder rather than sweetened drinking chocolate. Sweetened condensed milk is not a substitute for the evaporated milk in this recipe.
Instructions
1. Combine the dry ingredients.
Place the sugar, cocoa powder, cornflour and salt in a medium saucepan. Whisk together, breaking up any visible cocoa lumps.
Do this before adding liquid so the thickening ingredient is evenly distributed.
2. Make a smooth paste.
Gradually whisk in approximately 50 ml of the measured cold water until you have a smooth paste. Add the remaining water a little at a time, followed by the evaporated milk.
Scrape around the bottom edges of the pan to check that no dry mixture remains.
3. Heat gently while stirring.
Place the saucepan over a medium-low heat. Cook, whisking steadily and reaching into the corners, until the mixture begins to thicken. This may take approximately 6–10 minutes, depending on your pan and hob.
Do not leave it unattended. The pudding can thicken quite suddenly once it gets hot enough.
4. Cook the thickened pudding briefly.
When slow bubbles begin breaking through the surface, reduce the heat and continue cooking for approximately 1 minute, whisking continuously. Keep it bubbling gently rather than boiling vigorously.
The mixture should look glossy and fall from the whisk in thick ribbons. It will still be softer than the finished chilled pudding.
5. Add the finishing ingredients.
Remove from the heat. Stir in the butter and vanilla until fully incorporated.
If you notice small lumps, carefully pass the hot pudding through a fine-mesh sieve into a heatproof jug. Take care when handling the hot mixture.
6. Portion and chill.
Divide between the four heatproof dishes, leaving a little space at the top.
If you prefer a pudding without a skin, place food-safe film directly against the surface, provided its instructions allow contact with warm food. Otherwise, leave the surface uncovered initially and cover the dishes once the pudding has cooled slightly.
Refrigerate promptly; do not wait for the pudding to reach room temperature. Chill for approximately 3 hours, or until cold and softly set.
Getting the Texture Right
Lumps appearing during cooking? Remove the pan from the heat briefly and whisk thoroughly. Return it to a lower heat and continue stirring.
Too loose while warm? Remember that the pudding thickens further as it chills. Make sure it reaches the gentle bubbling stage and cooks for the additional minute before removing it from the heat.
Too firm after chilling? Stir an individual portion with a teaspoon or two of milk to loosen it. This changes the neat set surface but gives a softer consistency.
Serve plain to let the chocolate flavour stand on its own, or add a small spoonful of whipped cream just before serving.
Storing the Pudding
Keep covered in the refrigerator at 4°C / 40°F or below and use within 3–4 days. Refrigerate within 2 hours of cooking, or within 1 hour if the surrounding temperature exceeds 32°C / 90°F.
Freezing is not recommended for the best texture, as the pudding may separate or become watery after thawing.
For general storage guidance, see the USDA’s advice on leftovers and food safety.
Recipe development note: This recipe was developed with AI assistance and has not been independently kitchen-tested for this article. Cooking and chilling times and serving sizes are estimates.
A Final Thought from Adam
I’m not a kitchen expert, and I tend to feel most comfortable with recipes that use familiar ingredients and explain each step clearly. A bowl of mashed potatoes, a simple pasta dish or a small chocolate pudding feels much more approachable to me than an elaborate menu.
That is what I wanted to bring to these recipes that use evaporated milk: a few practical ideas you can take at your own pace. Choose whichever appeals to you, read through the instructions before starting and give yourself time to notice how the texture changes.
If you are still building confidence in the kitchen too, you are welcome here. Your food does not need to look perfectly styled to deserve a place at the table. A little care and a willingness to learn are a good beginning.
About the images: The pictures in this article are AI-generated illustrations of the ingredients and suggested presentation. They are not photographs of kitchen-tested results, and the appearance of your finished dishes may vary.