Welcome to a whirlwind of flavors and textures! Grating ingredients is an essential technique used in many dishes, from Italian pesto to Mexican tacos. Have you ever wondered what this mysterious tool can do? In this article, we’ll explain the nuances of grating and how it can be used to add new dimensions to your favorite meals. So buckle up and let’s dive right in – you won’t want to miss out on these delicious possibilities!
Quick Answer: Grate means to reduce food into small pieces by rubbing it against a grater, which is a kitchen utensil with sharp edges or holes.
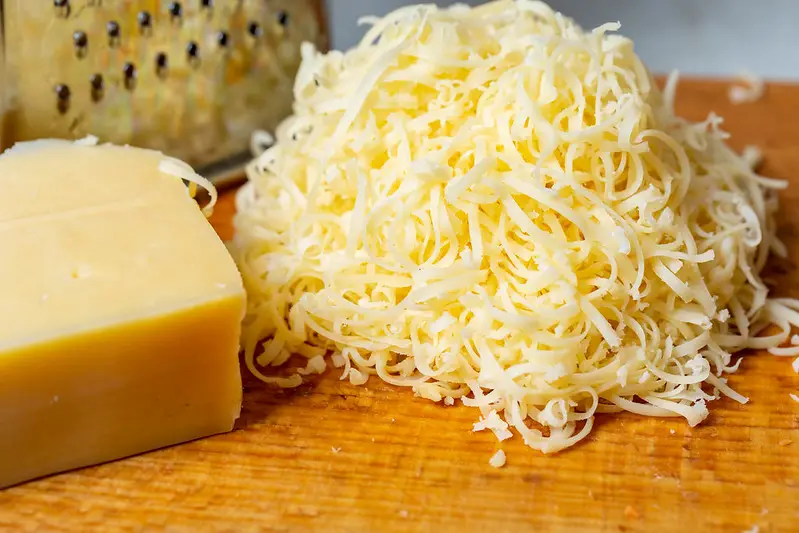
what does grate mean in cooking?
When it comes to cooking, the word “grate” can mean a few different things. Firstly, it refers to the act of using a grater – that little handheld tool with sharp holes in various sizes. You might use a grater to grate cheese or vegetables, for example. This method can create finely shredded pieces that are ideal for melting into sauces or incorporating into salads.
There’s also another meaning of “grating” in cooking, which is related but slightly different. In this context, “to grate” means to rub something against a rough surface in order to remove tiny particles from it. For example, you might grate nutmeg over your oatmeal by rubbing the whole nut against a small grater until you have just enough powder left behind on top of your breakfast bowl. Similarly, you could use this same technique to extract zest from citrus fruits like lemons or limes – simply rub them back and forth across the smallest holes on your grater until fragrant yellow strands accumulate beneath!
How to Choose the Right Grater for Specific Ingredients
When it comes to cooking, choosing the right equipment is just as important as selecting the best ingredients. One tool that is essential in any kitchen is a grater – and not just any grater, but one that’s specifically designed for certain foods. Using the wrong type of grater can lead to uneven results, wasted food, and even injuries.
Firstly, consider what you’re planning to grate: cheese, vegetables or fruits? If you’re looking to shred hard cheeses like Parmesan or Romano then a microplane grater might be your best bet. These graters produce very fine shavings which work perfectly on dense cheeses without melting them in the process. For softer cheeses such as cheddar or mozzarella then a box grater will do just fine; these have larger holes and are better suited for soft cheeses and vegetables too! When it comes to shredding veggies such as carrots or zucchini you’ll want something with small holes so they don’t turn into mush – again this points towards the trusty box-graters. Lastly if you need lemon zest or ginger root grated finely then look no further than your Microplane once again!
In conclusion there’s no one-size fits all solution when it comes to graters; different designs are made for different types of ingredients- either by size of hole or shape of blade- make sure you’ve got the right tool before getting started! It’s always worth investing in good quality products that will last longer and offer more control over how finely (or coarsely) things get grated up… Happy cooking!
Tips for Properly Using a Grater When Cooking or Baking
Using a grater can be a fantastic way to add an extra level of texture and flavor to your dishes, but it’s important to know how to use one properly. Whether you’re slicing cheese for a sandwich or grating fresh ginger for a stir-fry, there are certain tips you should keep in mind.
Firstly, make sure the food you’re grating is cold. This will help it hold its shape better and prevent it from turning into mush as soon as it hits the grater. When using softer foods like cheese or butter, try placing them in the freezer for about 20-30 minutes before grating. For larger items like vegetables or fruits, chill them in the refrigerator beforehand.
Another important thing to consider is which side of the grater to use. Most graters have both coarse and fine sides – if you need smaller shreds (like when zesting citrus), go with the fine side; if you want larger pieces (like with cheese) choose the coarse side instead. Always keep your fingers away from the sharp blades by holding onto either end of what you’re putting through it – this will also give you more control over how much pressure gets applied as well!
Lastly, when cleaning up after using your grater always remember to be careful handling these tools since they are very sharp! Make sure that all loose bits of food debris have been removed from between each blade slot by rinsing thoroughly under running water . Then add soap and wash carefully so that none is left stuck on any particular part of your tool before rinsing once again under running water until all traces disappear completely before drying off with paper towel or cloth depending on preference. By taking care not only during use but also cleaning afterwards too!
Cleaning and Maintaining Your food Grater for Longevity
Have you ever used your food grater only to find that it’s a nightmare to clean? Or worse yet, have you noticed rust or dullness on the blades? Taking proper care of your food grater is essential not just for cleanliness but also longevity. With just a few simple steps, you can ensure that your trusty kitchen tool stays in tip-top shape.
Firstly, make sure to clean your food grater immediately after use. The longer any remnants of food stay stuck on the blades, the harder they will be to remove. Use warm water and dish soap with a non-abrasive sponge or brush, being careful not to scrub too hard and damage the blades. If there are stubborn pieces of food stuck in small crevices or holes, try using an old toothbrush or even a skewer to gently dislodge them. Once cleaned, make sure to dry all parts thoroughly before storing them away – moisture left on the blade can cause rusting over time.
Another important step in maintaining your grater is oiling it regularly. This may sound strange at first but rubbing some vegetable oil onto both sides of each blade with a cloth or paper towel helps prevent rust from forming and also keeps the sharpness intact for longer periods of time. It’s also recommended that you store your grater separate from other utensils since metal-on-metal contact can cause scratches and dullness over time. Lastly, if you do notice signs of wear and tear like chips on the edges or significant dullness no amount of cleaning will fix- it may be time for an upgrade!