Boneless skinless chicken breast recipes can make everyday dinner planning easier, especially when the instructions explain how to handle the meat before it reaches the pan. A whole breast, a thin cutlet and a handful of bite-sized pieces need different cooking times. Choosing the right preparation for each dish is a useful first step towards chicken that stays pleasant to eat.
This collection includes five options: garlic butter chicken cutlets, baked pesto chicken with tomatoes and mozzarella, honey garlic chicken bites, a chicken and vegetable tray bake, and a coconut chicken curry. Each recipe takes a different approach, giving you a choice between a quick pan-cooked meal, an oven dinner and chicken served in a generous sauce.
I’m still a beginner in the kitchen, so I appreciate instructions that explain the details experienced cooks may take for granted. Knowing how thick to cut the chicken or when to add vegetables makes a recipe feel more manageable. That is the approach behind these five dinners.
Prepare the Chicken for the Cooking Method
Check the weight listed in each recipe rather than relying only on the number of chicken breasts. Two large fillets can weigh considerably more than two small ones, and a particularly thick piece will cook differently from a thin cutlet.
For the skillet recipe, slicing the breasts horizontally creates thinner pieces that cook more evenly. For chicken bites and curry, similarly sized chunks help prevent small pieces from overcooking while larger ones finish. The individual recipes explain the preparation needed, so read those steps before cutting.
Prepare vegetables and serving accompaniments before handling raw chicken where practical. Keep ready-to-eat ingredients separate from the utensils and surfaces used for the raw meat.
Use Cooking Times as a Guide
The times in these boneless skinless chicken breast recipes are estimates. Meat thickness, pan size and appliance performance all affect how quickly dinner cooks.
Use a food thermometer to check that the thickest part of the chicken reaches 74°C / 165°F. Browning on the outside does not confirm that the centre is ready. Check several pieces when they differ in size, and remove finished pieces rather than leaving them cooking while thicker ones catch up.
Choose whichever dish suits your evening, prepare the ingredients and work through the instructions one step at a time. A simple side of rice, potatoes or vegetables is enough to complete most of these meals.
Recipe development note: These recipes were developed with AI assistance and have not been independently kitchen-tested for this article. Cooking times and yields are estimates.
1. Garlic Butter Boneless Skinless Chicken Breast Cutlets
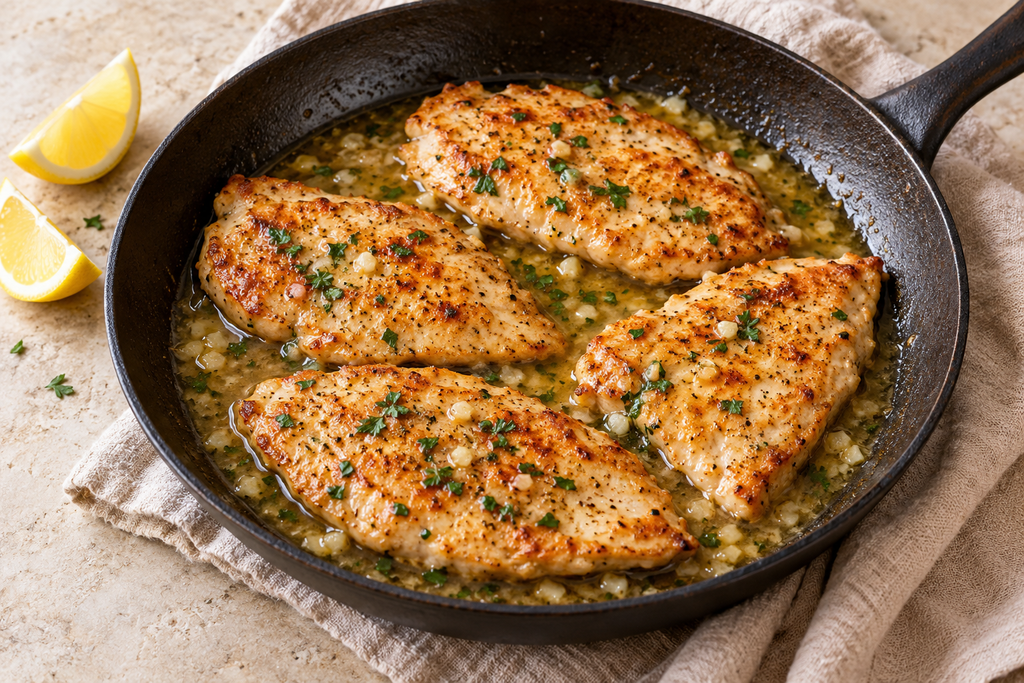
These garlic butter cutlets are a straightforward starting point for exploring boneless skinless chicken breast recipes. Slicing the breasts horizontally creates thinner pieces that cook more evenly. Once the chicken is cooked, a quick pan sauce of garlic, butter, stock and lemon brings the dish together.
Prep time: 15 minutes
Cook time: 15–20 minutes, including batches
Total time: Approximately 30–35 minutes
Servings: 4
Equipment: Large frying pan, sharp knife, meat mallet or rolling pin, food thermometer
Ingredients
- 600 g (approximately 1⅓ lb) boneless, skinless chicken breasts
- ½ teaspoon fine salt
- ¼ teaspoon ground black pepper
- ½ teaspoon sweet paprika
- 1 tablespoon olive oil
- 30 g (2 tablespoons) unsalted butter, divided
- 3 garlic cloves, finely chopped
- 80 ml (⅓ cup) low-sodium chicken stock
- 1 tablespoon fresh lemon juice
- 1 tablespoon chopped fresh parsley
- Optional: lemon wedges, for serving
Step-by-Step Instructions
- Make the cutlets.
Place the chicken breasts flat on a stable chopping board. Carefully slice each breast horizontally into two thinner pieces, keeping your supporting hand above the blade’s path. If any sections remain thick, place the cutlets between sheets of baking parchment and gently flatten them to approximately 1–1.5 cm thick. The number of cutlets will depend on the size of the breasts. - Dry and season.
Pat the chicken dry with kitchen paper. Sprinkle both sides with the salt, black pepper and paprika. Divide the seasoning evenly between the pieces. - Heat the pan.
Heat the olive oil in a large frying pan over medium-high heat. Add the cutlets in a single layer without overlapping. Cook in batches if necessary; crowding the pan makes browning more difficult. - Cook the chicken.
Cook for approximately 3–4 minutes on the first side, then turn and cook for another 2–4 minutes. Begin checking thinner pieces early. Insert a food thermometer horizontally from the side into the centre of each cutlet. The chicken must reach 74°C / 165°F. Transfer cooked pieces to a clean plate. - Gently cook the garlic.
Reduce the heat to medium-low and let the pan cool briefly. Add half the butter, followed by the garlic. Stir for 30–45 seconds, just until fragrant. Avoid letting the garlic turn dark brown. - Build the sauce.
Pour in the chicken stock and scrape up the browned cooking residue with a wooden spoon. Simmer for 2–3 minutes, until slightly reduced. If the pan contains blackened, burnt residue, wipe it out carefully before making the sauce rather than incorporating it. - Finish off the heat.
Remove the pan from the heat. Stir in the lemon juice, remaining butter and parsley. Add any juices collected on the plate beneath the cooked chicken. Taste the sauce before adding extra salt. - Coat and serve.
Return the cutlets to the pan and turn them in the warm sauce. Serve promptly, spooning the garlic butter sauce over each portion.
Small Details That Help
Keep the thickness consistent. This matters more than making every cutlet the same shape. A thick section can remain undercooked while a thin edge becomes dry.
Let the first side brown. Avoid constantly sliding the chicken around. If a cutlet sticks to a stainless-steel pan, give it a little more time before gently trying to turn it.
Add the garlic after cooking the meat. Finely chopped garlic can burn during the longer, hotter chicken-cooking stage. Adding it later gives you more control.
Expect a light pan sauce. There is no flour or cream in this recipe. The sauce should lightly coat the chicken and pool beneath it rather than become thick like gravy. If it reduces too far, stir in a tablespoon of water.
What to Serve Alongside
Serve with rice, mashed potatoes or couscous to catch the sauce. Steamed green beans, broccoli or a simple tomato salad make easy accompaniments. Prepare your side dishes before the final cooking stage so the thin cutlets can be served as soon as they are ready.
Recipe note: This recipe was developed with AI assistance and has not been independently kitchen-tested for this article. Cooking times are estimates; check doneness with a food thermometer.
2. Baked Pesto Boneless Chicken with Tomatoes and Mozzarella
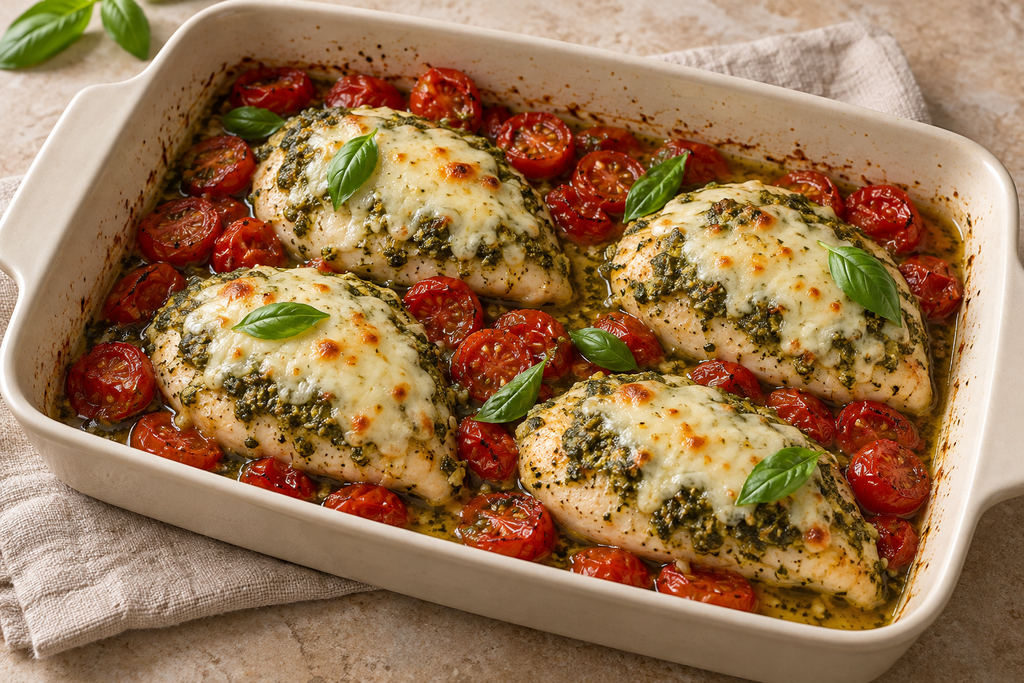
This oven-baked option brings a different flavour to our boneless skinless chicken breast recipes. Basil pesto coats the chicken, cherry tomatoes soften around it, and mozzarella melts over the top during the final few minutes. Preparing the chicken to an even thickness helps it cook consistently without leaving thinner edges in the oven unnecessarily.
Prep time: 15 minutes
Cook time: Approximately 18–25 minutes
Resting time: 5 minutes
Total time: Approximately 38–45 minutes
Servings: 4
Equipment: Shallow baking dish, meat mallet or rolling pin, food thermometer
Ingredients
- 600 g (approximately 1⅓ lb) boneless, skinless chicken breasts
- 60 g (approximately ¼ cup) basil pesto
- 250 g (9 oz) cherry tomatoes, halved
- 100 g (3½ oz) low-moisture mozzarella, grated
- 1 teaspoon olive oil
- ¼ teaspoon ground black pepper
- Optional: up to ¼ teaspoon fine salt, depending on the pesto
- Optional: a few fresh basil leaves, for serving
Step-by-Step Instructions
- Preheat the oven.
Heat the oven to 200°C / 400°F, or 180°C fan. Lightly grease a shallow baking dish with the olive oil. Choose a dish that holds the chicken in one layer with a little room for the tomatoes. - Prepare evenly sized portions.
Divide the chicken into four portions of approximately 150 g each. If using two large breasts, slice each horizontally into two cutlets. Place the pieces between sheets of baking parchment and gently flatten thicker areas so each portion is approximately 1.5–2 cm thick. - Add the pesto.
Arrange the chicken in the dish without overlapping. Sprinkle with black pepper. Spread the measured pesto evenly over the tops. Pesto already contributes salt, so add the optional salt only if your chosen product needs it. Use a separate spoon for the measured pesto to avoid transferring raw chicken juices into the jar. - Arrange the tomatoes.
Scatter the halved tomatoes around the chicken, keeping most of them off the meat so the pesto coating remains exposed. There is no need to add stock or water; the tomatoes and chicken will release juices. - Begin baking.
Bake uncovered for 12–15 minutes. The chicken will usually need further cooking at this point. - Add the mozzarella.
Carefully remove the dish and distribute the grated mozzarella over the chicken. Return to the oven for approximately 6–10 minutes, until the cheese has melted and the chicken is cooked through. - Check the temperature.
Insert a food thermometer horizontally into the thickest part of each portion, making sure the tip is in the chicken rather than the cheese topping. Every piece must reach 74°C / 165°F. If necessary, continue cooking in short intervals. Do not keep baking solely to brown the cheese once the chicken is ready. - Rest and serve.
Rest for 5 minutes. Add fresh basil if using, then serve with the softened tomatoes and a spoonful of the cooking juices.
Small Details That Help
Use low-moisture mozzarella. It melts readily without releasing as much water as fresh mozzarella packed in liquid. If using fresh mozzarella instead, drain it thoroughly and pat it dry before slicing.
Check the pesto label. Ingredients and salt levels vary. Many basil pestos contain milk and nuts, so choose a product that suits the people you are serving.
Expect some liquid in the dish. Tomato juices, chicken juices and pesto oil form a light accompaniment rather than a thick sauce. Spoon over as much as you prefer when serving.
Match the timing to the thickness. Thin cutlets may finish earlier than the suggested range. Thicker, unflattened breasts will need longer, so follow the preparation instructions and check with a thermometer.
What to Serve Alongside
Serve with plain pasta, couscous or rice to make use of the tomato and pesto juices. A green salad or steamed courgette also works well. Keep the side dishes lightly seasoned, as the pesto and mozzarella already bring plenty of flavour.
Recipe note: This recipe was developed with AI assistance and has not been independently kitchen-tested for this article. Cooking times are estimates; check doneness with a food thermometer.
3. Honey Garlic Boneless Skinless Chicken Bites
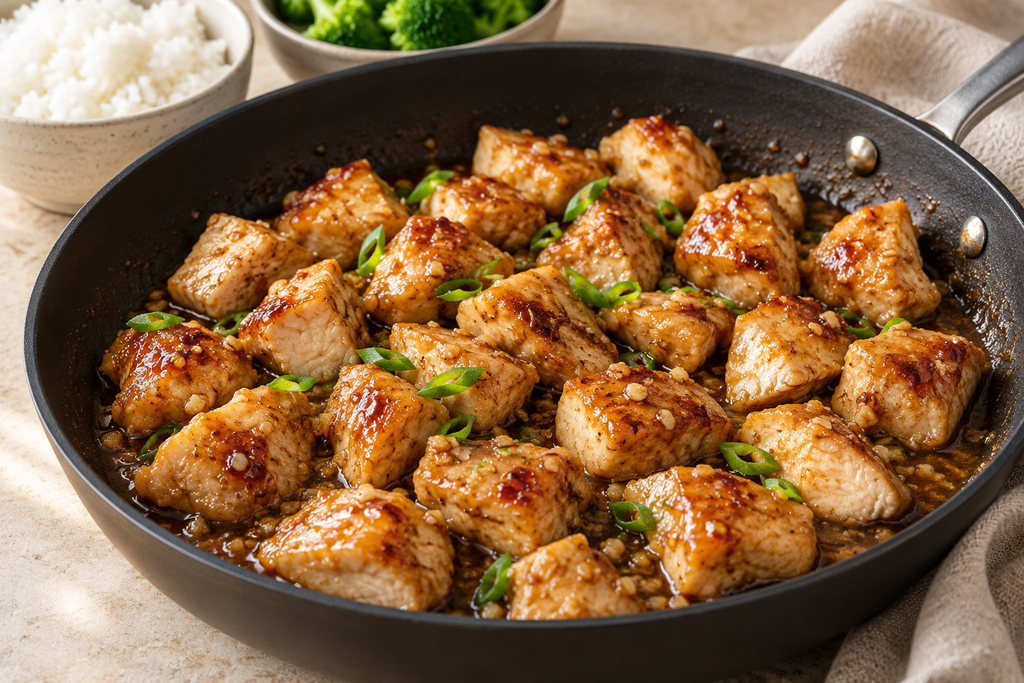
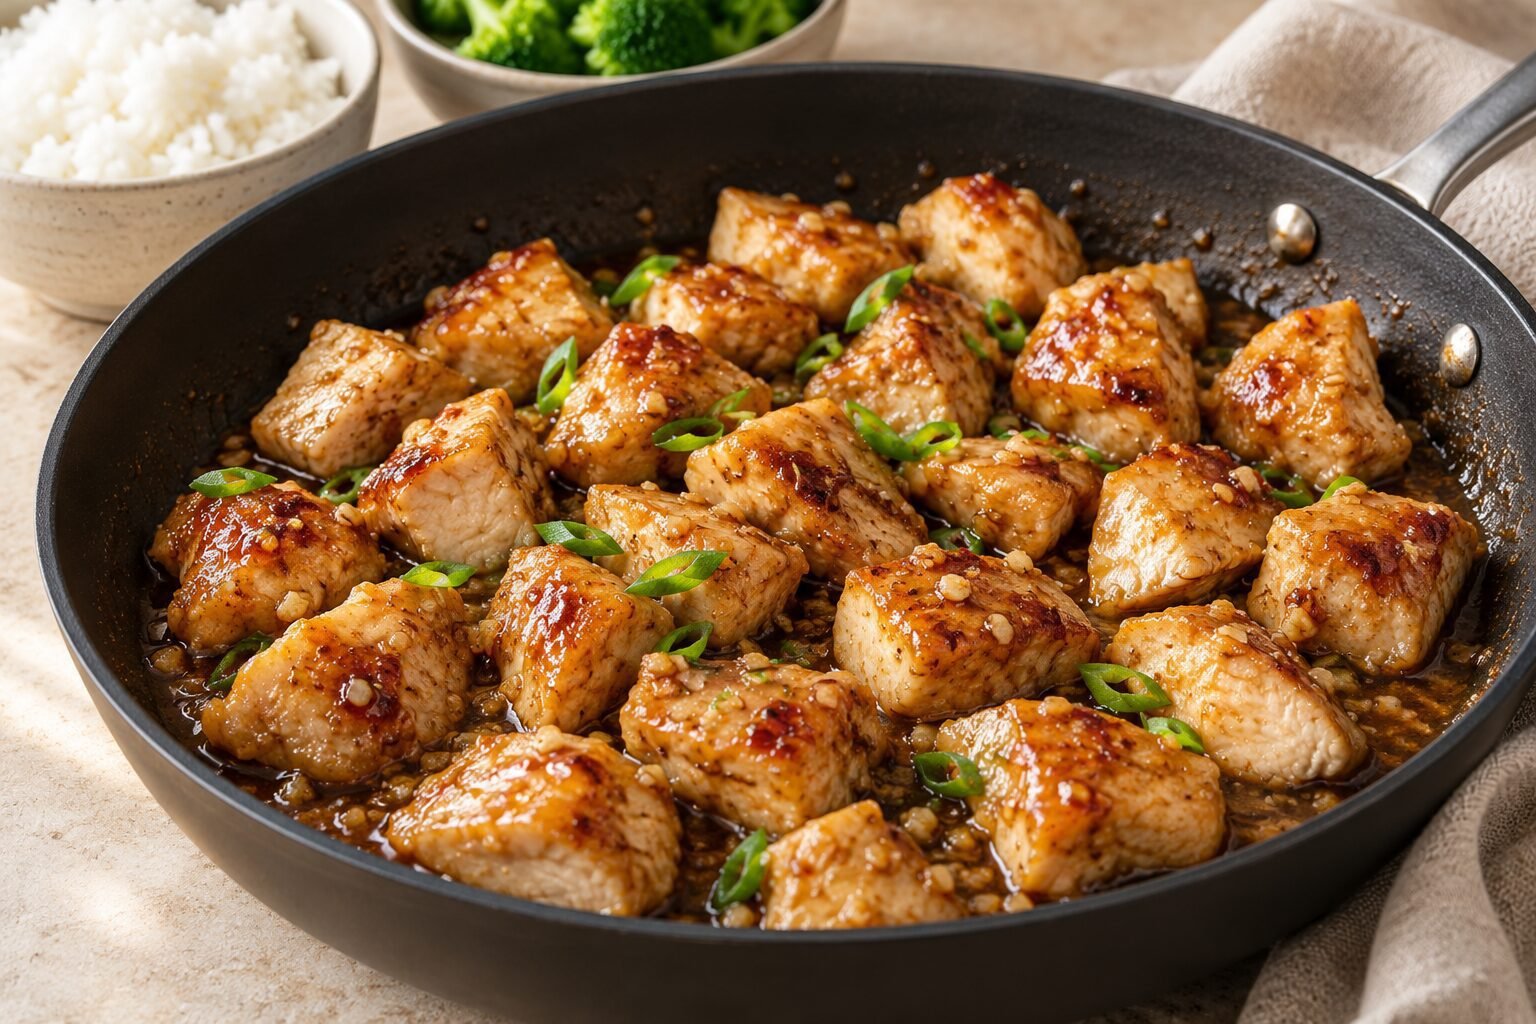
These boneless skinless chicken bites have a lightly browned coating and a sweet, savoury garlic sauce. Cutting the breast meat into evenly sized pieces helps it cook consistently, while adding the honey mixture near the end keeps the sugars from burning during the browning stage.
Prep time: 15 minutes
Cook time: 15–20 minutes
Total time: Approximately 30–35 minutes
Servings: 4
Equipment: Large non-stick frying pan, mixing bowl, small jug, food thermometer
Ingredients
For the chicken:
- 600 g (approximately 1⅓ lb) boneless, skinless chicken breasts
- 1 tablespoon cornflour (cornstarch)
- ¼ teaspoon ground black pepper
- 1½ tablespoons neutral cooking oil, divided
For the honey garlic sauce:
- 2 tablespoons honey
- 2 tablespoons low-sodium soy sauce
- 1 tablespoon rice vinegar
- 80 ml (⅓ cup) water
- 3 garlic cloves, finely chopped
Optional, for serving:
- 1 spring onion, thinly sliced
- Cooked rice
- Steamed broccoli
Step-by-Step Instructions
- Mix the sauce.
Whisk the honey, soy sauce, rice vinegar and water together in a small jug. Keep the chopped garlic separate; it will briefly cook in the pan before the liquid is added. - Prepare the chicken.
Cut the breasts into approximately 2.5 cm pieces, keeping them as similar in thickness as possible. Pat away excess surface moisture with kitchen paper. - Add the light coating.
Place the chicken in a bowl, sprinkle with the cornflour and black pepper, and toss until lightly coated. There should be no thick patches of dry cornflour. Additional salt is usually unnecessary because the sauce contains soy sauce. - Brown in batches.
Heat 1 tablespoon of oil in a large non-stick frying pan over medium-high heat. Add half the chicken in a single layer. Cook for approximately 4–5 minutes, turning occasionally, until lightly browned on several sides. Transfer to a plate, then repeat with the remaining chicken and ½ tablespoon oil. The chicken may not yet be fully cooked. - Briefly cook the garlic.
Reduce the heat to medium-low. If the pan is very hot, let it cool briefly before adding the garlic. Stir for about 20–30 seconds, until fragrant, without letting it brown deeply. - Add the sauce and chicken.
Pour the prepared sauce into the pan and stir. Return all the chicken, including any juices collected on the plate. Bring to a gentle simmer. - Finish cooking.
Simmer for approximately 3–5 minutes, turning the pieces so they become coated. Check several of the largest pieces with a food thermometer, inserting the probe from the side into the centre. The chicken must reach 74°C / 165°F. If necessary, continue cooking briefly, adding a splash of water if the sauce becomes too thick. - Check the sauce and serve.
The sauce should lightly cling to the chicken while remaining spoonable. If the chicken is ready but the sauce is still watery, lift the meat onto a clean plate and simmer the sauce alone for another minute or two. Return the chicken, toss briefly and serve. Scatter with spring onion if using.
Small Details That Help
Prepare the sauce before heating the pan. Once the garlic goes in, the next step follows quickly. Having the liquid ready reduces the chance of scorching it.
Keep the coating light. The cornflour helps the surface brown and contributes a little thickening to the sauce. This is not a battered or deep-fried dish, and the coating will soften once mixed with the liquid.
Avoid crowding the pan. Browning in two batches gives moisture more room to evaporate. A crowded pan tends to produce pale, steamed pieces.
Watch the sauce as it reduces. Honey can catch on the bottom when the liquid becomes concentrated. Keep the simmer gentle and loosen with water a tablespoon at a time if needed.
What to Serve Alongside
Plain rice and steamed broccoli balance the sweet, savoury sauce without adding much preparation. Start the rice before cooking the chicken, and have the broccoli ready to steam during the final stage. Spoon the remaining sauce over the rice rather than leaving the chicken cooking while you finish the sides.
Recipe note: This recipe was developed with AI assistance and has not been independently kitchen-tested for this article. Cooking times are estimates; check doneness with a food thermometer.
4. Boneless Skinless Chicken Tray Bake with Broccoli and Sweet Potatoes
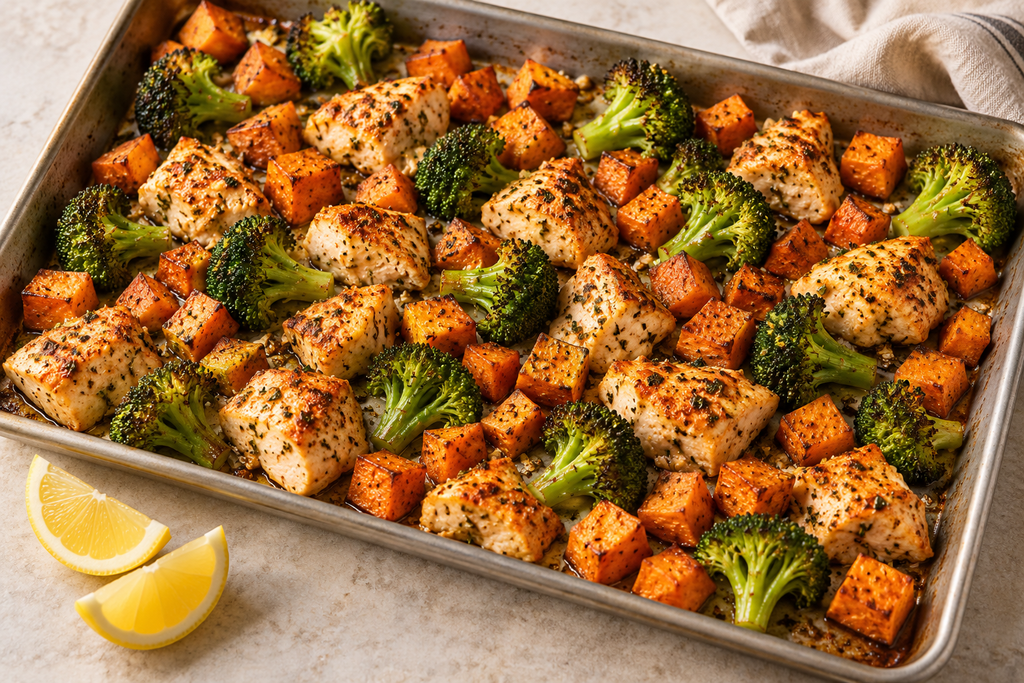
This boneless skinless chicken tray bake combines breast meat, sweet potatoes and broccoli in one oven-cooked dinner. The vegetables and chicken go onto the tray in stages, giving the sweet potatoes time to soften before the quicker-cooking ingredients join them. Paprika, garlic and oregano provide a simple seasoning, with lemon added just before serving.
Prep time: 20 minutes
Cook time: Approximately 35–45 minutes
Total time: Approximately 55–65 minutes
Servings: 4
Equipment: Large rimmed metal baking tray, approximately 33 × 45 cm, mixing bowls, food thermometer
Ingredients
- 600 g (approximately 1⅓ lb) boneless, skinless chicken breasts
- 600 g (approximately 1⅓ lb) sweet potatoes, peeled
- 350 g (12 oz) broccoli florets
- 2½ tablespoons olive oil, divided
- 1½ teaspoons sweet paprika, divided
- 1 teaspoon garlic powder, divided
- 1 teaspoon dried oregano, divided
- ¾ teaspoon fine salt, divided
- ½ teaspoon ground black pepper, divided
- 1 tablespoon fresh lemon juice
- Optional: lemon wedges, for serving
Step-by-Step Instructions
- Preheat the oven.
Heat the oven to 220°C / 425°F, or 200°C fan. Use a large rimmed metal tray with enough room to spread the ingredients out. If your tray is smaller, use two trays rather than piling everything together. - Prepare the vegetables.
Cut the sweet potatoes into approximately 1.5 cm cubes. Divide the broccoli into medium florets, approximately 4 cm across, and slice any thick stems into thinner pieces. Dry the broccoli well after washing. - Season the sweet potatoes.
Toss the sweet potato cubes with 1 tablespoon olive oil, ½ teaspoon paprika, ¼ teaspoon garlic powder, ¼ teaspoon oregano, ¼ teaspoon salt and ⅛ teaspoon black pepper. Spread over the tray in a single layer. - Give them a head start.
Roast for 20–25 minutes, turning once. A knife should enter a cube with only slight resistance. If the centres are still hard, roast for another 5 minutes before adding the chicken. - Prepare the chicken.
While the sweet potatoes roast, cut the chicken into evenly sized pieces approximately 3 cm across. Using a separate bowl and utensils, toss with 1 tablespoon olive oil, the remaining 1 teaspoon paprika, ½ teaspoon garlic powder, ½ teaspoon oregano, ¼ teaspoon salt and ¼ teaspoon black pepper. - Season the broccoli.
Toss the broccoli with the remaining ½ tablespoon olive oil, ¼ teaspoon garlic powder, ¼ teaspoon oregano, ¼ teaspoon salt and ⅛ teaspoon black pepper. - Add the chicken and broccoli.
Carefully remove the tray from the oven. Move the sweet potatoes to one section, keeping them in a single layer. Spread the chicken and broccoli across the remaining space, with the chicken pieces separated rather than touching or overlapping. - Finish roasting.
Return the tray to the oven for approximately 15–20 minutes. Turn the chicken pieces and broccoli after about 10 minutes. Check several of the largest chicken pieces with a food thermometer: their centres must reach 74°C / 165°F. The sweet potatoes should be tender throughout, and the broccoli should have softened stems and lightly browned tips. - Finish with lemon.
Once the chicken is cooked, remove the tray from the oven. Drizzle with lemon juice and gently combine using clean serving utensils. Divide between four plates and serve.
Small Details That Help
Cut the sweet potatoes small enough. Large chunks take considerably longer to soften. The initial roasting stage is essential; adding everything at once can leave you with firm potatoes or overcooked chicken.
Leave space on the tray. Crowding traps moisture and encourages steaming. If using two trays, switch their positions during the final roasting stage for more even cooking.
Check the broccoli separately. Thin florets can brown quickly. If they are ready before the chicken, transfer them to a clean plate, provided they have been kept separate from raw chicken juices.
Let the thermometer guide the final minutes. Chicken pieces vary slightly even when cut carefully. Check more than one piece and avoid continuing to roast cooked chicken solely to achieve darker edges.
Serving Suggestion
This tray bake already includes chicken, vegetables and a starchy side. A spoonful of plain yogurt mixed with a little lemon juice makes an optional accompaniment. Keep it refrigerated until serving and prepare it with utensils that have not touched the raw chicken.
Recipe note: This recipe was developed with AI assistance and has not been independently kitchen-tested for this article. Cooking times are estimates; check doneness with a food thermometer.
5. Boneless Skinless Chicken Coconut Curry with Vegetables
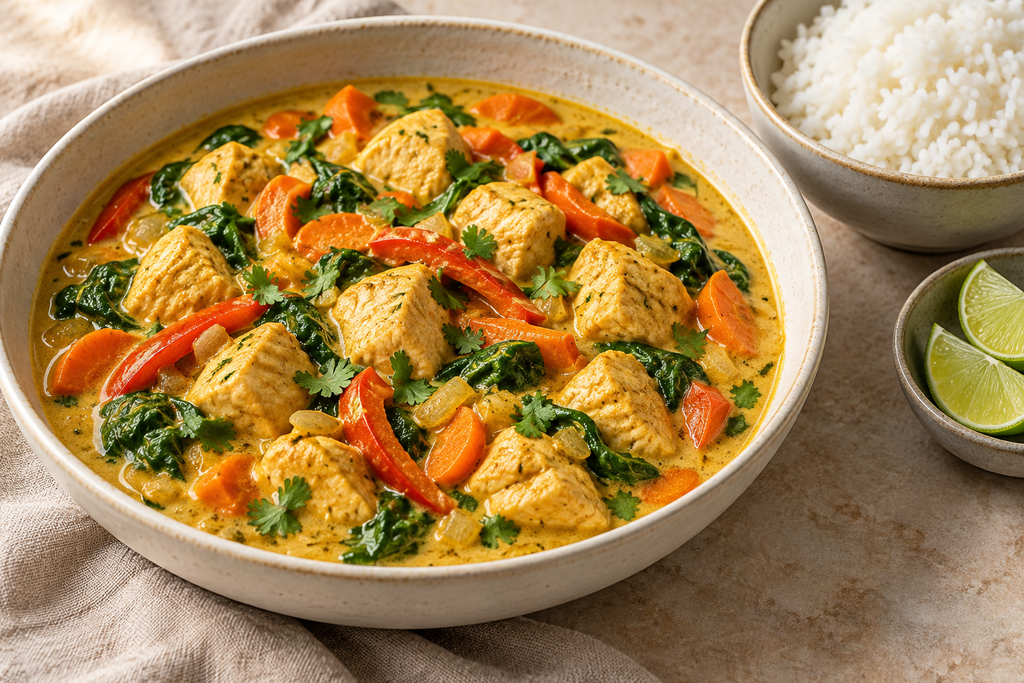
This boneless skinless chicken curry finishes the collection with a gently spiced coconut sauce. Sliced carrots and bell pepper cook first, followed by evenly cut chicken breast pieces. Adding the meat later gives the vegetables time to soften without leaving the chicken simmering longer than necessary.
Prep time: 20 minutes
Cook time: Approximately 25–30 minutes
Total time: Approximately 45–50 minutes
Servings: 4
Equipment: Large, deep frying pan with a lid, food thermometer
Ingredients
- 600 g (approximately 1⅓ lb) boneless, skinless chicken breasts
- 1 tablespoon neutral cooking oil
- 1 medium onion, approximately 150 g, finely chopped
- 2 garlic cloves, finely chopped
- 1 tablespoon finely grated fresh ginger
- 1½ teaspoons ground cumin
- 1½ teaspoons ground coriander
- ½ teaspoon ground turmeric
- Optional: ⅛ teaspoon chilli flakes
- 150 g carrots, peeled and sliced into thin half-moons, approximately 3 mm thick
- 1 red bell pepper, approximately 150 g, deseeded and cut into short strips
- 1 × 400 ml (13.5 fl oz) can full-fat coconut milk
- 100 ml (approximately ⅓ cup plus 1 tablespoon) water
- ½ teaspoon fine salt, plus more to taste
- 80 g (approximately 3 oz) fresh baby spinach, washed and drained
- 1 tablespoon fresh lime juice
Optional, for serving:
- Cooked rice
- Chopped fresh coriander
- Lime wedges
Step-by-Step Instructions
- Prepare the ingredients.
Chop the vegetables before handling the raw chicken. Cut the chicken breasts into evenly sized pieces approximately 2.5 cm across. Keep them refrigerated while you begin the sauce, and clean any utensils and surfaces that touched the raw meat. - Soften the onion.
Heat the oil in a large, deep frying pan over medium heat. Add the onion and cook for 5–6 minutes, stirring occasionally, until softened. Reduce the heat if it starts browning rapidly. - Add the aromatics and spices.
Stir in the garlic and ginger and cook for 30 seconds. Add the cumin, coriander, turmeric and optional chilli flakes. Stir for another 20–30 seconds, then promptly add the coconut milk to prevent the spices from scorching. - Start cooking the vegetables.
Add the water, carrots, bell pepper and salt. Stir thoroughly and bring to a gentle simmer. Cover and cook for 6–8 minutes, until the carrots are beginning to soften but still offer some resistance when pierced. - Add the chicken.
Stir the chicken pieces into the sauce, separating any that stick together. Bring the mixture back to a gentle simmer, then partially cover the pan. - Simmer until cooked through.
Cook for approximately 8–12 minutes, stirring occasionally so the chicken heats evenly. Check several of the largest pieces with a food thermometer, inserting it from the side into the centre. Each must reach 74°C / 165°F. The carrots should now be tender. - Wilt the spinach.
Stir in the spinach in two batches and cook for another 1–2 minutes, just until wilted. If the sauce becomes too thick, add water a tablespoon at a time. - Finish with lime.
Remove the pan from the heat and stir in the lime juice. Taste before adding extra salt or lime. Serve with rice and the optional coriander and lime wedges.
Small Details That Help
Slice the carrots thinly. Thick pieces may remain firm after the chicken is ready. Check their texture before adding the meat, and give them a few extra minutes if needed.
Use a gentle simmer. Vigorous boiling is unnecessary and makes it harder to control the final cooking stage. Look for small bubbles breaking the surface rather than constant rolling movement.
Stir the coconut milk before measuring or pouring. The cream and liquid may separate in the can. Combine them so the sauce has an even consistency.
Adjust the sauce without overcooking the chicken. This curry has a spoonable sauce rather than a thick paste. If you want it thicker after the chicken is cooked, lift the meat onto a clean plate and reduce the sauce briefly before returning it.
Keep the heat level manageable. The recipe has no added chilli heat unless you include the flakes. You can offer extra chilli at the table for anyone who prefers a hotter portion.
What to Serve Alongside
Plain rice is an easy accompaniment for the coconut sauce. Start it before cooking the curry so both are ready at roughly the same time. Warm flatbread is another option, with cucumber slices alongside for a cool, fresh contrast.
Recipe note: This recipe was developed with AI assistance and has not been independently kitchen-tested for this article. Cooking times are estimates; check doneness with a food thermometer.
Finding Your Feet in the Kitchen
I’m not a professional chef, and I still appreciate recipes that make the next step clear. A short ingredient list, manageable preparation and a little guidance can make cooking feel much more approachable. That is what I wanted to bring to this collection of boneless skinless chicken recipes: different ways to prepare dinner without assuming you already know every kitchen technique.
You don’t need to try all five dishes at once. Start with the one that appeals to you and fits the equipment you have. The garlic butter cutlets offer a simple introduction to pan cooking, while the tray bake brings the chicken and vegetables together in one meal. If you enjoy a generous sauce, the coconut curry gives you another direction to explore.
The small details deserve your attention. Cutting pieces evenly, preparing ingredients before heating the pan and checking doneness with a thermometer can help you make more confident decisions. With boneless skinless chicken, learning when to stop cooking is just as useful as knowing how to begin.
There is no need for your dinner to look like a carefully styled photograph. A little sauce on the edge of the plate or unevenly chopped vegetables won’t make the meal less worth sharing. As someone who prefers simpler cooking, I find that a manageable recipe is a much more inviting starting point than an elaborate presentation.
I hope these boneless skinless chicken ideas give you a comfortable place to begin. Take your time, follow the steps and let familiarity build gradually. You don’t have to be a kitchen expert to enjoy making something for yourself or the people around your table.
About the recipes and images: These recipes were developed with AI assistance and have not been independently kitchen-tested for this article. The images are AI-generated illustrations, not photographs of tested dishes. Actual appearance and cooking times may vary; follow the written instructions and use a food thermometer to check doneness.