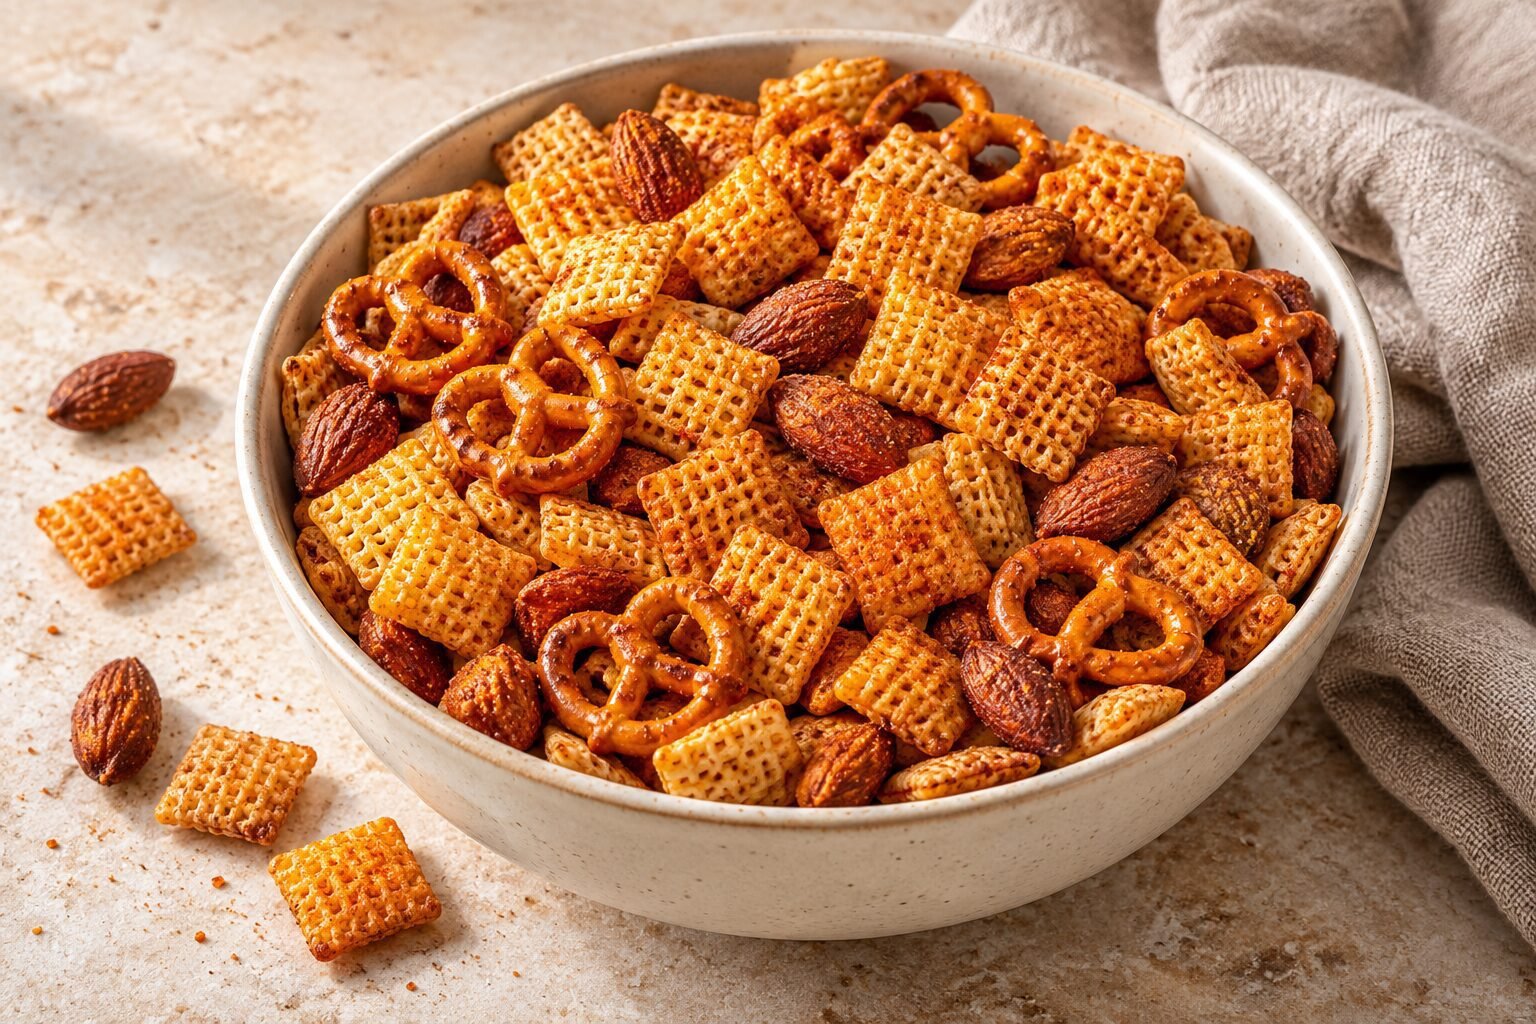
A bowl of homemade snack mix can be a simple addition to a film night, a casual gathering or an afternoon spent with friends. The appeal is in the contrast: crisp cereal squares, crunchy pretzels and a coating that brings everything together.
These three homemade Chex Mix recipes offer a savoury oven-baked version, a smoky paprika variation and a sweet-and-salty mix finished with chocolate. Each includes measured ingredients, clear instructions and practical tips for coating, baking and cooling the mixture.
You do not need special equipment. A large mixing bowl, a roomy baking tray and a little patience are the main requirements. Spreading the ingredients evenly and allowing them to cool properly matter more than elaborate presentation.
Start with the Right Cereal
These recipes use Chex breakfast cereal, not a bag of ready-seasoned Chex Mix. Plain rice and corn varieties provide a straightforward starting point; each recipe specifies which cereal to use.
If Chex is unavailable, a similar plain, crisp cereal with a lattice shape may work, but its size, sweetness and texture can change the result. Avoid assuming that every breakfast cereal is an interchangeable substitute.
The recipes below are independent homemade variations, not the brand’s official Original Chex Party Mix recipe.
A Few Details That Help
Coat gently and gradually. Pouring the seasoning mixture over the cereal in stages makes it easier to distribute without crushing the pieces.
Give the mix enough space. A deep, crowded layer can cook unevenly. Follow the tray guidance and divide the mixture between trays when needed.
Let it cool before packing. Warm snack mix can release moisture inside a closed container and lose its crunch. Chocolate-coated versions also need time for the chocolate to set.
Check ingredients for dietary needs. A homemade mix is not automatically gluten-free or suitable for every allergy. Check the cereal, pretzels, sauces, chocolate and any nuts individually, including relevant cross-contact information.
Choose the flavour that appeals to you, prepare your ingredients and take it one tray at a time.
1. Savoury Oven-Baked Chex Mix
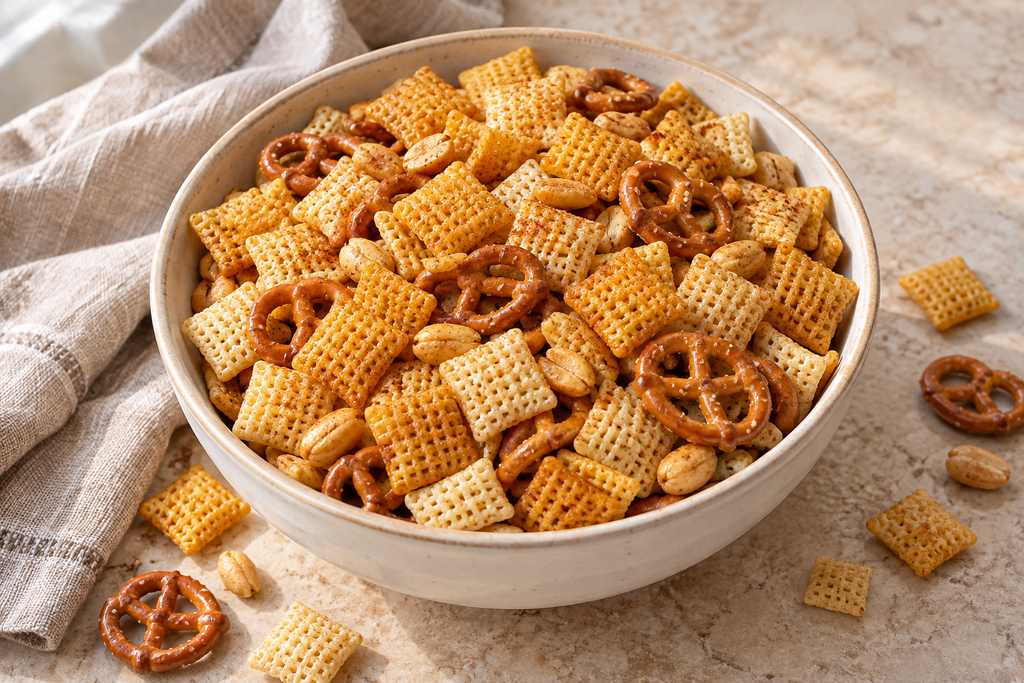
This savoury snack mix combines crisp cereal squares, mini pretzels and peanuts with a buttery Worcestershire coating. Garlic and onion powder provide seasoning without needing a complicated spice blend.
A low oven temperature and regular stirring help the coating dry evenly. Let a small sample cool before judging the crunch: the mix becomes crisper as it loses heat.
Makes: approximately 6 cups
Servings: approximately 12 snack portions of ½ cup
Preparation time: approximately 10 minutes
Baking time: approximately 45–60 minutes
Cooling time: approximately 30 minutes
Equipment: a large mixing bowl and a rimmed baking tray approximately 33 × 45 cm
Ingredients
- 2 cups Rice Chex cereal, approximately 55 g
- 2 cups Corn Chex cereal, approximately 60 g
- 1 cup mini pretzels, approximately 45–60 g, depending on shape
- ½ cup unsalted roasted peanuts, approximately 70 g
- 60 g unsalted butter
- 1 tablespoon Worcestershire sauce, 15 ml
- ½ teaspoon garlic powder
- ½ teaspoon onion powder
- ¼ teaspoon sweet paprika
- ⅛ teaspoon fine salt, optional
Cup measurements use a 240 ml measuring cup. Cereal and pretzel weights vary between products, so the gram amounts are approximate.
Use garlic and onion powder, not garlic or onion salt. If your peanuts are salted, omit the optional salt initially.
Instructions
1. Heat the oven and prepare the tray.
Preheat the oven to 120°C conventional / 100°C fan / 250°F.
Line the rimmed baking tray with baking parchment suitable for the oven. If your tray is smaller, use two trays so the mixture can spread into a shallow layer.
2. Combine the dry ingredients.
Place the rice cereal, corn cereal, pretzels and peanuts in the large bowl. Gently turn them together with a broad spoon or silicone spatula.
Leave enough room in the bowl to mix without spilling or crushing the cereal.
3. Make the seasoning mixture.
Melt the butter gently in a small saucepan over a low heat. Remove from the heat and stir in the Worcestershire sauce, garlic powder, onion powder, paprika and optional salt.
Stir again immediately before pouring, as the seasoning can settle.
4. Coat the snack mix.
Drizzle approximately one-third of the butter mixture over the dry ingredients and fold gently. Repeat twice with the remaining mixture.
Scrape any seasoning from the bottom of the bowl and continue turning until the pieces have a light, reasonably even coating. Avoid pressing down on the cereal.
5. Spread and bake.
Transfer to the prepared tray and spread into a shallow, even layer.
Bake for approximately 45–60 minutes, gently stirring every 15 minutes. Move pieces from the edges towards the centre and redistribute the mixture after each stir.
If using two trays, swap their positions halfway through baking.
6. Check the texture.
After approximately 45 minutes, remove a few cereal pieces and let them cool for several minutes before tasting.
They should be crisp rather than damp or chewy. If necessary, continue baking in 5–10-minute intervals, checking regularly. The coating should look dry, with no pooled butter; dark browning is not the goal.
If the mix begins colouring quickly at the edges, check your oven temperature and stir more frequently.
7. Cool completely.
Remove the tray and spread the mixture out again. Leave uncovered until completely cool, approximately 30 minutes, before transferring to a clean, dry, airtight container.
Do not seal it while warm, as trapped moisture can soften the cereal.
Tips and Substitutions
Too salty? Use unsalted peanuts and butter, and omit the optional salt. Worcestershire sauce and pretzels already contribute seasoning.
Prefer no peanuts? Replace them with an additional half cup of cereal or pretzels. For an allergy-related substitution, also check the remaining ingredients and their cross-contact information.
Need a vegetarian version? Choose a Worcestershire-style sauce labelled vegetarian, since many traditional versions contain anchovies.
Making a larger batch? Use additional trays rather than piling more mixture onto one. Stir each tray separately to help the coating dry evenly.
Serving and Storage
Serve in a large bowl with a scoop, or divide into small individual bowls.
Keep the fully cooled mix in an airtight container in a cool, dry place. For this untested recipe, make an amount you expect to enjoy within 5–7 days for best texture; this is a quality estimate, not a validated shelf-life guarantee.
Use clean, dry utensils and keep moisture out of the container. If the mixture develops mould, an unusual smell or signs of spoilage, discard it.
Recipe development note: This recipe was developed with AI assistance and has not been independently kitchen-tested for this article. Baking time, yield and storage quality are estimates. This is an independent homemade variation, not the official Original Chex Party Mix recipe.nd slow with melted butter, Worcestershire sauce, and seasonings, ensuring every bite is packed with flavor! This delightful mix is perfect for snacking and gatherings, making it an ideal treat for any occasion!
2. Smoky Paprika Chex Mix
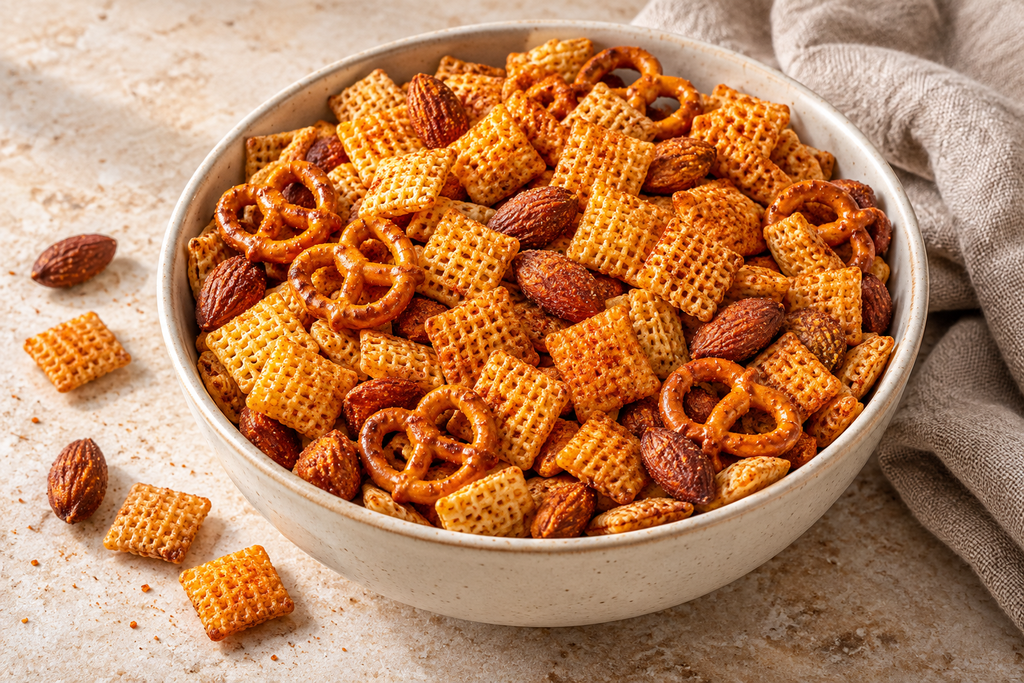
Smoked paprika gives this oven-baked snack mix a smoky flavour without needing a smoker. A small amount of brown sugar balances the savoury seasoning, while optional cayenne lets you choose whether to add heat.
Unlike hot paprika, sweet smoked paprika contributes smokiness without necessarily making the mixture spicy. Check the label before measuring.
Makes: approximately 5½–6 cups
Servings: approximately 11–12 snack portions of ½ cup
Preparation time: approximately 10 minutes
Baking time: approximately 45–60 minutes
Cooling time: approximately 30 minutes
Equipment: a large mixing bowl and a rimmed baking tray approximately 33 × 45 cm
Ingredients
- 2 cups Rice Chex cereal, approximately 55 g
- 2 cups Corn Chex cereal, approximately 60 g
- 1 cup mini pretzels, approximately 45–60 g
- ½ cup unsalted roasted almonds, approximately 70 g
- 55 g unsalted butter
- 1 tablespoon Worcestershire sauce, 15 ml
- 2 teaspoons sweet smoked paprika
- 1 teaspoon light brown sugar
- ½ teaspoon garlic powder
- ¼ teaspoon onion powder
- ⅛ teaspoon cayenne pepper, optional
Cup measurements use a 240 ml measuring cup. Cereal and pretzel weights vary between products, so the gram amounts are approximate.
No extra salt is included initially: the pretzels and Worcestershire sauce already provide seasoning.
Instructions
1. Heat the oven.
Preheat the oven to 120°C conventional / 100°C fan / 250°F.
Line the baking tray with oven-safe baking parchment. If using smaller trays, divide the mixture between two rather than creating a deep layer.
2. Mix the crunchy ingredients.
Place both cereals, the pretzels and almonds in a large bowl. Gently turn them together, keeping the cereal squares as intact as possible.
3. Prepare the smoky coating.
Melt the butter in a small saucepan over a low heat, then remove from the heat.
Stir in the Worcestershire sauce, smoked paprika, brown sugar, garlic powder, onion powder and optional cayenne. Mix thoroughly, breaking up any sugar or spice lumps.
The coating should be evenly mixed, although some seasoning may settle between pours.
4. Coat in stages.
Drizzle one-third of the coating over the cereal mixture and fold gently with a broad spatula. Repeat with the remaining coating in two additions, stirring the coating before each pour.
Scrape up any seasoning that collects at the bottom of the bowl and distribute it through the mixture.
5. Bake gently.
Spread the mix across the prepared tray in a shallow, even layer.
Bake for 45–60 minutes, gently stirring every 15 minutes. Move the pieces around the edges towards the centre, then spread everything out again.
If using two trays, swap their oven positions halfway through.
6. Test a cooled sample.
Start checking after approximately 45 minutes. Remove a few pieces and let them cool for several minutes before tasting.
They should be dry and crisp, without a damp coating. If necessary, bake for another 5–10 minutes and test again.
Paprika gives the mixture a reddish colour from the start, so colour alone is not a useful doneness check. If you notice darkening edges or a burnt-spice smell, remove the tray and check immediately.
7. Cool before serving.
Leave the mixture spread out on the tray until completely cool, approximately 30 minutes.
Taste before adding any extra seasoning. Transfer to a serving bowl or a clean, dry, airtight container.
Adjusting the Flavour
For a milder mix: omit the cayenne and use sweet smoked paprika rather than a hot variety.
For a different nut: substitute unsalted roasted peanuts for the almonds using the same half-cup measure.
For a vegetarian version: choose a Worcestershire-style sauce labelled vegetarian; traditional versions often contain anchovies.
For a nut-free variation: replace the almonds with another half cup of cereal or pretzels. If preparing food for someone with an allergy, check all ingredient labels and relevant cross-contact information.
Serving and Storage
Serve as a snack alongside drinks or portion into small bowls for a film night. If packing it as a gift, wait until completely cool and include an ingredient list for the recipient.
Store in an airtight container in a cool, dry place. For this untested recipe, aim to enjoy it within 5–7 days for best texture. This is a quality estimate, not a validated shelf-life guarantee.
Keep moisture out of the container and discard the mix if it develops mould, an unusual smell or other signs of spoilage.
Recipe development note: This recipe was developed with AI assistance and has not been independently kitchen-tested for this article. Baking time, yield and storage quality are estimates. This is an independent homemade variation, not an official Chex recipe.
3. Chocolate-Drizzled Sweet and Salty Chex Mix
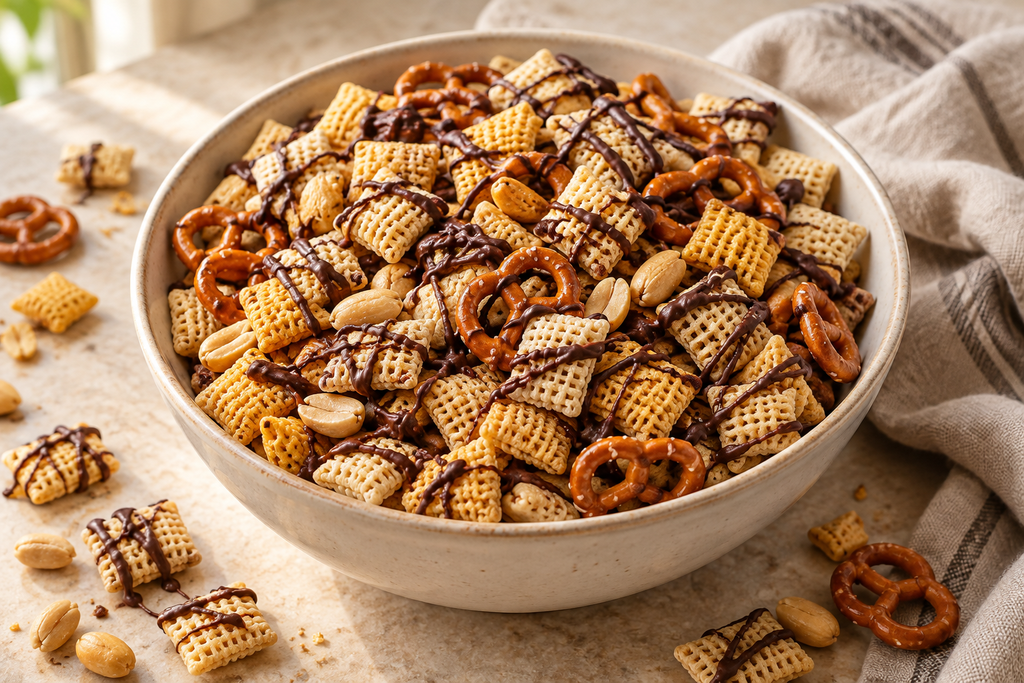
This version combines lightly buttered cereal, salty pretzels and roasted peanuts with a thin drizzle of chocolate. There is no caramel to cook, and the chocolate stays on the surface in ribbons rather than coating every piece completely.
Bake and cool the base before adding the chocolate. Drizzling it over warm cereal can leave the chocolate soft and make the finished mix messy to handle.
Makes: approximately 5½–6 cups
Servings: approximately 11–12 snack portions of ½ cup
Preparation time: approximately 15 minutes
Baking time: approximately 30–40 minutes
Cooling time: approximately 30 minutes
Chocolate setting time: approximately 1–2 hours, depending on room temperature
Ingredients
- 2 cups Rice Chex cereal, approximately 55 g
- 2 cups Corn Chex cereal, approximately 60 g
- 1 cup mini pretzels, approximately 45–60 g
- ½ cup unsalted roasted peanuts, approximately 70 g
- 30 g unsalted butter
- 100 g dark or milk chocolate, suitable for melting, finely chopped
Cup measurements use a 240 ml measuring cup. The gram amounts for cereal and pretzels are approximate because products vary.
Choose plain cereal rather than a sweetened or flavoured variety. No additional salt is needed initially; the pretzels provide the salty contrast.
Instructions
1. Prepare the oven and tray.
Preheat the oven to 120°C conventional / 100°C fan / 250°F.
Line a rimmed baking tray, approximately 33 × 45 cm, with oven-safe baking parchment. Use two trays if necessary to avoid a deep layer.
2. Coat the base ingredients.
Combine the cereals, pretzels and peanuts in a large bowl.
Melt the butter gently, then drizzle it over the mixture in two additions, folding carefully after each. Aim for a light coating without crushing the cereal.
3. Bake until dry and crisp.
Spread the mixture into a shallow layer on the prepared tray.
Bake for approximately 30–40 minutes, gently stirring every 10–15 minutes. Start checking at 30 minutes: cool a few pieces before tasting them for crunch.
The mix should be dry and crisp, without becoming deeply browned.
4. Cool completely.
Remove the tray from the oven and leave the mixture spread out for approximately 30 minutes, or until completely cool.
Do not add chocolate while the cereal or tray is still warm.
5. Melt the chocolate gently.
Place the chopped chocolate in a clean, completely dry microwave-safe bowl.
Heat at medium power in 20-second intervals, stirring thoroughly between each interval. Stop heating when only a few small pieces remain, then stir until smooth.
Follow any melting instructions on the chocolate’s packaging. Keep water away from the bowl, and do not add milk or water to thin the chocolate.
6. Drizzle over the mix.
Spread the cooled snack mix across the parchment again.
Use a spoon to drizzle half the melted chocolate in thin lines over the surface. Let it begin to set, then gently turn some of the pieces and drizzle over the remaining chocolate.
Some pieces will have more chocolate than others, and a few small clusters may form. That is part of the finished texture.
7. Let the chocolate set.
Leave in a cool, dry place until the chocolate is firm enough to handle, approximately 1–2 hours. The time varies with the chocolate and room temperature.
If the room is warm, refrigerate the tray briefly, checking after 10–15 minutes. Avoid leaving it uncovered in the fridge for an extended period.
Gently separate any large clusters before serving.
Tips for a Neater Finish
Use thin ribbons. Large spoonfuls of chocolate create heavy clumps and take longer to set.
Choose chocolate you enjoy eating. Dark chocolate gives a less sweet contrast, while milk chocolate produces a sweeter mix.
Expect a homemade finish. Simply melted chocolate is not tempered, so it may soften in warm hands or develop pale streaks. For a more consistent setting result, use a confectionery coating according to its packet instructions.
Prefer no peanuts? Replace them with another half cup of cereal or pretzels. For allergy-related substitutions, check every ingredient and relevant cross-contact information.
Serving and Storage
Serve once the chocolate has set. For gifting, pack into clean, food-safe containers and include the ingredients and preparation date.
Store in an airtight container in a cool, dry place, away from sunlight and heat. Separate layers with baking parchment if needed.
For this untested recipe, aim to enjoy the mix within 5–7 days for best texture. This is a quality estimate, not a validated shelf-life guarantee. Warm conditions may soften the chocolate, and moisture can reduce the cereal’s crunch.
Recipe development note: This recipe was developed with AI assistance and has not been independently kitchen-tested for this article. Baking time, yield and storage quality are estimates. This is an independent homemade variation, not an official Chex recipe.
A Simple Snack Worth Sharing
I’m still finding my feet in the kitchen, so I appreciate recipes built around manageable steps and familiar ingredients. A homemade Chex mix recipe fits that approach: measure, mix gently, keep an eye on the oven and allow enough time for everything to cool.
Whether you prefer the savoury version, smoky paprika or a little chocolate, choose the combination that sounds good to you. There is no need for perfectly even seasoning or tidy chocolate ribbons. Small differences are part of preparing food at home.
I hope you find a Chex mix recipe here that you would enjoy sharing—or simply serving in a small bowl while settling down with a favourite film.
These recipes were developed with AI assistance and have not been independently kitchen-tested. Baking times, yields and storage quality are estimates. Check ingredient labels for dietary requirements and allergens.
The images are AI-generated illustrations, not photographs of tested batches. These are independent homemade variations, not official recipes endorsed by the Chex brand.