Breakfast does not have to be sweet, repetitive, or complicated. Sometimes the most satisfying way to begin the day is with something warm, savory, and freshly seasoned. These Easy Indian Breakfast Recipes bring together comforting grains, lentils, vegetables, flatbreads, eggs, herbs, and fragrant spices in thirteen distinctly different dishes.
Indian breakfast is not a single style of cooking. The foods served in the morning vary considerably between regions, families, seasons, and everyday routines. South Indian kitchens may begin the day with upma, idli, dosa, or appe, while poha is especially familiar in western and central parts of the country. Aloo paratha is closely associated with northern India, and thalipeeth belongs to the culinary traditions of Maharashtra. Egg bhurji and masala omelettes offer quick, flexible choices enjoyed in many different settings.
That variety is what makes this collection so useful. Some dishes, including poha, besan chilla, egg bhurji, and masala omelette, can be prepared in well under half an hour. Others require a little advance planning. Moong dal needs time to soak, while a traditional dosa batter is normally soaked, ground, and fermented. These recipes remain manageable for home cooks, but “easy” does not always mean instant. Whenever preparation is required, the instructions will explain how to fit it comfortably into your routine.
You also do not need a cupboard full of unfamiliar ingredients before you begin. A few staples—mustard seeds, cumin, turmeric, curry leaves, fresh coriander, ginger, and green chili—can create many different flavor combinations. Ingredients such as semolina, flattened rice, gram flour, and lentils each behave differently, so the individual recipes include practical guidance about texture, consistency, and suitable substitutions.
One lesson I have taken from exploring these dishes is that Indian breakfast rewards preparation more than rushing. Chopping vegetables the evening before, soaking lentils overnight, or keeping a basic chutney in the refrigerator can turn a recipe that initially appears involved into a realistic weekday option. It also makes the actual cooking more enjoyable: instead of searching for ingredients while a pan heats up, you can pay attention to the mustard seeds popping, the curry leaves becoming fragrant, or the batter turning crisp around the edges.
The recipes can also be adjusted to suit different appetites. A small bowl of upma or poha works well for a lighter morning, while an aloo paratha or masala dosa creates a more substantial breakfast. Chutney, plain yogurt, sambar, pickles, or a squeeze of fresh lemon can complete the dish without requiring an elaborate spread.
These Easy Indian Breakfast Recipes are written as approachable home-kitchen versions rather than claims that every family prepares each dish identically. Regional recipes naturally have many respected variations. Use the instructions as a reliable starting point, then adjust the chili, vegetables, consistency, and accompaniments according to your ingredients and preferences.
Whether you are looking for a ten-minute egg dish, a crisp savory pancake, or a weekend breakfast worth taking your time over, the collection offers a practical place to begin.
1. Rava Upma
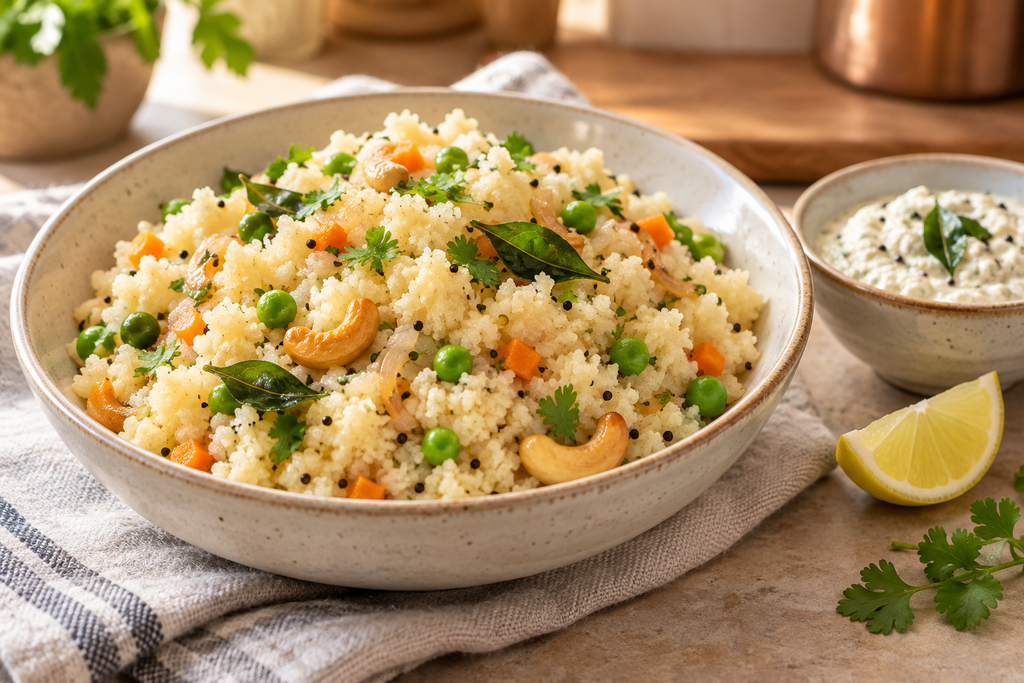
Rava Upma is a warm, savory South Indian breakfast made from roasted semolina, vegetables, and a fragrant tempering of mustard seeds and curry leaves. Its soft but distinctly grainy texture makes it comforting without feeling like ordinary porridge. From start to finish, it can be on the table in approximately 25 minutes.
For two servings, use ¾ cup fine semolina, 2 cups water, ½ small onion, ¼ cup mixed peas and finely diced carrot, ½ teaspoon mustard seeds, 6 curry leaves, 1 tablespoon oil or ghee, and salt to taste. A small amount of grated ginger, chopped green chili, cashews, and fresh coriander can also be added.
Begin by dry-roasting the semolina in a wide pan over low to medium heat. Stir continuously for 4–5 minutes, until it smells gently nutty but has not changed significantly in color. Transfer it to a bowl. This step helps the grains remain separate and prevents a raw flavor.
Heat the oil in the same pan and add the mustard seeds. Once they begin to pop, add the curry leaves, cashews, onion, ginger, and optional chili. Cook until the onion softens, then stir in the vegetables. Add the water and salt, and bring everything to a steady boil.
Reduce the heat before gradually sprinkling in the roasted semolina. Add it in a thin stream while stirring continuously; tipping it in all at once is the most common cause of lumps. Cover the pan and cook gently for 3–4 minutes, then switch off the heat and allow the upma to rest for another 2 minutes. Fluff it with a fork rather than pressing it down.
Rava Upma is best served immediately with coconut chutney and a squeeze of lemon. If it becomes firm while standing, stir in a spoonful of hot water before serving. Leftovers can be refrigerated for up to two days and reheated gently with a splash of water. Because semolina is made from wheat, this breakfast is not gluten-free.
2. Poha
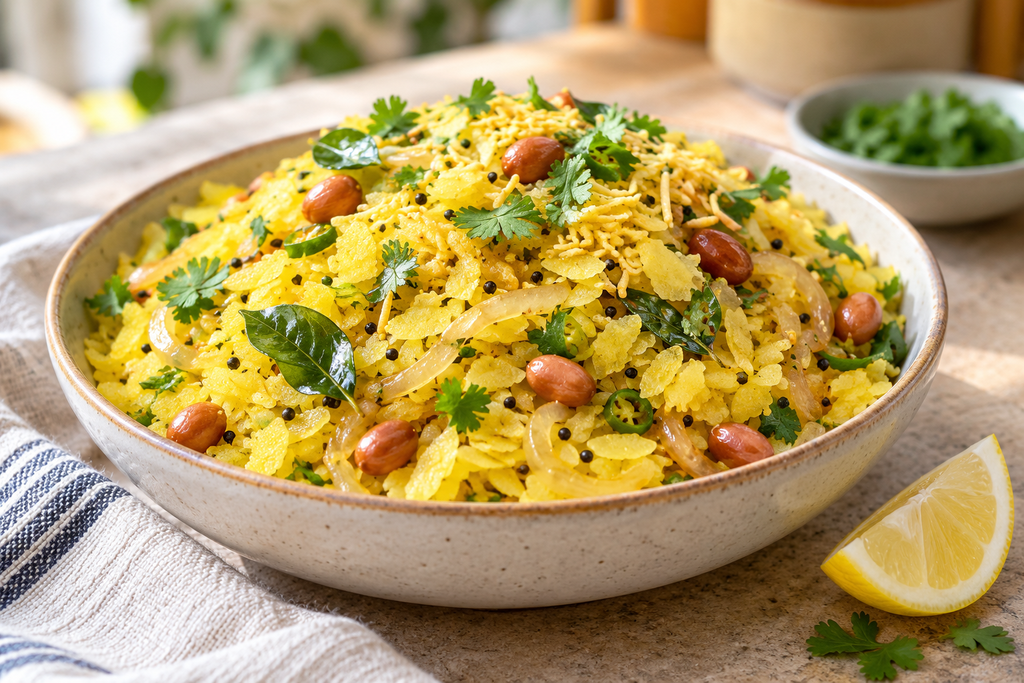
Poha is a light, savory breakfast made with flattened rice, onions, spices, and fresh lemon. It is especially popular in western and central India, although the ingredients and garnishes vary from one region and household to another. The dish comes together in approximately 20 minutes and has a soft, fluffy texture balanced by crisp roasted peanuts.
For two servings, use 1½ cups medium or thick poha, ½ small onion, 2 tablespoons raw peanuts, ½ teaspoon mustard seeds, 6 curry leaves, ¼ teaspoon turmeric, 1 tablespoon oil, and salt to taste. You can also add one finely chopped green chili, a pinch of sugar, fresh coriander, and lemon juice.
Place the poha in a colander and rinse it briefly under cool running water. Toss it gently with your fingers, then leave it to drain for 5–10 minutes. Avoid soaking it in a bowl of water: flattened rice absorbs liquid quickly and can become mushy. When ready, the flakes should be soft enough to break with gentle pressure but still retain their shape.
Heat the oil in a wide pan and fry the peanuts until lightly toasted. Remove and reserve them. Add the mustard seeds to the same oil, followed by the curry leaves and optional green chili. Once fragrant, add the onion and cook until soft but not deeply browned.
Stir in the turmeric, drained poha, salt, and optional pinch of sugar. Fold everything together gently so the flakes become evenly yellow without breaking apart. Cover and cook over low heat for 2–3 minutes. Switch off the heat, return the peanuts to the pan, and finish with lemon juice and chopped coriander.
Serve Poha immediately with an extra lemon wedge. Fine sev can be added for crunch, although it is optional. Leftovers may be refrigerated for up to two days and gently reheated with a few drops of water. Poha is made from rice and is naturally gluten-free, but check the packaging for cross-contact information when this is medically important.
3. Semiya Upma
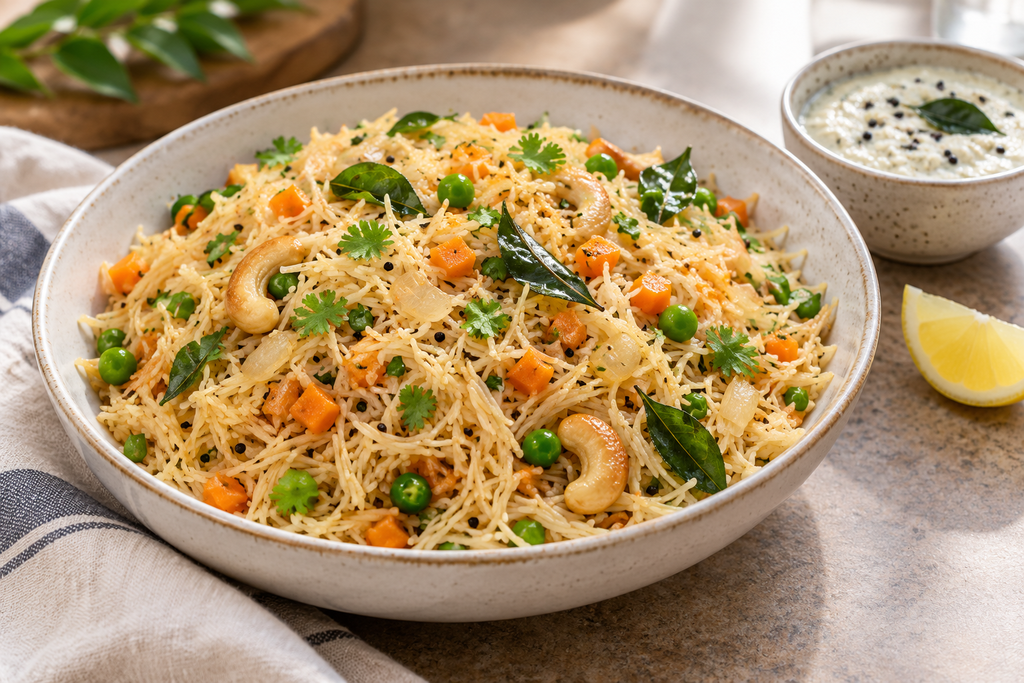
Semiya Upma is a savory South Indian breakfast made with short vermicelli, vegetables, and a fragrant mustard seed and curry leaf tempering. It offers the familiar comfort of noodles in a lighter, gently spiced form and can be prepared in approximately 25 minutes.
For two servings, use 1½ cups roasted vermicelli, 2¼ cups water, ½ small onion, ⅓ cup finely diced mixed vegetables, ½ teaspoon mustard seeds, 6 curry leaves, 1 tablespoon oil, and salt to taste. Optional additions include grated ginger, chopped green chili, cashews, fresh coriander, and lemon juice.
If your vermicelli is not already roasted, heat it in a dry pan over low to medium heat for 3–4 minutes. Stir constantly until it turns lightly golden and smells toasted, then transfer it to a plate. Roasting gives the dish a deeper flavor and helps the strands remain separate during cooking.
Heat the oil in the same pan and add the mustard seeds. When they begin to pop, add the curry leaves, cashews, optional chili, ginger, and onion. Cook until the onion softens, then add the vegetables and sauté them for another 2 minutes.
Pour in the water, season with salt, and bring it to a full boil. Add the roasted vermicelli gradually while stirring gently. Reduce the heat, cover the pan, and cook until the liquid has been absorbed and the strands are tender. Follow the vermicelli package directions if they recommend a different liquid ratio, as thickness can vary considerably between brands.
Remove the pan from the heat and leave it covered for 3 minutes. Fluff the Semiya Upma gently with a fork rather than stirring vigorously, which may break the softened strands. Finish with coriander and a squeeze of lemon, then serve with coconut chutney.
Leftovers can be refrigerated for up to two days. Reheat them covered with a small splash of water. Traditional semiya is normally made from wheat and is not gluten-free; a certified rice-vermicelli alternative may be used, but its cooking time and water requirement will be different.
4. Rava Idli
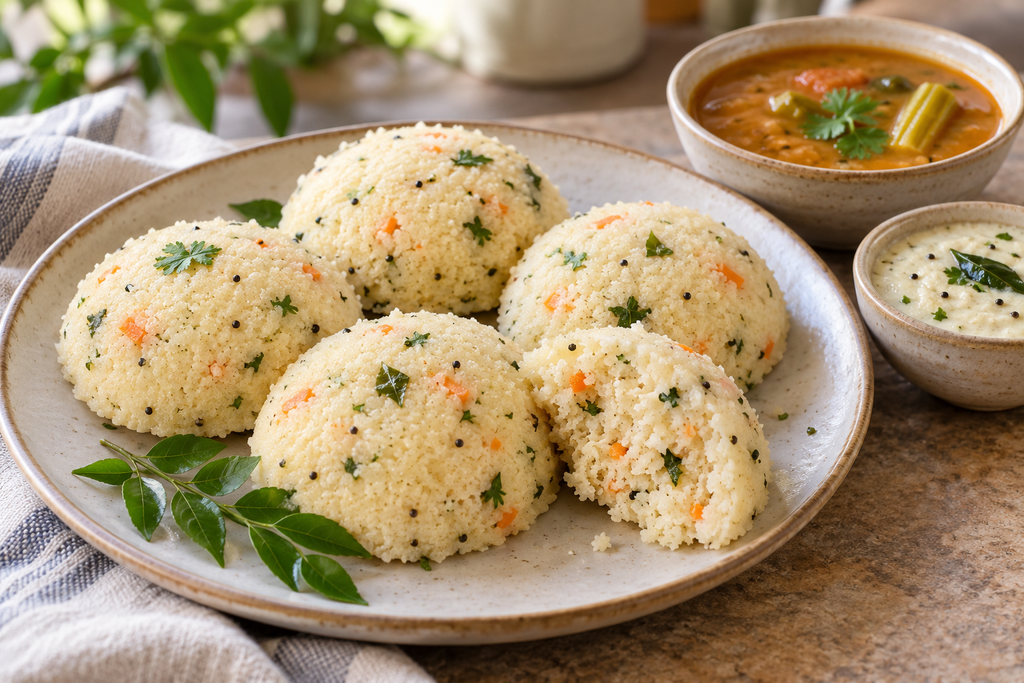
Rava Idli is a quick South Indian variation of traditional idli, prepared with semolina and yogurt rather than a fermented rice-and-lentil batter. The small steamed cakes are soft, gently tangy, and lightly seasoned with mustard seeds and curry leaves. Since lengthy fermentation is unnecessary, they are practical even when breakfast has not been planned the previous evening.
For approximately six idlis, use 1 cup fine semolina, ¾ cup plain yogurt, ¼–½ cup water, ½ teaspoon mustard seeds, 6 curry leaves, 1 teaspoon oil, ½ teaspoon grated ginger, ¼ teaspoon salt, and ½ teaspoon fruit salt such as Eno. Finely diced carrot, chopped coriander, cashews, and green chili may be added in small quantities.
Dry-roast the semolina over low heat for 3–4 minutes without allowing it to brown, then leave it to cool. Heat the oil in a small pan and add the mustard seeds. Once they pop, add the curry leaves, ginger, and any optional cashews or chili.
Combine the cooled semolina, yogurt, salt, tempering, and optional vegetables. Add enough water to create a thick but spoonable batter. Let it rest for 15 minutes, then check the consistency because the semolina will absorb liquid as it stands.
Grease the idli molds and bring the water in your steamer to a gentle boil. Stir the fruit salt into the batter immediately before filling the molds. Mix only until the batter becomes light and aerated, then work quickly. Steam for 10–12 minutes, or until a skewer inserted into an idli comes out clean.
Let the Rava Idli rest for 2 minutes before removing it from the mold with a lightly greased spoon. Serve warm with coconut chutney and sambar. Refrigerate leftovers for up to two days and reheat them by steaming briefly so they do not dry out. Since rava is made from wheat, this recipe is not gluten-free.
5. Besan Chilla
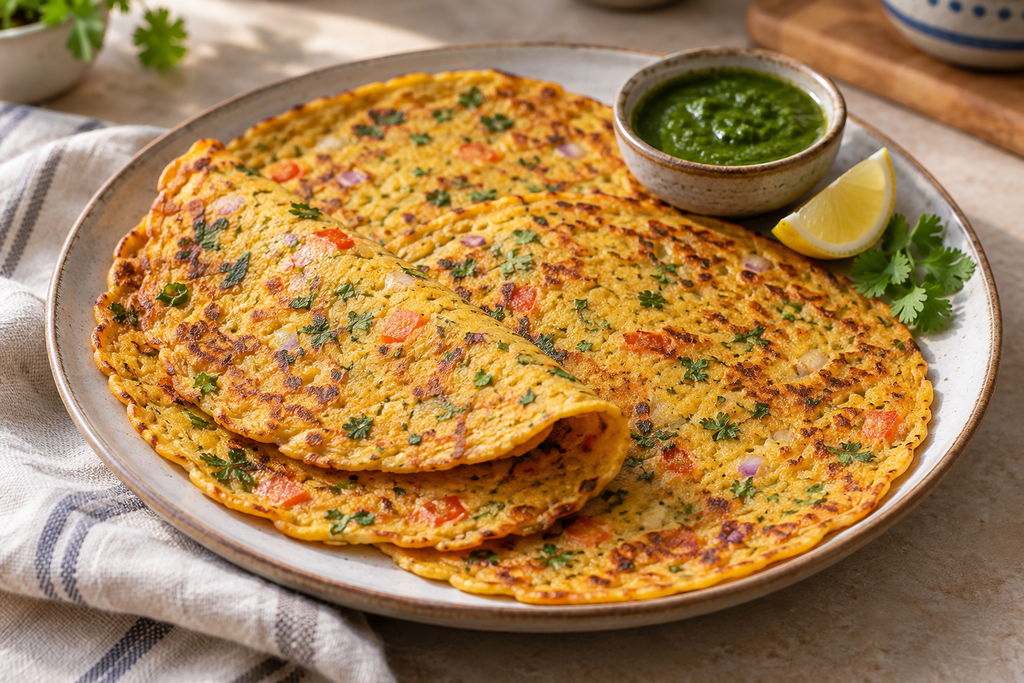
Besan Chilla is a thin, savory Indian pancake made from gram flour, vegetables, herbs, and spices. It requires no soaking or fermentation, so the batter can be mixed shortly before cooking. The finished chilla has a lightly crisp exterior, a tender center, and a warm, nutty flavor from the chickpea flour.
For two servings, use 1 cup gram flour, approximately ¾ cup water, ¼ cup finely chopped onion, ¼ cup finely chopped tomato, 2 tablespoons chopped coriander, ¼ teaspoon turmeric, ½ teaspoon ground cumin, and ¼ teaspoon salt. Finely chopped green chili, grated ginger, or a pinch of chili powder can be added according to taste.
Place the gram flour, turmeric, cumin, and salt in a bowl. Gradually whisk in the water until a smooth, pourable batter forms. Add the onion, tomato, coriander, and optional chili or ginger. Let the mixture rest for approximately 10 minutes, then check its consistency. It should spread easily across the pan but should not be as thin as water.
Heat a nonstick or well-seasoned skillet over medium heat and brush it lightly with oil. Pour in a small ladleful of batter and spread it gently into a thin circle. Cook until the surface begins to look dry and the edges lift easily from the pan. Drizzle a few drops of oil around the edge, flip carefully, and cook the second side until golden with small browned patches.
Avoid turning the chilla too early. Waiting until the underside is properly set is the easiest way to prevent tearing. If the batter thickens while standing, loosen it with one tablespoon of water at a time.
Serve Besan Chilla immediately with coriander-mint chutney, plain yogurt, or fresh lemon. The batter can be refrigerated for up to one day, although the vegetables may release extra moisture. Gram flour is naturally gluten-free, but certified packaging should be selected when avoiding cross-contact is medically necessary.
6. Suji Appe
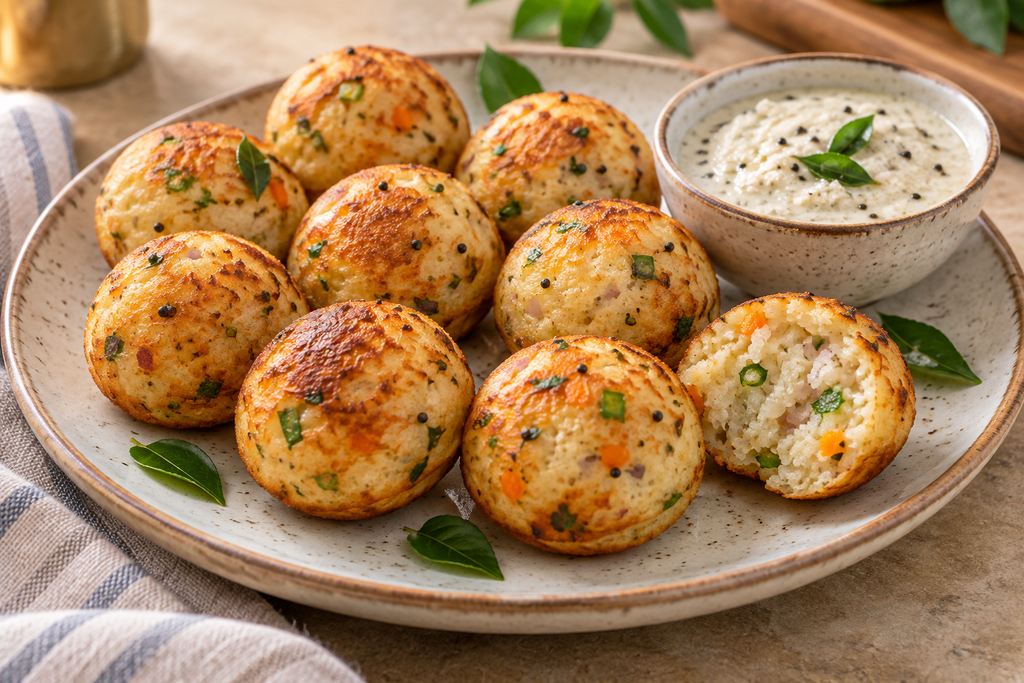
Suji Appe are small, savory semolina bites cooked in the rounded cavities of an appe or paniyaram pan. They develop a lightly crisp, golden exterior while remaining soft inside. Yogurt provides gentle tanginess, and finely chopped vegetables add color and texture without making the batter heavy.
For approximately 12 appe, use 1 cup fine semolina, ¾ cup plain yogurt, ¼–½ cup water, ¼ cup finely chopped onion, ¼ cup finely diced carrot, 2 tablespoons chopped coriander, ½ teaspoon grated ginger, and salt to taste. You will also need ½ teaspoon fruit salt, such as Eno, and a small amount of oil for the pan. Green chili, mustard seeds, and curry leaves are optional but flavorful additions.
Combine the semolina, yogurt, salt, ginger, vegetables, and enough water to create a thick, spoonable batter. Let it rest for 15 minutes so the semolina can absorb the moisture. Check the consistency afterward and add a little more water if the mixture has become too stiff.
Heat the appe pan over medium-low heat and brush each cavity lightly with oil. Stir the fruit salt into the batter immediately before cooking. Fill each cavity approximately three-quarters full, cover the pan, and cook until the undersides are golden and the tops begin to set.
Turn each appe carefully using a skewer or small spoon. Cook uncovered until the second side is golden and the center is fully set. Keeping the heat moderate allows the interior to cook before the outside becomes too dark.
Serve Suji Appe warm with coconut or coriander chutney. Refrigerate leftovers for up to two days and reheat them in a covered skillet with a few drops of water. Suji is made from wheat, so traditional Suji Appe are not gluten-free.
7. Moong Dal Chilla
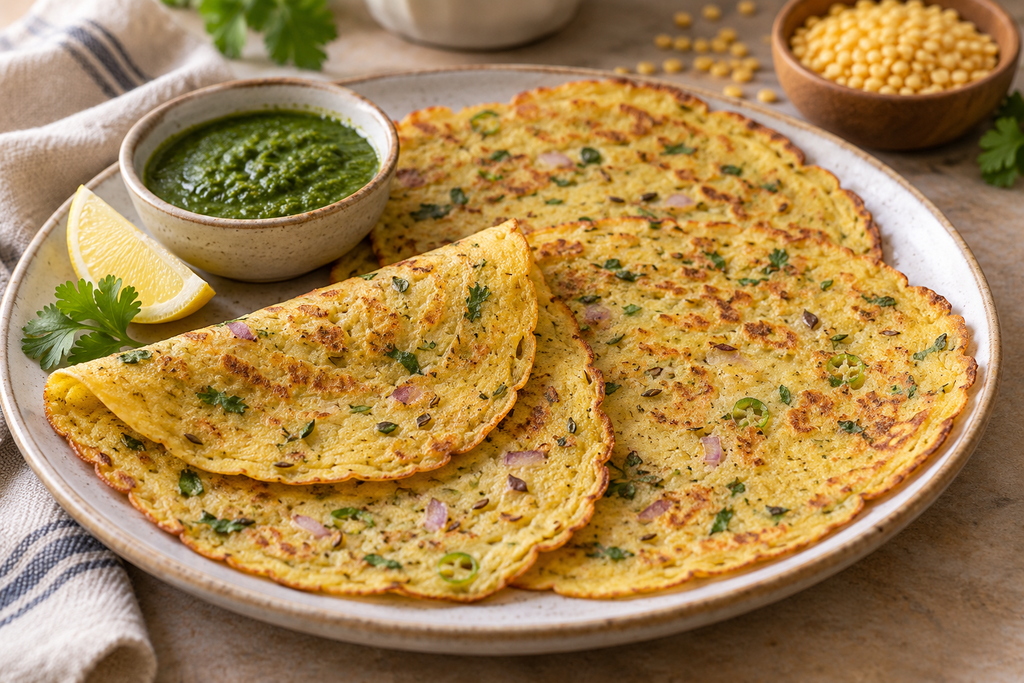
Moong Dal Chilla is a savory Indian pancake made from soaked and blended split yellow mung beans. It has a lightly crisp surface, a tender center, and a mild lentil flavor that pairs well with ginger, cumin, green chili, and fresh coriander. The batter needs advance soaking, but the actual cooking process is quick.
For approximately four chillas, use 1 cup split yellow moong dal, ¼–½ cup water, ¼ cup finely chopped red onion, 2 tablespoons chopped coriander, ½ teaspoon cumin seeds, ½ teaspoon grated ginger, and salt to taste. One small green chili can be added for extra heat.
Rinse the moong dal thoroughly, then cover it with plenty of fresh water and soak for at least 3–4 hours. Overnight soaking is also convenient when preparing breakfast the following morning. Drain the dal well before transferring it to a blender.
Add the ginger, salt, and only a small amount of fresh water. Blend until smooth but still slightly textured. The batter should be thick enough to coat the back of a spoon while remaining easy to spread. Pour it into a bowl and stir in the onion, coriander, cumin, and optional chili.
Heat a nonstick or well-seasoned skillet over medium heat and brush it lightly with oil. Pour in a ladleful of batter and spread it gently into a thin circle. Cook until the top begins to dry and the edges release easily. Drizzle a few drops of oil around the edge, flip, and cook the second side until golden.
Avoid adding too much water during blending, as an overly thin batter is difficult to turn and may produce soft rather than lightly crisp chillas. Serve Moong Dal Chilla immediately with coriander chutney, plain yogurt, or lemon.
The batter can be refrigerated in a covered container for up to two days; stir it before cooking. Moong dal is naturally gluten-free, but check packaged spices and lentils for cross-contact information when necessary.
8. Rava Dosa
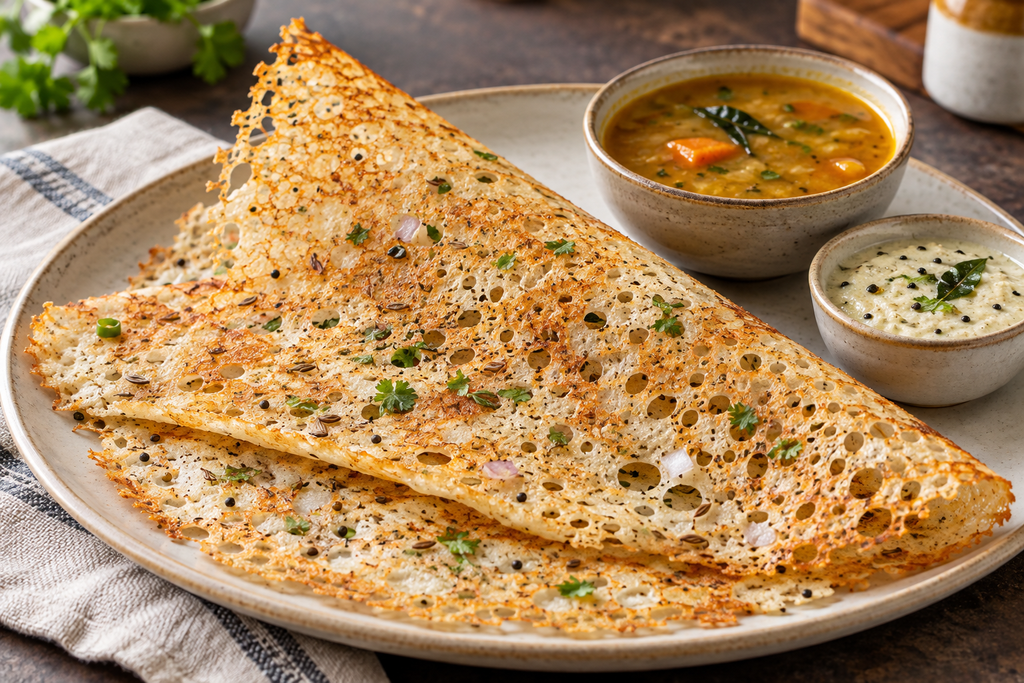
Rava Dosa is a thin, crisp South Indian crepe known for its delicate, lace-like surface. Unlike a traditional fermented dosa, this version uses semolina, rice flour, and a small amount of all-purpose flour. The batter requires only a short rest, making it a practical choice when you want dosa without preparing a fermented batter in advance.
For approximately four dosas, combine ½ cup fine semolina, ¼ cup rice flour, 2 tablespoons all-purpose flour, 2½ cups water, ½ teaspoon cumin seeds, ¼ teaspoon coarsely ground black pepper, and ½ teaspoon salt. Finely chopped onion, green chili, ginger, coriander, and curry leaves can be added sparingly.
Whisk the dry ingredients together, then gradually add the water. The finished batter should be much thinner than ordinary pancake or dosa batter—closer to lightly seasoned water than cream. Stir in the herbs and seasonings, then let the mixture rest for 20 minutes. The semolina will settle, so stir thoroughly before cooking every dosa.
Heat a cast-iron or nonstick skillet until a drop of water sizzles immediately. Lightly grease the surface, then pour the batter from several inches above the pan, beginning around the outer edge and moving toward the center. Do not spread it with the back of a ladle. The irregular gaps created during pouring give Rava Dosa its characteristic lacy texture.
Drizzle a little oil around the edges and across the surface. Cook over medium-high heat until deeply golden, crisp, and easy to release. Rava Dosa is often cooked primarily on one side, although a thicker section may be turned briefly if necessary.
Serve it straight from the skillet with coconut chutney and sambar, as it softens while standing. The batter may be refrigerated for one day, but add water if it thickens. Because semolina and all-purpose flour are made from wheat, traditional Rava Dosa is not gluten-free.!
9. Masala Dosa
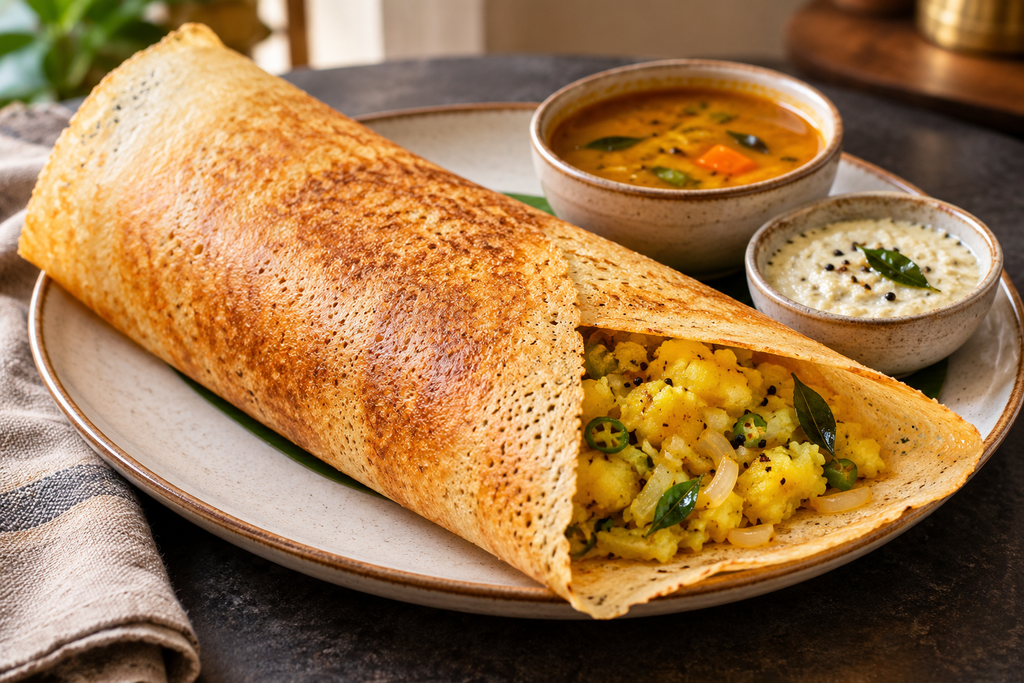
Masala Dosa combines a thin, crisp fermented crepe with a warm filling of potatoes, onions, mustard seeds, and curry leaves. Preparing traditional dosa batter from scratch requires soaking, grinding, and fermentation, so this approachable version uses good-quality refrigerated dosa batter. This keeps the morning preparation manageable without changing the essential character of the dish.
For four dosas, use approximately 2 cups prepared dosa batter and oil or ghee for cooking. For the filling, you will need 3 medium potatoes, ½ onion, ½ teaspoon mustard seeds, 8 curry leaves, ¼ teaspoon turmeric, 1 tablespoon oil, and salt to taste. Green chili, grated ginger, and fresh coriander are optional.
Boil the potatoes until tender, then drain, peel, and crush them roughly. They should retain some texture rather than becoming completely smooth.
Heat the oil in a skillet and add the mustard seeds. Once they begin to pop, add the curry leaves, sliced onion, and optional chili and ginger. Cook until the onion softens. Stir in the turmeric, potatoes, salt, and a small splash of water. Fold everything together and cook for 3–4 minutes, then keep the filling warm.
Heat a flat cast-iron or nonstick pan over medium-high heat. If the dosa batter is very thick, loosen it with a little water. Pour a ladleful into the center and quickly spread it outward in widening circles. Drizzle a small amount of oil around the edges and cook until the underside is golden and the surface looks dry and crisp.
Place a modest portion of potato masala in the center, then fold or roll the dosa around it. Serve Masala Dosa immediately with coconut chutney and sambar; it loses its crispness as it stands.
The potato filling can be prepared one day ahead and reheated gently. Traditional rice-and-urad-dal dosa batter is naturally gluten-free, but check prepared batter and accompaniments for cross-contact when necessary.
10. Aloo Paratha
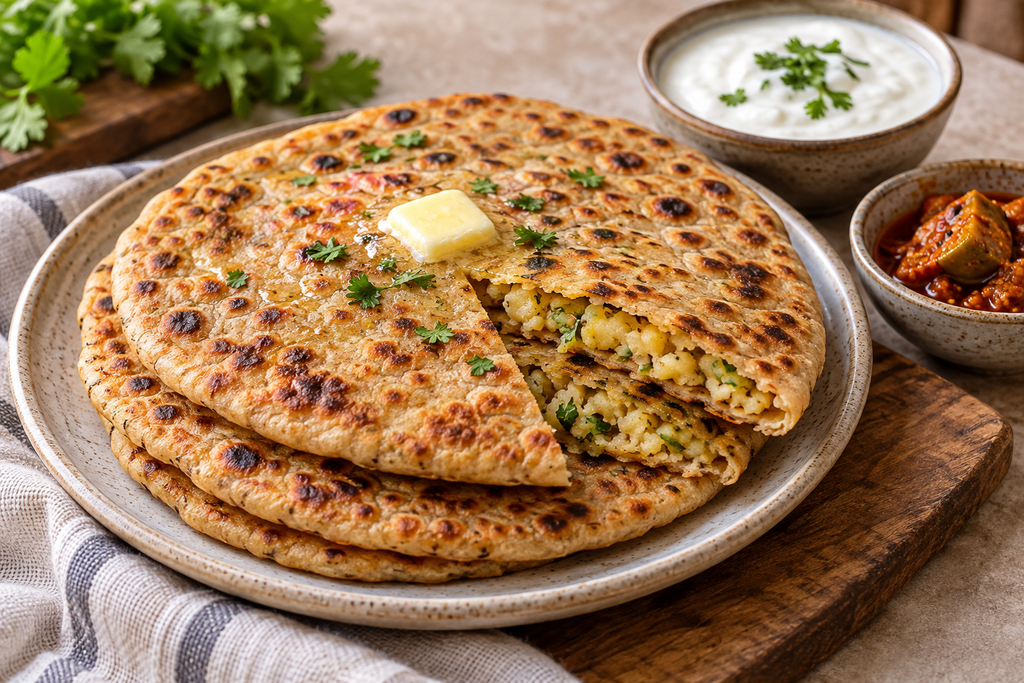
Aloo Paratha is a North Indian flatbread filled with warmly spiced potatoes and cooked on a hot griddle until soft inside and golden outside. It is more substantial than many of the quicker breakfasts in this collection, but the filling can be prepared ahead, making the morning assembly much easier.
For four parathas, combine 1½ cups whole-wheat atta flour, approximately ½ cup water, ½ teaspoon salt, and 1 teaspoon oil. For the filling, use 2 medium potatoes, ½ teaspoon ground cumin, ½ teaspoon garam masala, ¼ teaspoon chili powder, 2 tablespoons chopped coriander, and salt to taste. Finely chopped green chili or grated ginger can also be included.
Mix the flour and salt, then gradually add the water until a soft, smooth dough forms. Knead for 5 minutes, cover, and let it rest for at least 20 minutes.
Boil the potatoes until tender, then drain them thoroughly. Peel and mash them while still warm, making sure no large lumps remain. Mix in the spices, coriander, and salt. Let the filling cool completely; warm or wet potatoes can soften the dough and make the parathas difficult to roll.
Divide both the dough and filling into four equal portions. Roll one piece of dough into a small circle, place a ball of filling in the center, and bring the edges together to seal it. Flatten gently, dust with flour, and roll into a wider circle using light, even pressure. If the filling begins to escape, stop rolling rather than adding excessive flour.
Cook the paratha on a hot skillet until bubbles appear, then flip it. Brush lightly with ghee or oil and cook both sides until golden-brown spots develop.
Serve Aloo Paratha warm with plain yogurt, Indian pickle, or a small amount of butter. Cooked parathas can be refrigerated for up to three days or frozen with parchment between each piece. Reheat them directly in a dry skillet. Since atta is wheat flour, this recipe is not gluten-free.
11. Omelette
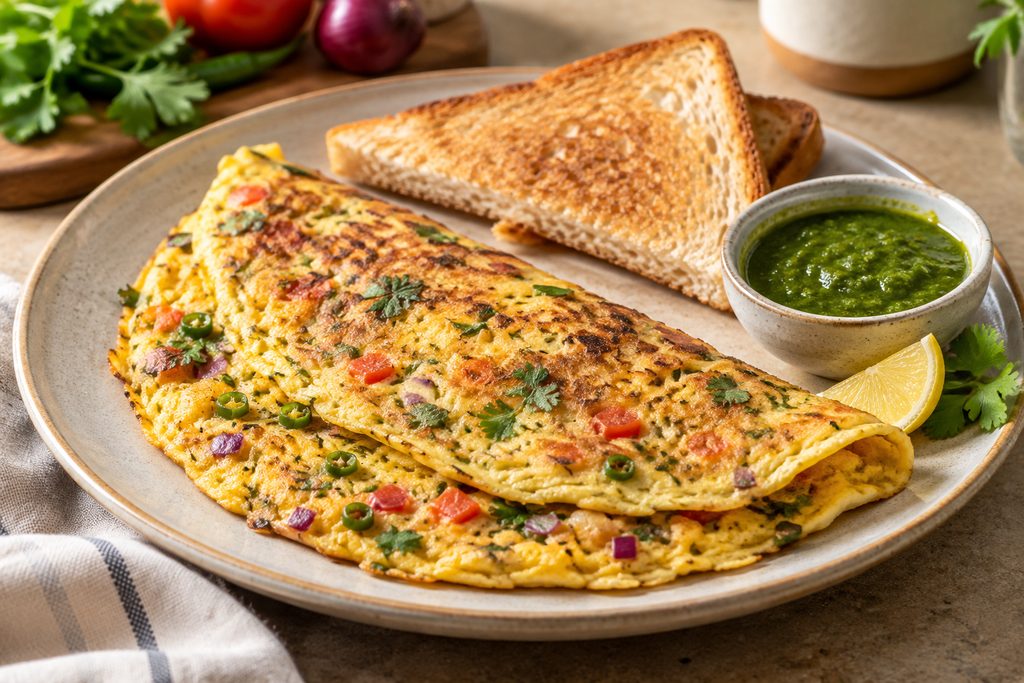
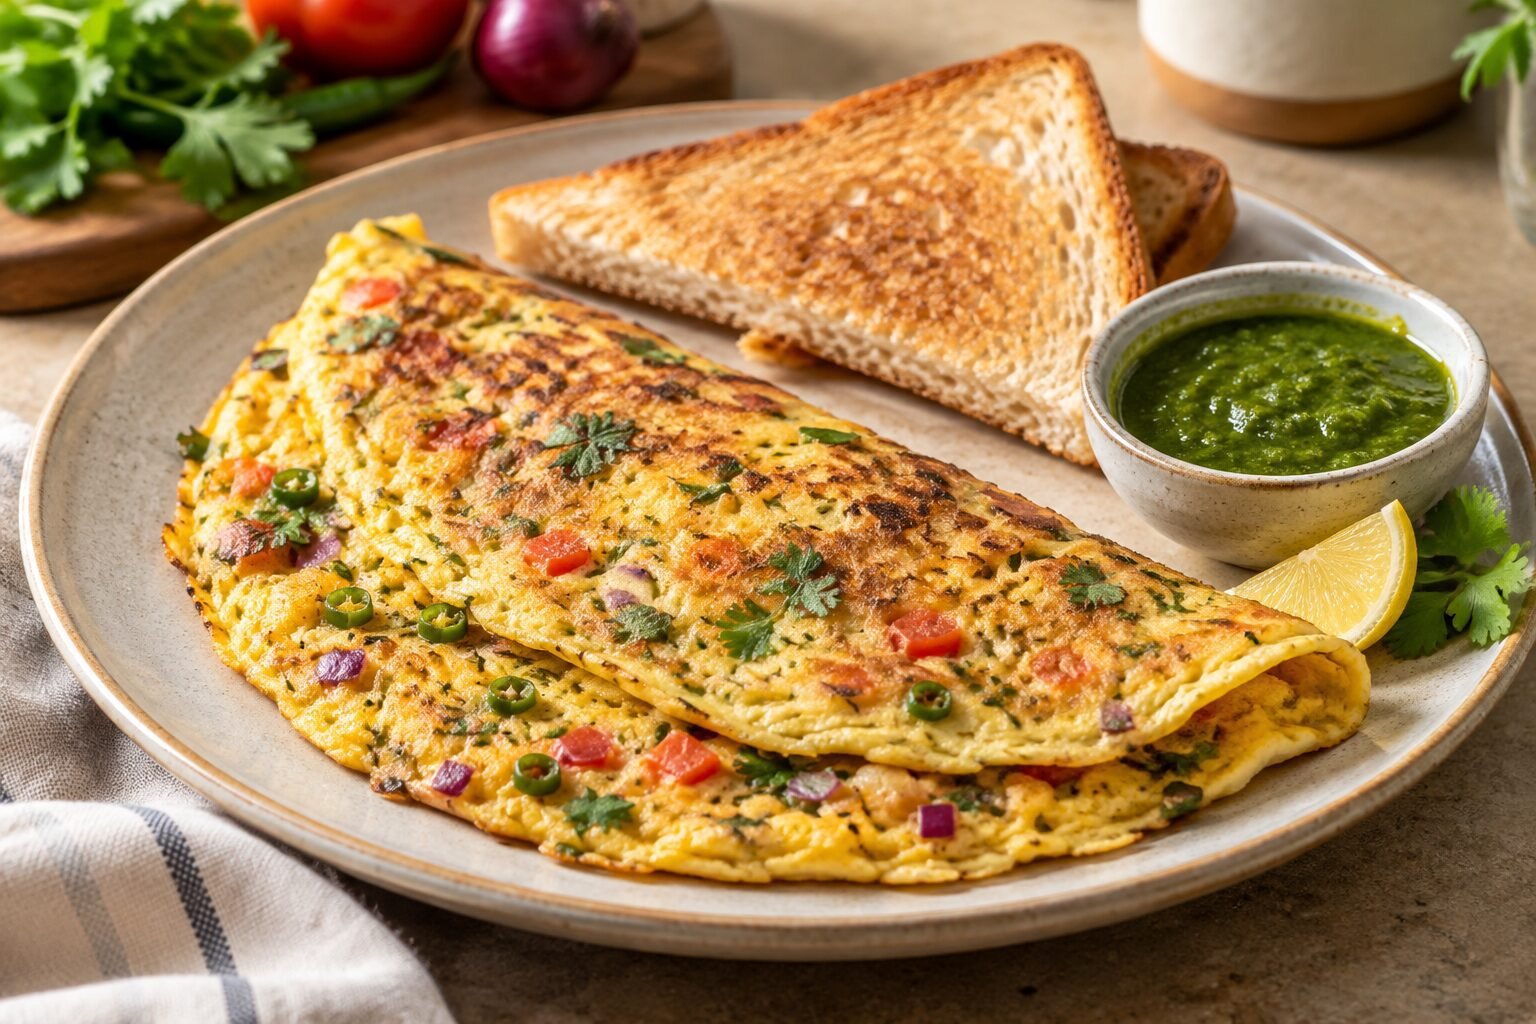
An Indian Masala Omelette turns a few everyday ingredients into a colorful breakfast in less than 15 minutes. Finely chopped onion, tomato, green chili, coriander, and warm spices are whisked directly into the eggs, creating a thin, flavorful omelette with lightly browned edges.
For one large serving or two smaller portions, use 3 eggs, 2 tablespoons finely chopped red onion, 2 tablespoons finely chopped tomato, 1 tablespoon chopped coriander, and ½ small green chili. Season with ¼ teaspoon ground cumin, a pinch of turmeric, salt, and black pepper. You will also need 1 teaspoon oil or ghee for the pan.
Crack the eggs into a bowl and whisk until the yolks and whites are completely combined. Add the onion, tomato, chili, coriander, cumin, turmeric, salt, and pepper. Keep the vegetables finely chopped so they cook quickly and do not tear the omelette.
Heat a nonstick or well-seasoned skillet over medium heat and add the oil. Pour in the egg mixture and tilt the pan so it spreads into an even layer. Cook until the underside is golden and the upper surface is mostly set.
Run a spatula around the edges, then carefully turn the omelette. If flipping a large omelette feels awkward, cut it into two halves first or briefly cover the pan to help the top set. Cook the second side only until the egg is fully cooked but still tender.
Fold the Indian Masala Omelette and serve it immediately with toast, green chutney, or a squeeze of lemon. It also works well inside a toasted sandwich or wrapped in a roti for a portable breakfast.
This dish is best cooked fresh, although the vegetables can be chopped the evening before and refrigerated separately. The omelette itself is naturally gluten-free, but bread and packaged chutneys should be checked when avoiding gluten is necessary.
12. Egg Bhurji
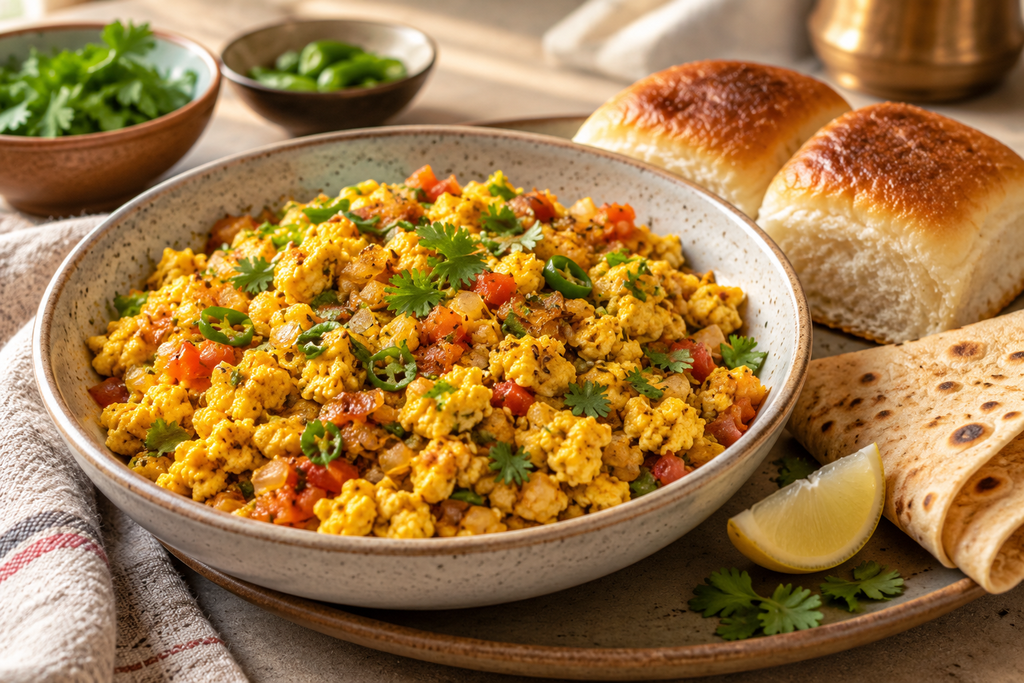
Egg Bhurji is India’s lively answer to scrambled eggs. Soft pieces of egg are cooked with onion, tomato, green chilli and warming spices, creating a breakfast that feels much more substantial than ordinary scrambled eggs. It takes only about 15 minutes to prepare, making it especially useful on mornings when you want something comforting without spending too long in the kitchen.
For two servings, you will need 4 large eggs, 1 tablespoon of oil or ghee, ½ teaspoon of cumin seeds, ½ finely chopped onion, 1 small chopped tomato, 1 finely sliced green chilli, ½ teaspoon of grated ginger, ¼ teaspoon of turmeric, salt and black pepper. Keep a small handful of chopped fresh coriander ready for finishing.
Heat the oil or ghee in a frying pan over medium heat. Add the cumin seeds and let them sizzle for around 20 seconds. Stir in the onion and cook for 3–4 minutes, until softened and lightly golden. Add the green chilli and ginger, followed by the tomato, turmeric and a pinch of salt. Cook until the tomato has softened and most of its excess liquid has evaporated. This step prevents the finished Egg Bhurji from becoming watery.
Meanwhile, crack the eggs into a bowl and whisk them lightly with black pepper. Reduce the heat slightly before pouring the eggs into the pan. Allow them to begin setting, then gently fold the mixture with a spatula. Avoid stirring continuously or cooking over high heat, as this can make the eggs dry and rubbery. Remove the pan while the egg curds are still soft and slightly glossy; the remaining heat will finish cooking them.
Scatter fresh coriander over the top and serve immediately with warm roti, toasted pav, sourdough toast or a simple cucumber salad. A squeeze of lemon adds a welcome touch of freshness.
Egg Bhurji is naturally gluten-free when served on its own. If gluten is a concern, pair it with certified gluten-free bread or flatbread and check any packaged condiments carefully. The vegetable mixture can be prepared the evening before, but the eggs are best cooked just before serving. Leftovers may be refrigerated for up to one day and reheated gently over low heat.
13. Thalipeeth
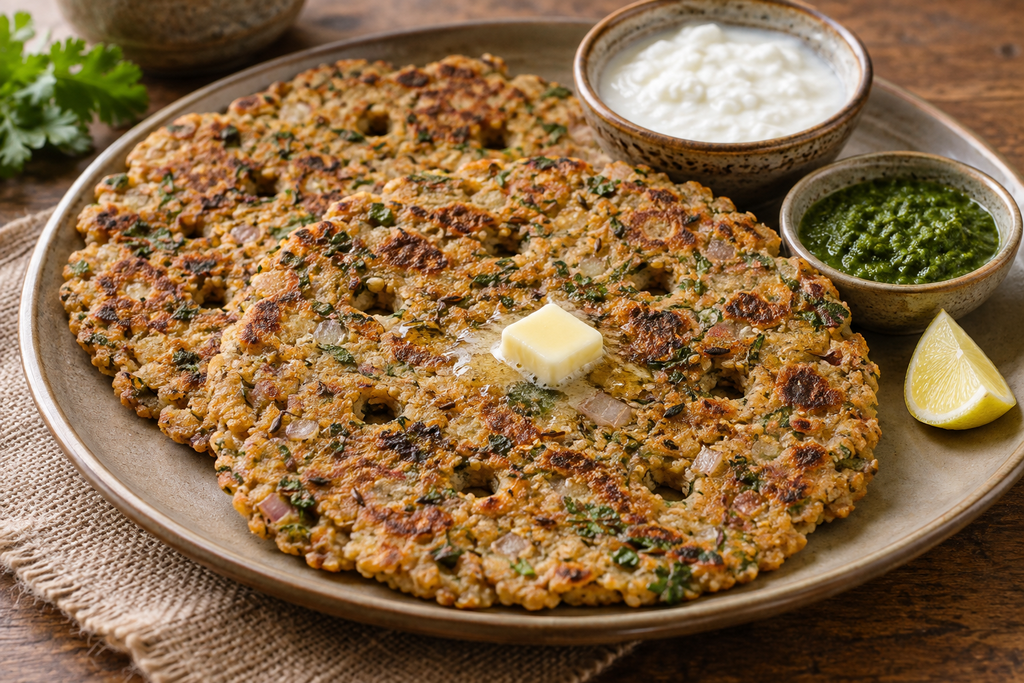
Thalipeeth is a traditional savory flatbread from Maharashtra, where it has long been enjoyed as a nourishing breakfast or light meal. Its wonderfully rustic texture comes from bhajani, a roasted multigrain flour blend that may contain ingredients such as sorghum, pearl millet, rice, chickpeas and other grains or pulses. Onion, coriander, green chilli and aromatic spices make every bite flavorful enough to enjoy with only a spoonful of yogurt or a little butter.
To make approximately four small flatbreads, combine 1 cup of bhajani flour with ½ finely chopped onion, 1 chopped green chilli, 2 tablespoons of chopped coriander, ½ teaspoon of cumin seeds, ½ teaspoon of ground coriander, ¼ teaspoon of turmeric and ½ teaspoon of salt. Add 1 teaspoon of sesame seeds if desired. Gradually mix in about ½ cup of warm water until you have a soft, moist dough that holds together without becoming runny. Let it rest for 10 minutes so the flour can absorb the moisture evenly.
Traditional Thalipeeth dough does not roll as easily as wheat-based flatbread dough. Place one portion on a damp piece of parchment paper, a clean damp cloth or a lightly greased cold pan. Wet your fingers and gently pat it into a round about ¼ inch thick. Make several small holes in the surface with your fingertip. These characteristic holes help the flatbread cook evenly and allow a small amount of oil to reach the center.
Heat a skillet over medium-low heat and carefully transfer the shaped flatbread if necessary. Drizzle a little oil around its edges and into the holes. Cover and cook for 3–4 minutes, then turn it gently and cook the other side until firm, golden and marked with crisp brown patches. Keep the heat moderate: excessively high heat can burn the outside before the center has cooked.
Serve Thalipeeth hot with plain yogurt, green chutney, pickle or a small pat of butter. The dough can be mixed several hours ahead and refrigerated, although freshly cooked flatbreads have the best texture.
Bhajani blends vary considerably. Some contain wheat, while others are made only with naturally gluten-free grains and pulses. If you require a gluten-free breakfast, check the ingredient list carefully and choose a certified gluten-free flour blend to avoid cross-contamination.
A Note About the Images
The food images featured in this article were created with the assistance of artificial intelligence. Each visual was carefully developed using the traditional characteristics, typical ingredients, cooking methods and expected appearance of the featured dish as a reference. They are intended to provide a realistic and helpful impression of how the finished recipes may look. However, your own results may vary depending on the ingredients used, preparation method, cookware and serving style.