Are you wondering if you can cook beef tenderloin ahead of time? You’ve come to the right place! I’m here to answer all your questions and provide knowledge on the best way to prepare this delicious cut of meat. Whether it’s a special meal for family or friends, preparing a holiday feast, or just looking to learn something new in the kitchen- I understand that cooking perfect beef tenderloin can be intimidating. With my years of experience working as a chef in high-end restaurants combined with my culinary studies, I’m confident that after reading this article you will have learned how to achieve your desired results confidently!
In this article, we’ll cover everything from what kind of tenderloin is best suited for cooking ahead of time and how long it should keep in the fridge/freezer before consumption and more. All your burning questions about getting every bite cooked through perfectly while preserving its flavor will be answered too – so read along and let’s get started!
Read also: How do you not overcook beef tenderloin?
can i cook beef tenderloin ahead of time?
Yes, you can cook beef tenderloin ahead of time. The best way to do this is by roasting it in the oven at a low temperature. This will help ensure that the meat stays juicy and flavorful while also allowing for easy reheating later on. Just be sure to store it properly in an airtight container and use within 3-4 days for optimal results.
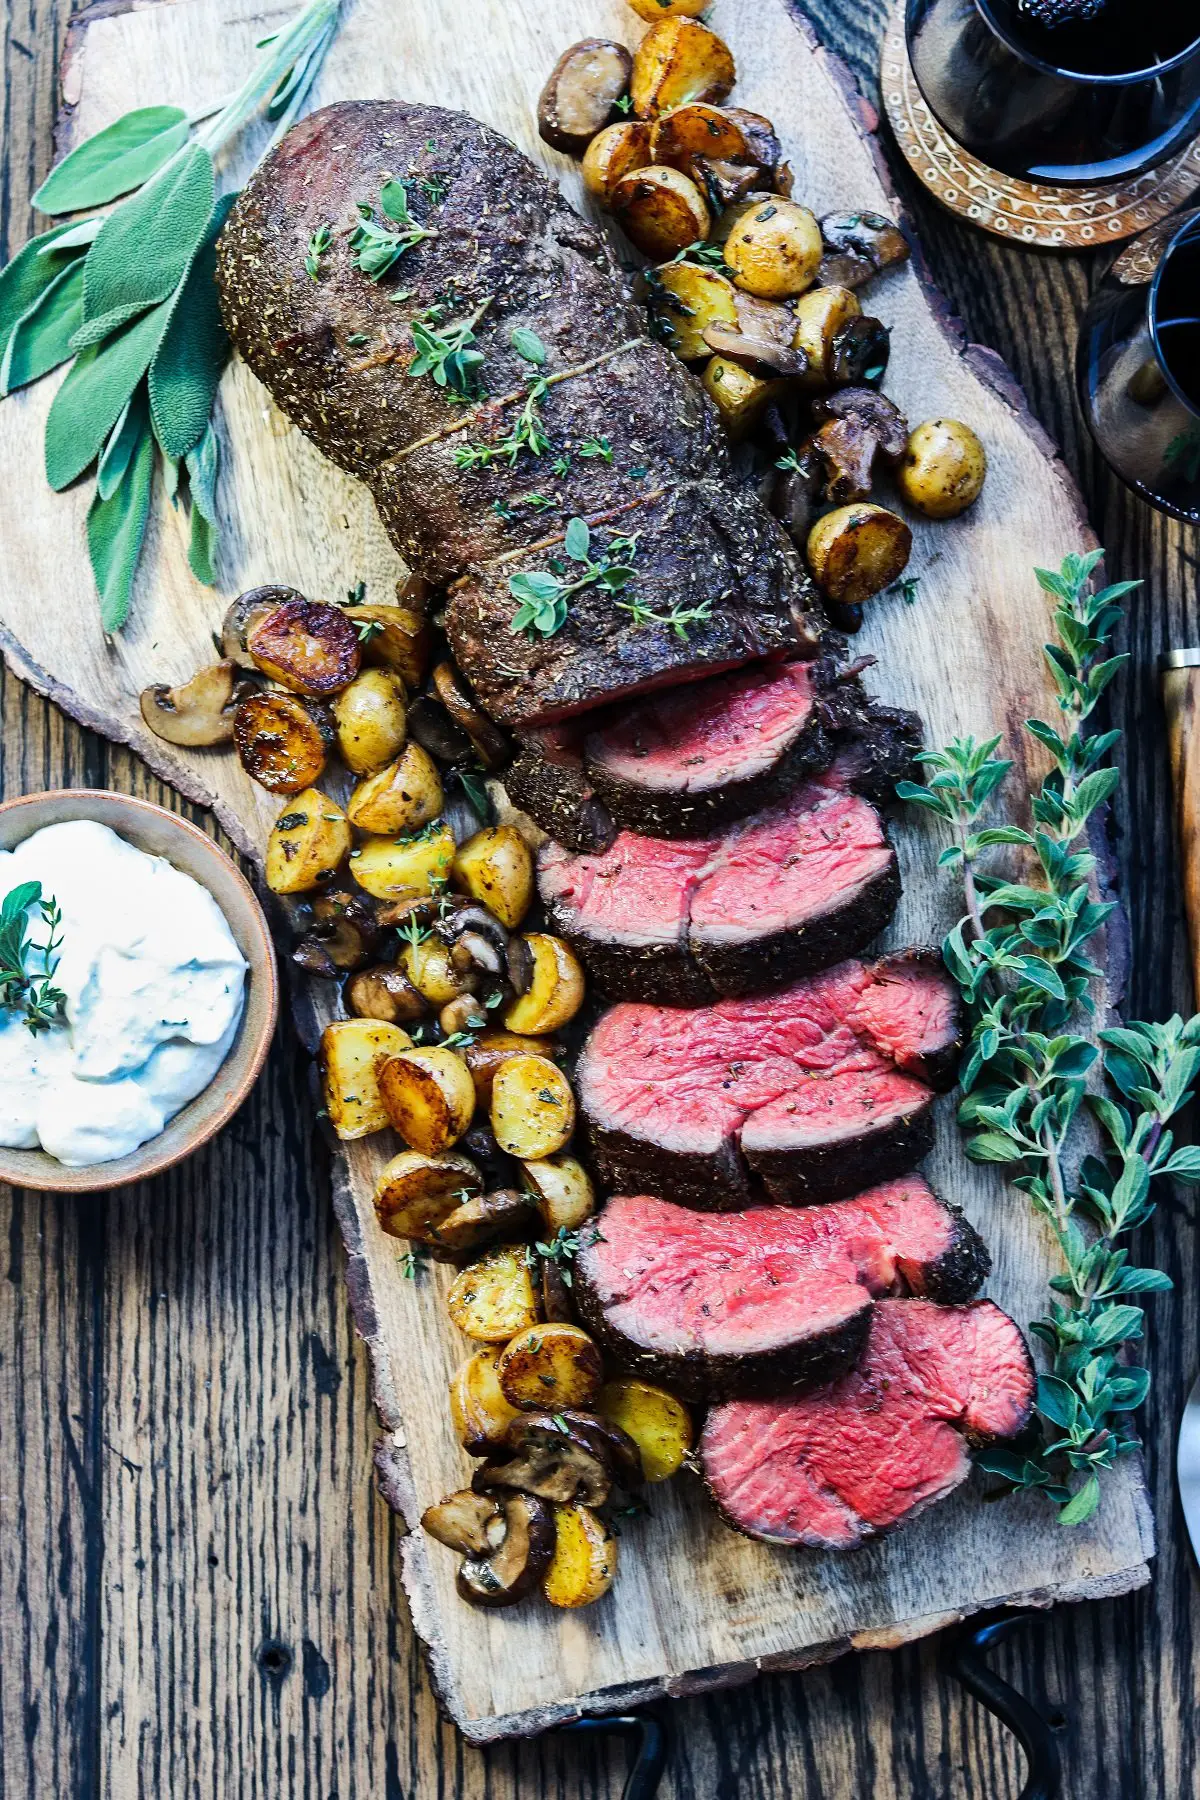
Choosing the Right Beef Tenderloin for Pre-cooking
When it comes to planning an impressive dinner, or even an everyday meal, a delicious beef tenderloin can truly be the star of the show. However, not all cuts of this beloved meat are created equal. Selecting the right cut from your local butcher shop is like choosing a gem in a jeweler’s store; every detail matters. Understanding what makes each piece unique and considering how you plan on ultimately preparing it will ensure you bring home exactly what you need for that perfect dish.
To begin with, let’s talk about some key factors to look for when picking out your beef tenderloin.
First off: marbling. Marbling refers to those little white lines – essentially threads of fat – that run through the meat itself. This fat melts during cooking, providing moisture and flavor.
Fat distribution, therefore should be pretty much at the top of your checklist when selecting your ideal cut – find one with uniform marbling spread throughout.
Secondly: size matters especially depending on how many people you’re hoping to feed.
- If it’s just two or three people dining together, then opt for a center-cut filet mignon.
- If there’s more mouths to feast (say six foodies), then go ahead with a full-sized roast.
Once we’ve selected our perfectly-marbled piece and determined its size based on our needs, now let’s consider other quality attributes such as color and freshness factor before pre-cooking starts.
Firstly, color: fresh, high-quality beef tends towards cherry-red hue rather than dark purple or brownish tint.
Next up is smell:a fresh, clean scent indicates good quality — anything rancid-smelling should definitely be avoided!
Finally,
when handling raw beef tenderloins prior to cooking them, feel The texture shouldn’t be too slippery nor too hard but rather firm yet yielding slightly under pressure.
Choosing well means bringing home flavorful tenderness which translates into unforgettable meals everyone around table enjoys! Remember these tips next time shopping trip brings by butcher’s counter — they’ll make world difference between ordinary extraordinary dining experience!

Read also: feijoa vodka recipe
Understanding How to Properly Store Cooked Beef Tenderloin
Storing Cooked Beef Tenderloin
Cooking a splendid beef tenderloin for meals is always an achievement, but what happens to the leftover? Proper storage is key. The first step in properly storing cooked beef tenderloin involves cooling it down.
It’s not advisable to just stick your hot beef right into the fridge. Instead, allow it to cool naturally at room temperature until it hits a manageable heat level that won’t increase your refrigerator’s temperature drastically and jeopardize other stored foods. However, ensure you don’t leave your meat out for more than two hours as this can lead to bacterial growth.
Next up: selecting an appropriate container — essential in maintaining freshness.
When picking your storage vessel, opt for shallow containers which are great because they encourage rapid, even cooling – reducing the risk of bacteria formation on your delicious leftovers! Glass or hard plastic containers with tight-fitting lids are ideal choices as they prevent unwanted odors seeping from other foods while providing clear visibility of food content without needing to open them frequently.
The Refrigeration Process
We’ve cooled our tenderloins and found some nice snug containers; now let’s talk refrigeration details.
- Fridge Temperature: Aim for below 40°F (4°C). This slows bacterial growth greatly.
- Lifespan: Properly stored cooked beef tenderloin should last 3-4 days in the fridge.
But what if you want longer-term preservation? Think freezing! Before doing so though, make sure your meat has thoroughly cooled in the fridge—freezing warm food causes fluctuation of freezer temperatures facilitating ice crystal formation which ruins texture and taste over time.
In terms of packaging when freezing:
- Avoid aluminum foil as constant contact with acidic meats like beef may cause chemical reactions affecting flavor.
- Use heavy-duty freezer bags or vacuum-sealed packs instead!
Freeze ’em fast and thaw gently when ready to savor again – preferably overnight within the refrigerator itself rather than direct heat methods like microwaves which might cook sections unevenly causing potential health risks!
Remember these points about storing cooked beef tenderloin next time you’re lucky enough left with this mouth-watering delicacy. Enjoy every bite today—and tomorrow too—with proper storage techniques!
The Best Methods for Reheating Cooked Beef Tenderloin
Reheating beef tenderloin can be tricky. The last thing you want is for your perfectly cooked meal to turn into a dried-out, chewy mess. But with the right technique, you can enjoy that succulent steak all over again! Here are some of the best methods for reheating cooked beef tenderloin:
The Oven Method: This method should only be used if there’s enough time to preheat your oven and allow it to heat up before putting in the meat. Preheat your oven to 350°F and place the beef onto an oven-safe baking dish or pan lined with foil. Cover tightly with foil and keep an eye on it as it heats up; once warmed through, serve immediately after removing from the oven.
The Stovetop Method: If you’re short on time but still want hot leftovers, this is one of your best options! Begin by wrapping the beef tightly in aluminum foil and placing into a skillet set over medium heat for about 10 minutes until completely heated through. Remove from skillet when done and serve while hot!
The Microwave Method: For those really pressed for time, microwaving is always an option — just make sure not to overcook or dry out your steak! Begin by wrapping up the cooked steak in microwave safe plastic wrap (or aluminum foil) so no steam escapes as it cooks. Place on plate inside microwave then set timer for 2-3 minutes at half power (50%). When finished cooking remove from microwave promptly; let sit 1 minute covered before serving – voila – warm perfection!
Read also: beef mince vs ground beef
Retaining Flavor and Juiciness in Precooked Beef Tenderloin
Cooking beef tenderloin is an art. The deliciousness of the steak depends on a number of factors, from marinade to heat and temperature control. Precooked beef tenderloin can be cooked in minimal time – but it’s essential to retain flavor and juiciness when pre-cooking for optimal taste.
Marinating One key step in prepping precooked beef tenderloins is marinating them ahead of time. This allows the meat to soak up flavors that will add richness once the steak is cooked; an excellent marinade might include olive oil, garlic, rosemary, thyme, oregano or other herbs and spices depending on taste preferences. Letting this mixture sit for at least two hours before cooking gives ample opportunity for absorption and best results in terms of flavor when served.
Temperature Control Temperature control is crucial during the cooking process as well; too high temperatures will render tough pieces with parched outer layers while low temperatures won’t give enough roasting which could lead to a soggy texture instead of juicy morsels! A good rule would be aiming towards medium rare: around 140F (60C) internal temperature should ensure nicely cooked steaks without drying out their exteriors – where most juice lies!
Final Touch Lastly adding butter or other fat into the mix during cooking helps seal off moisture inside each piece, creating naturally succulent steaks that are still full flavored despite having been precooked prior to serving! Adding some salt sprinkled over also helps enhance both flavor and color so don’t forget about this final touch if you want your guests’ mouths watering with anticipation before they even take a bite.