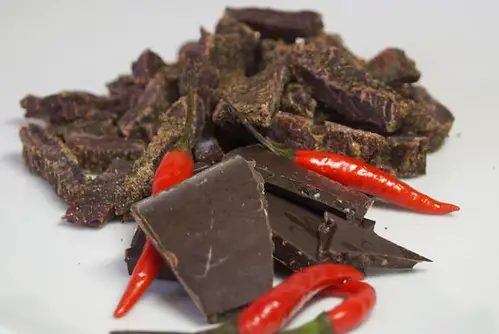
Are you curious about how to make beef jerky from deer meat? Do you want to learn the process and the best recipes to follow? I get it – it’s always exciting to try a new recipe, especially if it involves one of your favorite snacks.
I too have been on this journey before! After experimenting with different meats for my jerky recipe, I eventually settled on deer meat due its great taste and health benefits. In this article, we will explore everything there is know about making beef jerky from deer meat- from what cuts of meat work best all the way through the whole cooking process. We will also cover common mistakes people make when trying out their very first batch of homemade venison jerky. So if you’re as much into beef jerky as I am, then read on and let’s get started!
Read also: What’s the difference between beef sticks and beef jerky?
Can beef jerky be made from deer meat?
Yes, deer meat can be used to make beef jerky. The process is similar to making beef jerky, but it requires a few extra steps due to the leaner nature of deer meat. To start, you should marinate the meat in a mixture of salt and other spices for at least 4 hours before dehydrating or smoking it until all moisture has been removed from the meat.
Steps to Preparing Deer Meat for Jerky
Gather Supplies:
The first step to preparing deer meat for jerky is to gather all the necessary supplies. This will include a very sharp knife, jerk seasoning of your choice, gloves if desired, and either a food dehydrator or an oven. The temperature should be set at 160°F if using an oven. You may also need aluminum trays if you are using an oven instead of a dehydrator.
Cutting Meat into Strips:
Once you have all the supplies needed, then it’s time to begin cutting the meat into strips. It’s important that each strip is as uniform in size as possible so that they cook evenly and don’t end up burning or not being properly done on one side while overcooked on another side. Be sure to cut against the grain of the muscle with your knife so that when cooking they remain tender and easy to chew. Some people like their jerky more chewy than others so this is something you can experiment with later on once you become familiar with making it yourself consistently from start to finish.
Marinating & Drying Jerky:
Finally, once all your strips are cut and laid out onto parchment paper or aluminum trays (depending on whether you’re using an oven or dehydrator), sprinkle liberally with jerk seasoning until coated well but not overly salty tasting since this could ruin the flavor during drying process when too much remains on top after marination stage has finished due to evaporation of liquid ingredients within mixture itself which have been absorbed by meat fibers during soaking period prior to dehydration phase beginning with low temperature setting inside equipment device used for drying such as mention above.
- Jerk Seasoning
- Sharp Knife
Read also: what does copenhagen southern blend taste like?
The Role of Marination in Creating Flavorful Deer Jerky
Flavorful, delectable, and mouth-watering. These are all words used to describe a savory dish that has been marinated prior to being cooked. Marination is the process of soaking food in either an acidic or flavorful liquid before cooking. Deer jerky is no exception in needing this process to create a more flavorsome result.
When it comes to making deer jerky, prepping the meat for marination should be done with precision and care. The cut of the deer, thickness of slices, as well as types of seasonings must be considered when creating a satisfactory flavor profile for your marinade. For instance, you may choose to use thin slices versus thicker cuts if you want more intense flavor absorption or vice versa if you prefer less intensity in flavor saturation. In addition, vegetables like garlic can also add subtle nuances that will bring out new aromas and flavors within your meal!
The next step is selecting the type of marinade best suited for your dish; most recipes recommend tomato juice based liquids because they impart acidity which helps break down proteins faster allowing more efficient uptake of flavors from spices used during preparation time – a key factor when creating delicious tasting deer jerky! You could also consider different variations such as teriyaki sauce or honey glaze as these provide an array of unique tastes depending on preference while adding depth overall aroma and texture profiles for final presentation at serving time.
Once ingredients have been combined into one container, allow ample time (usually overnight) for adequate absorption into each piece so maximum amounts benefit from its composition before reaching desired level satisfaction – this allows all parts exposed get same amount seasoning without any wasted remains left behind due to uneven saturation across surface area thus ensuring even distribution throughout entire batch instead just concentrated areas near top layer pieces only!
Storing Your Homemade Deer Jerky: Best Practices
Using the Right Equipment and Methods
Preserving food is an ancient art, but when done correctly it can save your time, energy, and hard-earned money. When you’ve gone hunting for deer and prepared some of the meat to make jerky in your own kitchen, proper storage techniques become a must to ensure that you get maximum use out of it. To store homemade deer jerky safely and effectively:
- Invest in vacuum storage bags. Vacuum sealers are great for storing just about any kind of meat or game; they keep oxygen away from the food while also keeping moisture sealed inside. This helps prevent spoilage due to bacteria or mold growth over time.
- Refrigerate quickly after preparation. After making your jerky in the oven or dehydrator, transfer it straight into a vacuum-sealed bag so that all its juices don’t evaporate away. Store it in the refrigerator as soon as possible afterwards; this will help preserve its freshness longer.
In addition to using vacuum sealing techniques, there are other methods which can be employed for preserving homemade deer jerky without refrigeration. Dehydration: You can slow down spoilage by drying out most of the water content from your venison strips before storing them. Use a dehydrator if possible; otherwise hang up slices on racks over newspaper in an area with good air circulation and low humidity levels until they’re dry enough that no moisture is left behind when touched. Salt Solutions: Preparing salt solutions such as brine (water mixed with salt) or curing salts (nitrates) is another way to preserve freshly cut meats like venison so that they stay edible even when stored without refrigeration conditions for extended periods of time. Make sure not to add too much if going down this route though – using too much could have adverse effects on flavor and texture!
Finally, one more tip: always label each package you store clearly with key details like date prepared & date opened – this will help keep track of how long each batch has been kept unrefrigerated before eating!
Read also: what does pacific whiting taste like?