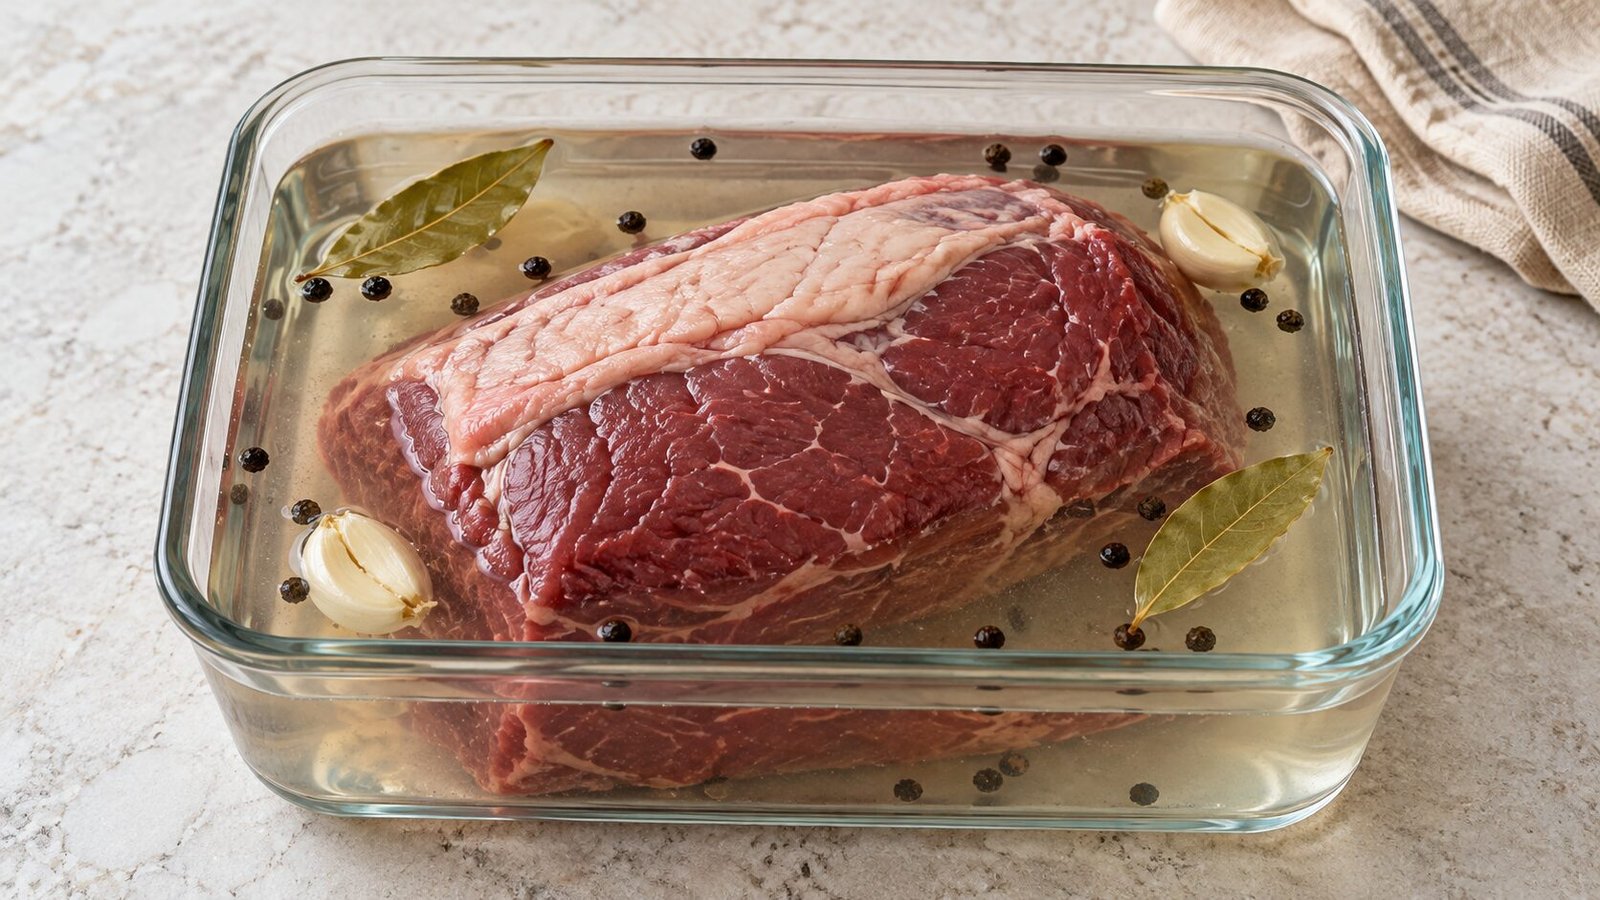
Preparing roast beef can feel intimidating when you are still finding your confidence in the kitchen. There is the cut to choose, the seasoning to measure, and the question of when to take the meat out of the oven.
I’m Adam, and I appreciate instructions that make those decisions easier. This guide explains how to prepare a brine for roast beef, when a simpler dry-salting method may suit you, and what brining can—and cannot—do.
You do not need a long list of spices or a large bucket. You need an appropriate piece of beef, accurately measured salt, enough refrigerator space, and a meat thermometer.
Does Roast Beef Need Brining?
No. Brining is an optional seasoning step, not a requirement for a successful roast.
A wet brine surrounds the meat with salted water. Dry salting, often called dry-brining, applies salt directly to the surface without added water. Both require time in the refrigerator before cooking.
For an ordinary oven roast, dry salting is often the more convenient choice: it requires less space and avoids handling a container of liquid. Wet brining remains an option if you prefer that method, but neither technique guarantees tender meat or compensates for overcooking.
Start with a cut intended for roasting. The method below uses a 1–1.2 kg boneless top sirloin roast, ideally a compact, evenly shaped piece approximately 7–9 cm thick. Ask your butcher for a suitable equivalent if local cut names differ.
Do not assume that a tough braising cut, such as brisket or chuck, will become tender with the same roasting method simply because it has been brined.
Wet Brining or Dry Salting?
| Method | How the salt is measured | Practical consideration |
|---|---|---|
| Wet brining | Salt is dissolved in a measured quantity of water. | The meat needs a food-safe container and enough cold brine to remain submerged. |
| Dry salting | Salt is weighed in proportion to the meat. | A rack over a rimmed tray takes less refrigerator space. |
Choose one method. Do not wet-brine the beef and then apply a full dry-salting dose.
Use plain, unseasoned beef. Products labelled “enhanced,” “injected,” “marinated,” or “contains a solution” may already contain salt. Corned beef is also unsuitable for these instructions.
A Simple Wet Brine for Roast Beef
This is a suggested home-cooking formulation, not an independently kitchen-tested recipe. Keep the stated cut, size, concentration, and timing together rather than treating the timing as suitable for every roast.
Suitable roast: 1–1.2 kg boneless top sirloin
Preparation time: Approximately 10 minutes
Refrigerated brining time: 8–12 hours
Additional time: Surface drying, roasting, and resting
Ingredients
- 1.5 litres cold drinking water
- 45 g ordinary food-grade salt
- 15 g sugar, optional
- 2 garlic cloves, lightly crushed
- 2 bay leaves
- 1 teaspoon whole black peppercorns
This uses 30 g salt per litre of water. The optional sugar rounds out the seasoning; it is not necessary for food safety.
Weigh the salt rather than measuring it by the cup. Different crystal sizes pack differently, so equal volumes can contain substantially different amounts of salt. Do not use curing salt or salt substitutes.
Equipment
- A digital kitchen scale
- A food-safe glass, stainless-steel, or plastic container
- A lid or suitable cover
- A rimmed tray
- Paper towels
- A meat thermometer
Instructions
- Check the fit. Choose a container that holds the roast reasonably snugly. An unnecessarily wide container requires more brine.
- Dissolve the salt. Stir the salt and optional sugar into the cold water until dissolved. Add the garlic, bay leaves, and peppercorns. Boiling is unnecessary for this version.
- Check the temperature. The finished brine should be refrigerator-cold, approximately 4°C / 40°F or below, before adding the beef. If the water was not already cold enough, refrigerate the brine first.
- Submerge the beef. Place the meat in the container and add the brine. If more liquid is needed, mix additional brine separately using the same 30 g salt per litre ratio. Do not top up with an unmeasured amount of salt or plain water.
- Refrigerate for 8–12 hours. Cover and place on a low refrigerator shelf, protected against leaks. This is a starting window for the specified roast, not a guarantee of uniform seasoning throughout. A shorter soak will generally season less deeply.
- Drain and dry. Lift out the beef, discard the used brine, and pat the surface thoroughly dry with paper towels. Do not reuse the liquid for gravy.
- Dry the surface further if convenient. Place the roast on a rack over a rimmed tray and refrigerate uncovered for 2–4 hours, keeping it separated from ready-to-eat food. Include this time in your meal planning.
Always marinate meat in the refrigerator, not on the kitchen counter. This seasoning brine is not a preservation method.
The Simpler Alternative: Dry Salting
If managing a container of liquid feels cumbersome, dry salting offers a straightforward alternative. Culinary guidance from Serious Eats describes its advantages for roasts, including less refrigerator space and a drier surface that browns more readily.
For this guide, use a moderate starting quantity of 8 g salt per kilogram of plain beef:
- For a 1 kg roast: use 8 g salt.
- For a 1.2 kg roast: use approximately 10 g salt.
Pat the meat dry and distribute the measured salt over every surface. Set it on a rack over a rimmed tray and refrigerate for 12–24 hours, protected from contact with other foods.
Use the meat within its existing storage life and any package instructions. Salting does not restart that clock.
Before roasting, blot away visible surface moisture if necessary. Do not add another full seasoning of salt.
Roasting After Either Method
For the specified 1–1.2 kg boneless top sirloin roast, have ready:
- 1 tablespoon olive oil
- ½ teaspoon freshly ground black pepper
- 1 teaspoon dried thyme or rosemary
- Preheat the oven to 180°C conventional / 160°C fan / 350°F.
- Season the surface. Rub the dried beef with the oil, pepper, and herbs. Omit additional salt initially.
- Position the roast. Place on a roasting rack in a shallow tray, with any fat cap facing upward. Roast uncovered.
- Begin checking early. Start checking the center temperature after approximately 45 minutes. Allow roughly 60–90 minutes for planning, but expect variation with the roast’s shape, starting temperature, and your oven.
- Use temperature to decide. Insert the thermometer into the thickest part, avoiding a pocket of fat. Check more than one central spot. For this guide, remove the beef only once it reaches at least 63°C / 145°F.
- Rest before slicing. Rest on a clean board for 15–20 minutes, loosely covered with foil. Slice thinly across the grain.
USDA guidance specifies 145°F / approximately 63°C before removal from the heat, followed by at least three minutes of resting for beef roasts. The longer rest suggested here exceeds that minimum. Do not remove the roast below the target and assume resting will make it reach the recommended temperature.
Common Questions and Mistakes
Should I rinse the beef after brining?
No rinsing is required for this method. Drain and pat dry. Washing raw meat can spread contamination around the sink and nearby surfaces; USDA advises against it.
Will a longer soak produce a better roast?
Not necessarily. Extending the soak changes salt uptake and can produce a result you find too salty. Do not automatically turn an overnight method into a multi-day process.
Can I add more salt before cooking?
Avoid doing so initially. Taste the finished meat before adjusting the seasoning. Pan drippings may also be salty, so taste them before using them in gravy and choose unsalted stock.
Can I use this method for a much larger roast?
Do not simply multiply the soaking time by weight. Thickness and shape matter, too. Choose instructions developed for that cut and size rather than extending this method by guesswork.
A Little Confidence for Your Next Roast
A useful brine for roast beef begins with clear measurements, not promises of perfection. Choose one seasoning method, keep the meat refrigerated, and let the thermometer guide the cooking.
I’m not a kitchen expert, and I know how reassuring a manageable set of steps can be. You do not need to try every variation at once. Start simply, note what you enjoy, and leave yourself enough time to cook without rushing.
— Adam
Recipe and Editorial Disclosure
This guide and its suggested recipe formulations were developed with AI assistance and have not been independently kitchen-tested for this article. Food-safety recommendations are supported by the cited sources; those sources do not validate the specific salt quantities, brining window, or estimated roasting time proposed here.
Results vary with the cut, dimensions, ingredients, and equipment. Follow package instructions where applicable and use a food thermometer rather than timing or appearance alone.