
Mornings have a habit of becoming busy before the day has even properly begun. Between getting ready for work, helping the family out the door, and remembering everything needed for the day ahead, breakfast can easily become an afterthought. That is where these muffin tin breakfast recipes can make life a little easier. They turn familiar breakfast ingredients into neat individual portions that are simple to serve, store, and enjoy wherever the morning takes you.
A muffin tin is surprisingly useful for much more than traditional muffins. It can transform eggs, potatoes, biscuit dough, oatmeal, and even toast into compact breakfasts with crisp edges and flavorful centers. Some of the recipes in this collection are savory and filling, while others bring a little sweetness to the table. This variety makes it easier to prepare something for different tastes without spending the entire morning in the kitchen.
These recipes are especially helpful when planning breakfast in advance. Several can be prepared during the weekend, refrigerated, and reheated over the next few days. Others freeze well, allowing you to build a small supply of homemade breakfasts for particularly hectic mornings. Once cooled completely, the individual portions can be placed in an airtight container with parchment paper between the layers. When needed, simply reheat one or two portions instead of preparing an entire meal from the beginning.
Simple Tips for Better Muffin Tin Breakfasts
A few small details can make a noticeable difference when working with a muffin pan. Grease every cup thoroughly, including the upper edges, because eggs, melted cheese, and sticky dough can expand while baking. A light coating of cooking spray works well, although butter or oil can provide more flavor and encourage browning.
Metal muffin tins usually produce crisp, golden edges and conduct heat quickly. Silicone pans make it easier to release delicate egg cups and baked oatmeal, but the exterior may remain a little softer. If you use a silicone pan, place it on a sturdy baking sheet before filling it so that it can be transferred to the oven safely.
Try not to overfill the cups. Egg mixtures can puff up considerably, while biscuit dough and muffins need room to rise. Filling each cavity approximately two-thirds to three-quarters full is generally a reliable starting point. Allow baked portions to rest in the pan for several minutes before loosening the edges with a thin silicone spatula or butter knife.
It is also worth remembering that muffin tins vary in size and color. Dark pans absorb heat more quickly and may brown food sooner than light-colored metal pans. Check your breakfast cups a few minutes before the suggested cooking time, particularly when trying a recipe for the first time. Eggs should be completely set in the center, while muffins should spring back gently when touched.
A Breakfast Collection for Different Mornings
The nine ideas in this collection include both familiar favorites and a few more distinctive combinations. Bacon and cheddar biscuit cups make a hearty grab-and-go option, while spinach and red pepper egg muffins offer a colorful way to add vegetables to breakfast. Eggs Benedict toast cups bring the character of a leisurely brunch into a more manageable individual serving.
There are sweet choices too. Cinnamon sugar doughnut muffins are ideal for relaxed weekends, and whole wheat blueberry muffins provide a fruit-filled option that is easy to pack. Apple cinnamon baked oatmeal cups are particularly practical for meal preparation because they can be enjoyed warm or at room temperature.
You will also find crab, corn, and Old Bay frittata cups, crisp hash brown quiche cups, and satisfying sausage and cheddar breakfast muffins. Together, these muffin tin breakfast recipes offer enough variety for family breakfasts, brunch gatherings, packed lunches, and busy weekdays.
Each recipe includes clear quantities, preparation and cooking times, practical instructions, and storage guidance. You can follow them as written or use the suggested substitutions to adjust the flavors to what you already have available. That flexibility is one of the best things about muffin tin cooking: a small change in vegetables, cheese, herbs, or seasoning can create a completely different breakfast.
Whether you are planning several days ahead or simply looking for a more enjoyable way to serve breakfast this weekend, these muffin tin breakfast recipes provide a convenient place to begin. Choose the recipe that suits your morning, prepare the muffin pan, and turn a handful of everyday ingredients into individually portioned breakfasts that feel thoughtfully homemade.
1. Bacon and Cheddar Biscuit Cups

Bacon and Cheddar Biscuit Cups bring together three comforting breakfast favorites in one convenient serving: fluffy eggs, smoky bacon, and warm biscuit dough. The dough forms a lightly crisp, golden shell around the soft filling, while the cheddar melts into every bite. They are substantial enough for a busy morning but also attractive enough to place on a weekend brunch table.
This recipe is particularly useful when breakfast needs to travel. Once the cups have cooled slightly, they hold their shape well and can be packed for work, school, or a relaxed outdoor breakfast. Serve them on their own, add some fresh fruit, or pair them with a simple green salad when you want to turn them into a light lunch.
Servings: 8 biscuit cups
Preparation time: 15 minutes
Cooking time: 18–22 minutes
Total time: Approximately 35 minutes
Ingredients
- 8 refrigerated biscuit dough rounds
- 5 large eggs
- 4 slices bacon, cooked until crisp and chopped
- ¾ cup shredded sharp cheddar cheese
- 2 tablespoons milk
- 2 tablespoons finely chopped green onions
- ¼ teaspoon salt
- ⅛ teaspoon ground black pepper
- Cooking spray or softened butter for the muffin tin
Instructions
- Preheat the oven to 375°F (190°C). Generously grease eight cups of a standard 12-cup muffin tin.
- Place one biscuit dough round into each prepared cup. Use your fingers to press the dough across the bottom and approximately two-thirds of the way up the sides. Try to keep the thickness reasonably even.
- Divide half of the chopped bacon and half of the cheddar cheese among the dough-lined cups.
- Crack the eggs into a medium bowl. Add the milk, salt, and black pepper, then whisk until the mixture is smooth and evenly combined.
- Carefully pour the egg mixture into the biscuit cups. Do not fill them completely, as the eggs will expand during baking.
- Sprinkle the remaining bacon and cheddar over the top. Finish with the chopped green onions.
- Bake for 18–22 minutes, or until the biscuit edges are golden and the egg filling is completely set in the center.
- Let the cups rest in the muffin tin for 5 minutes. Run a thin silicone spatula or butter knife around the edges before gently lifting them out. Serve warm.
A Practical Preparation Tip
Avoid stretching the biscuit dough too thinly around the bottom of the muffin cups. A thin spot can allow the egg mixture to leak underneath, making the finished cups more difficult to remove. If the dough becomes sticky while shaping it, lightly flour your fingertips.
Easy Variations
You can replace the bacon with cooked breakfast sausage, diced ham, or sautéed mushrooms. Monterey Jack, Swiss, or smoked Gouda can be used instead of cheddar. For a little extra color, add a tablespoon or two of finely diced red bell pepper to the egg mixture.
Storage and Reheating
Allow the Bacon and Cheddar Biscuit Cups to cool completely before placing them in an airtight container. Refrigerate for up to three days. Reheat them in a 325°F (165°C) oven for approximately 8–10 minutes, or microwave individually in short intervals until hot throughout.
The cups can also be frozen for up to one month. Wrap them individually and place them in a freezer-safe container. Thaw overnight in the refrigerator before reheating for the best texture.
2. Spinach and Red Pepper Egg Muffins

Spinach and Red Pepper Egg Muffins are a colorful, practical choice for mornings when you want something savory without preparing breakfast from scratch. The eggs form a light, tender base, while the spinach, sweet red pepper, and cheese add flavor and contrasting textures. Because they can be prepared in advance and reheated individually, these egg muffins work particularly well for weekday meal planning.
They can be served warm with whole-grain toast, sliced avocado, or fresh fruit. For a weekend brunch, arrange them on a platter with a simple salad and a bowl of yogurt dip. Their individual size also makes them convenient for packed breakfasts, although they should be kept chilled until you are ready to eat.
Servings: 8 egg muffins
Preparation time: 12 minutes
Cooking time: 18–22 minutes
Total time: Approximately 35 minutes
Ingredients
- 8 large eggs
- ¼ cup milk
- 1 teaspoon olive oil
- ½ medium red bell pepper, finely diced
- 1 packed cup fresh baby spinach, roughly chopped
- ½ cup shredded cheddar, Monterey Jack, or crumbled feta
- 2 tablespoons finely chopped green onions
- ¼ teaspoon garlic powder
- ¼ teaspoon salt
- ⅛ teaspoon ground black pepper
- Cooking spray or oil for greasing the muffin tin
Instructions
- Preheat the oven to 350°F (175°C). Generously grease eight cups of a standard muffin tin, paying particular attention to the sides and upper edges.
- Heat the olive oil in a small skillet over medium heat. Add the diced red bell pepper and cook for 3–4 minutes, until it begins to soften.
- Add the chopped spinach and cook for approximately 1 minute, stirring until it wilts. Remove the skillet from the heat and allow the vegetables to cool for a few minutes.
- Crack the eggs into a large bowl. Add the milk, garlic powder, salt, and black pepper. Whisk until the yolks and whites are completely combined.
- Divide the cooked vegetables, green onions, and cheese evenly among the eight prepared muffin cups.
- Pour the egg mixture over the fillings, stopping just below the rim of each cup. Gently stir each portion once with a fork to distribute the vegetables.
- Bake for 18–22 minutes, or until the centers are set and no liquid egg remains. The muffins will puff in the oven and settle slightly as they cool.
- Let them rest in the pan for 5 minutes. Carefully loosen the edges with a thin silicone spatula before removing and serving.
A Practical Preparation Tip
Cooking the vegetables briefly before adding them to the muffin tin improves both texture and consistency. Raw spinach and bell pepper release water as they bake, which can make the egg muffins spongy or leave moisture at the bottom. Let the cooked vegetables cool slightly so they do not begin cooking the eggs while you assemble the cups.
Easy Variations
Replace the spinach with chopped kale or broccoli that has been cooked until just tender. Mushrooms can also be used, but sauté them until their released moisture has evaporated. For a dairy-free version, omit the cheese and use an unsweetened plant-based milk suitable for savory cooking.
A small pinch of smoked paprika or dried oregano can provide additional flavor without making the recipe spicy.
Storage and Reheating
Cool the Spinach and Red Pepper Egg Muffins completely before refrigerating them in an airtight container. They will keep for up to four days.
Reheat individual muffins in the microwave for approximately 30–45 seconds, checking that they are hot in the center. Alternatively, place them in a 325°F (165°C) oven for 8–10 minutes.
To freeze them, wrap each cooled muffin individually and store them in a freezer-safe container for up to one month. Thaw overnight in the refrigerator before reheating. Patting away any surface moisture with a paper towel can help preserve their texture.
3. Eggs Benedict Toast Cups

Eggs Benedict Toast Cups turn a classic brunch favorite into individual portions that are much easier to prepare for several people at once. Each cup begins with a thin slice of bread that becomes crisp and golden in the muffin tin. Canadian bacon and a gently baked egg fill the center, while warm hollandaise sauce provides the familiar creamy, lemony finish.
Unlike traditional Eggs Benedict, this version does not require you to poach several eggs separately while keeping toast and sauce warm. Most of the preparation happens in a single muffin pan, making it a practical choice for Easter breakfast, Mother’s Day brunch, or a relaxed weekend gathering. Serve the cups immediately after adding the sauce so that the bread remains pleasantly crisp.
Servings: 6 toast cups
Preparation time: 20 minutes
Cooking time: 15–18 minutes
Total time: Approximately 40 minutes
Ingredients for the Toast Cups
- 6 slices soft sandwich bread
- 1 tablespoon softened butter
- 6 slices Canadian bacon or thinly sliced cooked ham
- 6 large eggs
- ¼ teaspoon salt
- ⅛ teaspoon ground black pepper
- Chopped fresh chives, for serving
- Cooking spray or additional butter for the muffin tin
Ingredients for the Hollandaise Sauce
- 2 large egg yolks
- 1 tablespoon fresh lemon juice
- 6 tablespoons unsalted butter, melted and kept warm
- ⅛ teaspoon salt
- A small pinch of cayenne pepper or paprika
- 1–2 teaspoons warm water, if needed
Instructions
- Preheat the oven to 375°F (190°C). Grease six cups of a standard muffin tin thoroughly.
- Remove the crusts from the bread. Gently flatten each slice with a rolling pin, then brush one side lightly with softened butter.
- Press each slice into a prepared muffin cup with the buttered side facing the pan. Overlap or fold the corners as needed to create a complete toast shell without large gaps.
- Place one slice of Canadian bacon or ham inside each bread cup. Bake the empty shells for 5 minutes to begin crisping the bread.
- Remove the muffin tin from the oven. Carefully crack one egg into each cup. Season with salt and black pepper.
- Return the pan to the oven and bake for another 10–13 minutes. The egg whites should be completely set, while the yolks can remain slightly soft or be cooked longer according to preference.
- While the cups bake, prepare the hollandaise. Place the egg yolks and lemon juice in a heatproof bowl and whisk until combined.
- Set the bowl over a saucepan containing a small amount of gently simmering water. Make sure the bottom of the bowl does not touch the water. Whisk continuously for 1–2 minutes, until the yolks begin to thicken.
- Slowly drizzle in the warm melted butter while continuing to whisk. Cook gently until the sauce becomes smooth and thick enough to coat the back of a spoon. Remove it from the heat and stir in the salt and cayenne. If the sauce is too thick, whisk in warm water one teaspoon at a time.
- Let the baked toast cups rest for 2–3 minutes before carefully loosening and removing them from the pan.
- Spoon warm hollandaise over each cup, garnish with chopped chives, and serve immediately.
A Practical Preparation Tip
Choose soft, flexible sandwich bread rather than thick artisan bread. It is easier to flatten and shape without tearing. Press the bread firmly into the bottom corners of the muffin cups so the egg remains centered. Prebaking the shells for five minutes is important because it creates a barrier against moisture from the ham and egg.
Easy Variations
Smoked salmon can replace the Canadian bacon for a different brunch-style version. For a meat-free option, use a few leaves of sautéed spinach or a thin slice of roasted tomato. English muffins are not suitable for forming the cups, but brioche-style sandwich bread can provide a slightly richer flavor.
Storage and Reheating
The toast cups are best enjoyed freshly baked. Leftover cups without hollandaise can be refrigerated in an airtight container for up to two days. Reheat them in a 350°F (175°C) oven for approximately 8 minutes, until hot throughout.
Store leftover hollandaise separately in the refrigerator and use it within one day. Reheat it very gently over warm water while whisking, although freshly prepared sauce will provide the best texture. The completed Eggs Benedict Toast Cups are not recommended for freezing because the egg, toast, and sauce do not thaw evenly.
4. Cinnamon Sugar Doughnut Muffins
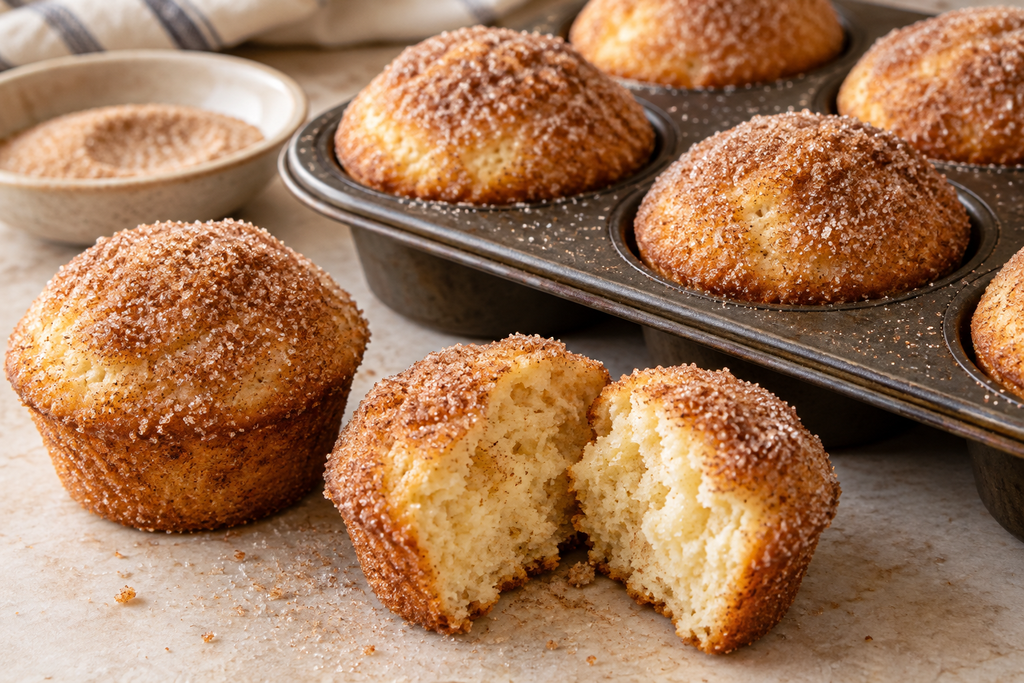
Cinnamon Sugar Doughnut Muffins offer the warm flavor and sugary finish of an old-fashioned doughnut without the need for deep-frying. They bake in an ordinary muffin tin and emerge with soft, lightly spiced centers and gently golden edges. While they are still warm, the tops are brushed with melted butter and coated in cinnamon sugar, creating the sweet, slightly crisp exterior that makes them especially inviting.
These muffins are simple enough for a casual family breakfast but also work beautifully as part of a brunch spread. Serve them with coffee, tea, hot chocolate, or a bowl of fresh fruit. They are at their best shortly after baking, when the centers remain tender and the buttery cinnamon coating is still fragrant.
Servings: 12 muffins
Preparation time: 15 minutes
Cooking time: 16–19 minutes
Total time: Approximately 35 minutes
Ingredients for the Muffins
- 2 cups all-purpose flour
- ¾ cup granulated sugar
- 2 teaspoons baking powder
- ½ teaspoon ground cinnamon
- ¼ teaspoon ground nutmeg
- ¼ teaspoon salt
- 1 large egg
- ¾ cup milk
- ⅓ cup unsalted butter, melted and slightly cooled
- 1 teaspoon vanilla extract
- Cooking spray or softened butter for the muffin tin
Ingredients for the Cinnamon Sugar Coating
- ¼ cup unsalted butter, melted
- ½ cup granulated sugar
- 1½ teaspoons ground cinnamon
Instructions
- Preheat the oven to 375°F (190°C). Grease all 12 cups of a standard muffin tin.
- In a large bowl, whisk together the flour, sugar, baking powder, cinnamon, nutmeg, and salt.
- In a separate bowl, whisk the egg, milk, melted butter, and vanilla extract until evenly combined.
- Pour the wet ingredients into the dry ingredients. Stir gently with a spatula just until no dry streaks of flour remain. A few small lumps are fine; overmixing can make the muffins dense.
- Divide the batter evenly among the prepared muffin cups, filling each one approximately two-thirds full.
- Bake for 16–19 minutes, or until the tops are lightly golden and spring back when gently pressed. A toothpick inserted into the center should come out clean or with only a few moist crumbs.
- Let the muffins cool in the pan for 5 minutes, then carefully transfer them to a wire rack.
- Mix the sugar and cinnamon for the coating in a small, shallow bowl.
- While the muffins are still warm, lightly brush the top and upper sides of each one with melted butter. Dip or roll the buttered portion in the cinnamon sugar until evenly coated.
- Serve warm or allow the coating to set for several minutes before storing.
A Practical Preparation Tip
The butter used in the muffin batter should be melted but no longer hot. Very hot butter can begin cooking the egg or create uneven pockets in the mixture. It is also important to measure the flour without packing it into the cup. Spoon it loosely into the measuring cup and level the top for a softer result.
Apply only a thin layer of melted butter before dipping the muffins. Too much butter can dissolve the sugar coating instead of helping it cling to the surface.
Easy Variations
For a stronger old-fashioned doughnut flavor, increase the nutmeg to ½ teaspoon. A small amount of orange zest can add a fresh citrus note, while replacing the vanilla with maple extract creates a cozy autumn variation.
You can coat only the tops for a lighter finish or brush and roll the entire muffin in cinnamon sugar for a sweeter, more doughnut-like exterior.
Storage and Reheating
Store completely cooled Cinnamon Sugar Doughnut Muffins in an airtight container at room temperature for up to two days. Place a sheet of paper towel beneath and above the muffins to help prevent excess moisture from softening the coating.
To refresh them, warm individual muffins in a 300°F (150°C) oven for approximately 5 minutes. They can also be frozen before adding the butter and cinnamon sugar coating. Freeze the uncoated muffins for up to one month, thaw them at room temperature, warm briefly, and apply the fresh coating before serving.
5. Crab, Corn and Old Bay Frittata Cups

Crab, Corn and Old Bay Frittata Cups bring a gentle coastal character to the breakfast table. Sweet corn complements the delicate crabmeat, while a small amount of seafood seasoning gives the eggs a savory, lightly spiced finish. The flavor is distinctive without becoming overpowering, making these individual frittatas suitable for breakfast, brunch, or a light lunch.
They are particularly appealing when you want to serve something a little different from ordinary egg muffins. Pair them with sliced tomatoes, a crisp green salad, or fresh fruit. A small spoonful of plain yogurt or sour cream can also provide a cool contrast to the warm seasoning.
Servings: 8 frittata cups
Preparation time: 15 minutes
Cooking time: 18–22 minutes
Total time: Approximately 35 minutes
Ingredients
- 8 large eggs
- ¼ cup milk
- ¾ cup cooked crabmeat, carefully checked for shell fragments
- ½ cup corn kernels, thawed if frozen
- ½ cup shredded Monterey Jack or mild cheddar cheese
- 2 tablespoons finely diced red bell pepper
- 2 tablespoons thinly sliced green onions
- 1 teaspoon Old Bay seasoning or another seafood seasoning
- 1 teaspoon fresh lemon juice
- ⅛ teaspoon ground black pepper
- 1 teaspoon olive oil
- Cooking spray or softened butter for the muffin tin
- Chopped fresh parsley or additional green onion, for serving
Instructions
- Preheat the oven to 350°F (175°C). Generously grease eight cups of a standard muffin tin.
- Heat the olive oil in a small skillet over medium heat. Add the red bell pepper and corn, then cook for 3–4 minutes, stirring occasionally. Remove the skillet from the heat and let the mixture cool slightly.
- Place the crabmeat in a small bowl. Check it carefully with your fingers and remove any pieces of shell or cartilage. Add the lemon juice and gently toss without breaking up the crab too much.
- Crack the eggs into a large mixing bowl. Add the milk, seafood seasoning, and black pepper. Whisk until completely combined.
- Divide the cooked corn and pepper mixture among the prepared muffin cups. Add the crabmeat, green onions, and shredded cheese.
- Pour the egg mixture evenly into the cups, filling each approximately three-quarters full. Gently stir each portion once with a fork so the fillings are distributed through the egg.
- Bake for 18–22 minutes, or until the tops are lightly golden and the centers are completely set.
- Allow the frittata cups to rest in the pan for 5 minutes. Run a thin silicone spatula around the edges and carefully lift them out.
- Garnish with chopped parsley or green onion and serve warm.
A Practical Preparation Tip
Crabmeat can contain more moisture than other frittata fillings. Drain it well and gently pat it with a paper towel before adding it to the muffin cups. The corn and bell pepper should also be briefly cooked so they do not release excess liquid into the eggs.
Seafood seasoning already contains salt, so taste and brand strength should be considered before adding any additional salt. It is easier to season the finished cups than to correct an overly salty egg mixture.
Easy Variations
Cooked chopped shrimp can replace the crab, or you can use a combination of the two. For a more economical variation, reduce the crab to ½ cup and increase the corn slightly.
Feta cheese gives the cups a sharper, saltier character, while Monterey Jack keeps the flavor mild. A small pinch of cayenne can be added for more heat. If seafood is not suitable for your guests, replace it with diced cooked chicken and use a mild herb blend instead of seafood seasoning.
Storage and Reheating
Cool the Crab, Corn and Old Bay Frittata Cups completely before transferring them to an airtight container. Refrigerate promptly and consume within three days.
Reheat them in a 325°F (165°C) oven for 8–10 minutes, or microwave individual portions in short intervals until steaming hot in the center. Avoid overheating, as this can make both the egg and crabmeat rubbery.
Although the cups can be frozen for up to one month, refrigeration provides a better texture. If frozen, thaw them overnight in the refrigerator before reheating, and do not refreeze previously frozen crabmeat unless it was cooked after thawing.
6. Hash Brown Quiche Cups

Hash Brown Quiche Cups replace traditional pastry with individual nests of crisp, golden shredded potato. Inside each potato shell is a creamy egg filling with sautéed mushrooms, Swiss cheese, and a touch of thyme. The contrast between the crunchy exterior and tender center makes these cups feel more substantial than ordinary egg muffins.
They are well suited to a leisurely brunch, but they can also be prepared ahead for weekday breakfasts. Serve them with fresh tomatoes, a lightly dressed salad, or sliced avocado. Since the potato crust already provides a satisfying base, the cups do not require toast or another side dish to feel complete.
Servings: 8 quiche cups
Preparation time: 25 minutes
Cooking time: 32–38 minutes
Total time: Approximately 1 hour
Ingredients for the Hash Brown Crusts
- 3 cups frozen shredded hash browns, completely thawed
- 1 large egg, lightly beaten
- ½ cup shredded cheddar cheese
- 1 tablespoon olive oil or melted butter
- ½ teaspoon salt
- ¼ teaspoon ground black pepper
- Cooking spray or softened butter for the muffin tin
Ingredients for the Quiche Filling
- 5 large eggs
- ⅓ cup milk or half-and-half
- 1 teaspoon olive oil
- 1 cup finely chopped mushrooms
- ½ cup shredded Swiss cheese
- 2 tablespoons finely chopped green onions
- ¼ teaspoon dried thyme
- ⅛ teaspoon salt
- ⅛ teaspoon ground black pepper
Instructions
- Preheat the oven to 400°F (200°C). Generously grease eight cups of a standard muffin tin.
- Place the thawed hash browns in a clean kitchen towel. Gather the towel around the potatoes and squeeze firmly over the sink to remove as much moisture as possible.
- Transfer the dry potatoes to a bowl. Add the beaten egg, cheddar cheese, olive oil, salt, and black pepper. Mix until the potato strands are evenly coated.
- Divide the mixture among the eight prepared muffin cups. Press it firmly across the bottoms and up the sides to create compact shells. Make sure there are no thin gaps where the filling could escape.
- Bake the potato crusts for 15–18 minutes, or until the edges begin to turn golden. Remove the pan from the oven and reduce the temperature to 350°F (175°C).
- While the crusts bake, heat one teaspoon of olive oil in a small skillet over medium heat. Add the mushrooms and cook for 5–7 minutes, stirring occasionally, until their released moisture has evaporated. Remove them from the heat.
- In a medium bowl, whisk the eggs, milk, thyme, salt, and black pepper until combined.
- Divide the cooked mushrooms, Swiss cheese, and green onions among the prebaked potato shells.
- Pour the egg mixture into the cups, stopping just below the tops of the crusts.
- Return the muffin tin to the oven and bake for another 17–20 minutes, until the egg filling is completely set and the potato edges are crisp and deeply golden.
- Let the cups rest in the pan for 5–7 minutes. Loosen the edges and lift them out carefully with a thin silicone spatula.
A Practical Preparation Tip
Removing moisture from the shredded potatoes is the most important step. Wet potatoes steam instead of becoming crisp and may stick to the pan. After squeezing them in the towel, the strands should feel relatively dry and separate easily.
Press the mixture firmly into the bottom corners and sides of each muffin cup. A measuring cup with a flat base can help compact the potatoes evenly. Do not skip the initial baking stage: the crust needs time to firm up before the liquid filling is added.
Easy Variations
Replace the mushrooms with finely chopped broccoli, sautéed leeks, or roasted red pepper. Gruyère, cheddar, or Monterey Jack can be used instead of Swiss cheese.
For a heartier version, add a small amount of cooked crumbled sausage or finely diced ham. Keep the total amount of filling moderate so the egg mixture does not overflow the potato shells.
Storage and Reheating
Cool the Hash Brown Quiche Cups completely before placing them in an airtight container. Refrigerate for up to three days.
For the best texture, reheat them in a 375°F (190°C) oven or air fryer for 6–10 minutes. This helps restore the crisp potato exterior. Microwave reheating is faster, but it will make the crust softer.
The cups can be frozen for up to one month. Freeze them individually on a tray before transferring them to a freezer-safe container. Thaw overnight in the refrigerator and reheat in the oven until hot in the center.
7. Whole Wheat Blueberry Muffins
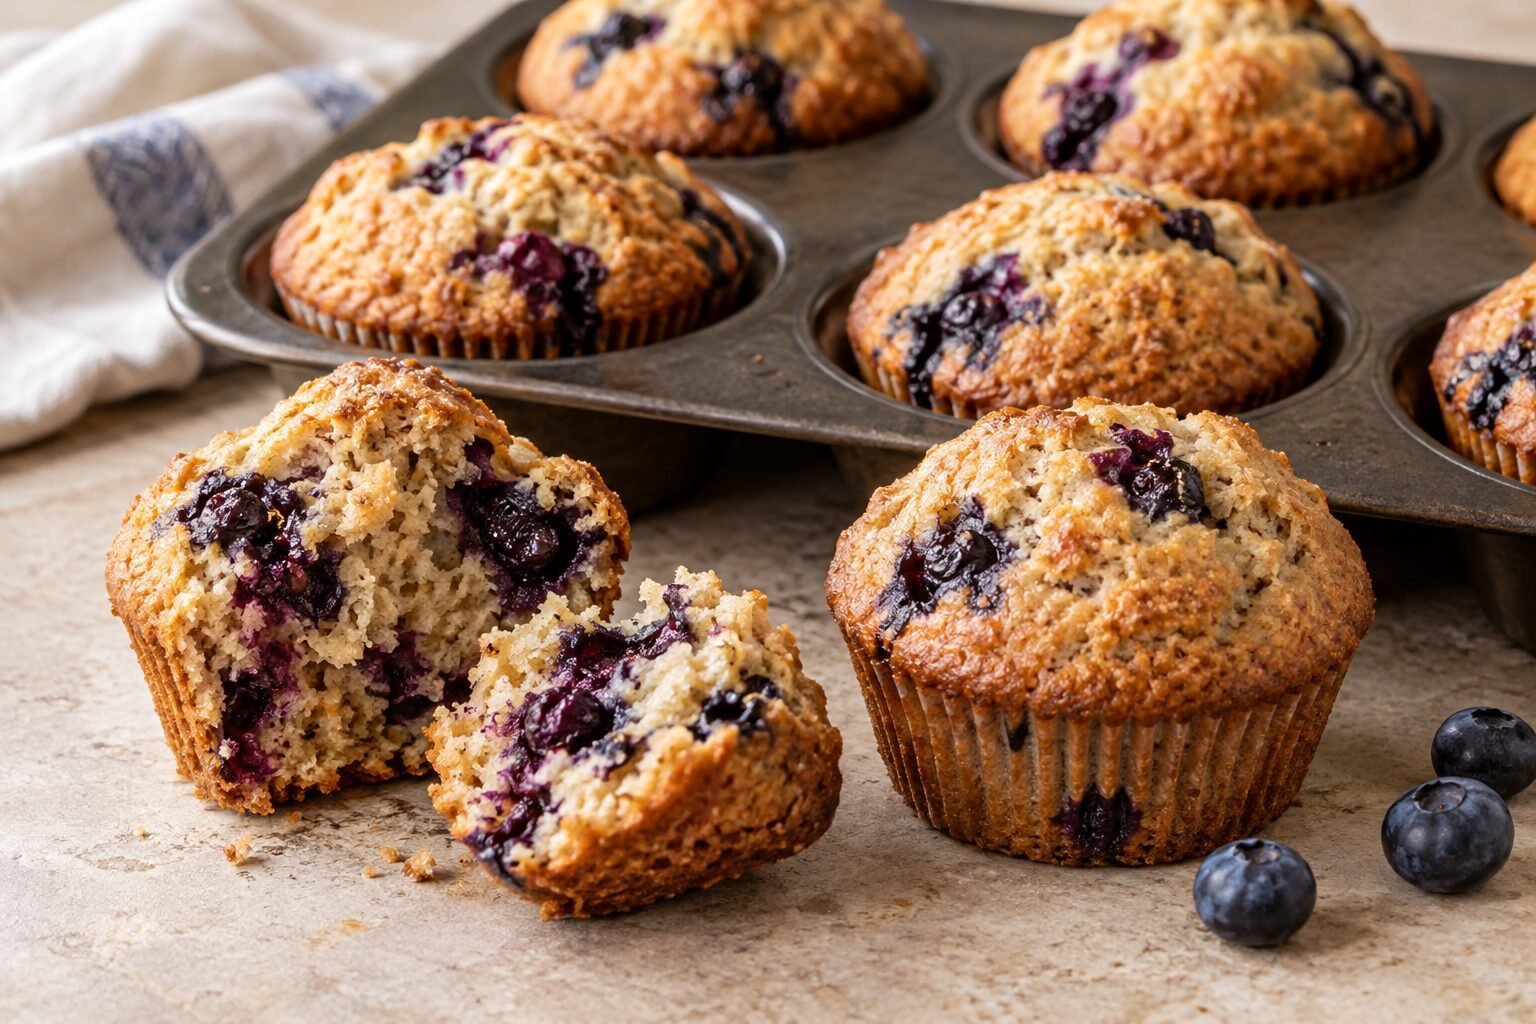
Whole Wheat Blueberry Muffins combine a gently nutty crumb with juicy pockets of fruit. They are not intended to taste like an overly sweet cupcake; instead, they offer a balanced breakfast flavor with a little honey, vanilla, and lemon zest highlighting the blueberries.
These muffins are useful for mornings when you need something that can be packed and eaten without reheating. They also make a welcoming addition to a brunch table alongside eggs, yogurt, or fresh fruit. The blueberries release some of their juice as they bake, creating purple streaks and slightly jammy spots throughout the muffins.
Servings: 12 muffins
Preparation time: 15 minutes
Cooking time: 18–22 minutes
Total time: Approximately 40 minutes
Ingredients
- 2 cups whole wheat pastry flour
- 1½ teaspoons baking powder
- ½ teaspoon baking soda
- ½ teaspoon ground cinnamon
- ¼ teaspoon salt
- 2 large eggs
- ½ cup plain Greek yogurt
- ½ cup milk
- ⅓ cup honey or maple syrup
- ⅓ cup neutral-flavored oil
- 1 teaspoon vanilla extract
- 1 teaspoon finely grated lemon zest
- 1¼ cups fresh blueberries
- 1 tablespoon whole wheat flour, for coating the blueberries
- Cooking spray, softened butter, or 12 paper muffin liners
Instructions
- Preheat the oven to 375°F (190°C). Grease a standard 12-cup muffin tin or line it with paper liners.
- In a large bowl, whisk together the whole wheat pastry flour, baking powder, baking soda, cinnamon, and salt.
- In a separate bowl, whisk the eggs, Greek yogurt, milk, honey, oil, vanilla, and lemon zest until smooth.
- Pour the wet mixture into the bowl containing the dry ingredients. Fold gently with a spatula until the batter is almost combined. A few visible streaks of flour should remain at this point.
- Place the blueberries in a small bowl and toss them with one tablespoon of flour. This light coating helps distribute them more evenly through the batter.
- Add the blueberries to the batter and fold only until no dry flour remains. Avoid crushing the berries or stirring more than necessary.
- Divide the batter evenly among the prepared muffin cups, filling each approximately three-quarters full.
- Bake for 18–22 minutes, or until the tops are lightly golden and a toothpick inserted into the center of a muffin comes out clean or with a few moist crumbs.
- Let the muffins cool in the pan for 5 minutes. Transfer them to a wire rack and allow them to cool for at least another 10 minutes before serving.
A Practical Preparation Tip
Whole wheat flour absorbs liquid more readily than all-purpose flour. After combining the wet and dry ingredients, work gently and stop mixing as soon as the batter comes together. Overmixing encourages gluten development and can produce firm, heavy muffins.
Whole wheat pastry flour gives the softest texture. If only regular whole wheat flour is available, replace ½ cup of it with all-purpose flour or add one additional tablespoon of milk if the batter appears unusually thick.
Using Frozen Blueberries
Frozen blueberries can be added directly from the freezer. Do not thaw them first, as thawed berries release more juice and may turn the entire batter purple. Toss the frozen berries with flour and fold them in just before filling the muffin cups. The muffins may require an additional 2–3 minutes in the oven.
Easy Variations
Replace the lemon zest with orange zest, or add ½ cup of chopped walnuts for extra texture. Raspberries can be substituted for the blueberries, although they should be folded in particularly gently because they break apart more easily.
For a lightly textured topping, sprinkle a small amount of rolled oats over each muffin before baking.
Storage and Reheating
Allow the Whole Wheat Blueberry Muffins to cool completely before storing them in an airtight container. Keep them at room temperature for up to two days or refrigerate them for up to four days. A sheet of paper towel in the container can absorb moisture released by the fruit.
The muffins can be frozen for up to two months. Wrap them individually and place them in a freezer-safe container. Thaw at room temperature or warm a muffin in a 300°F (150°C) oven for approximately 8 minutes.
8. Apple Cinnamon Baked Oatmeal Cups
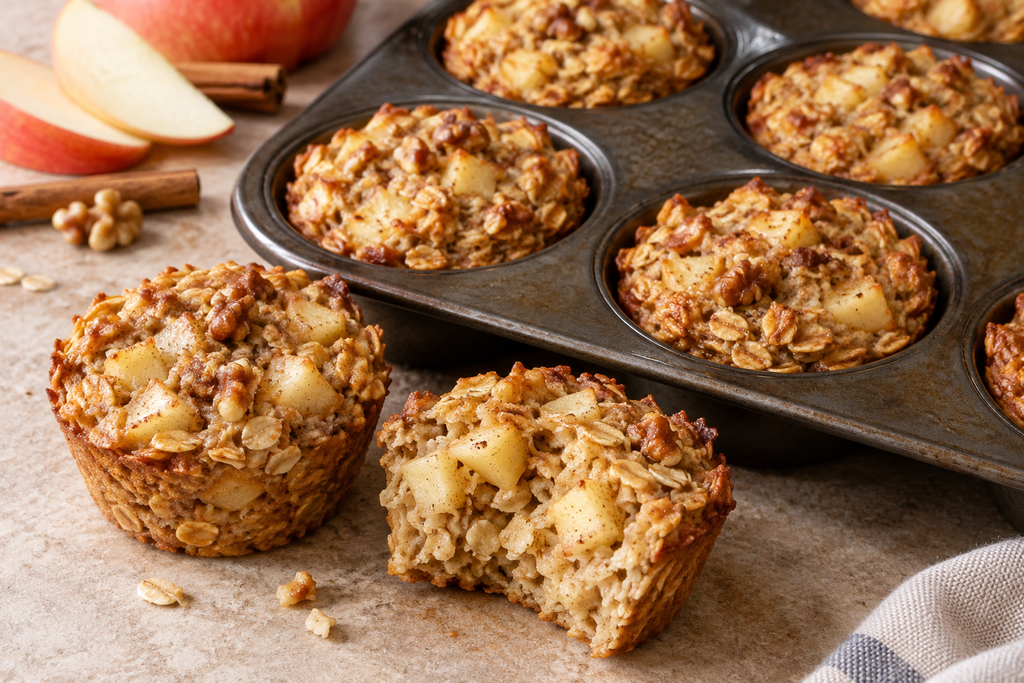
Apple Cinnamon Baked Oatmeal Cups turn a comforting bowl of oatmeal into portable individual portions. Rolled oats provide a pleasantly chewy texture, while small pieces of apple soften during baking and add natural sweetness. Cinnamon, vanilla, and maple syrup bring the familiar flavor of a warm apple breakfast without turning the cups into dessert.
These oatmeal cups are especially convenient for advance preparation. They can be stored in the refrigerator, frozen individually, and reheated only when needed. Serve them as they are, or warm them and add a spoonful of yogurt, a little nut butter, or a splash of milk. They also travel more easily than ordinary oatmeal, making them useful for workdays and early departures.
Servings: 12 oatmeal cups
Preparation time: 15 minutes
Cooking time: 24–28 minutes
Total time: Approximately 45 minutes
Ingredients
- 2½ cups old-fashioned rolled oats
- 1 teaspoon baking powder
- 1½ teaspoons ground cinnamon
- ¼ teaspoon ground nutmeg
- ¼ teaspoon salt
- 2 large eggs
- 1¾ cups milk
- ⅓ cup pure maple syrup or honey
- ¼ cup unsweetened applesauce
- 2 tablespoons melted unsalted butter or neutral-flavored oil
- 1 teaspoon vanilla extract
- 1 medium apple, peeled, cored, and cut into small cubes
- ⅓ cup chopped walnuts or pecans, optional
- Cooking spray or softened butter for the muffin tin
Instructions
- Preheat the oven to 350°F (175°C). Generously grease all 12 cups of a standard muffin tin.
- In a large bowl, combine the rolled oats, baking powder, cinnamon, nutmeg, and salt.
- In a separate bowl, whisk the eggs, milk, maple syrup, applesauce, melted butter, and vanilla until evenly combined.
- Pour the wet mixture over the oats. Stir well, then let the mixture rest for 5 minutes so the oats can begin absorbing the liquid.
- Fold in the diced apple and the chopped nuts, if using.
- Stir the mixture before filling each muffin cup so that the oats and apple pieces remain evenly distributed. Fill the cups almost to the top, adding both oats and liquid to every portion.
- Bake for 24–28 minutes, or until the centers are set and the edges are lightly golden.
- Allow the oatmeal cups to cool in the pan for 10 minutes. Run a thin silicone spatula around the edges, then carefully lift them out and transfer them to a wire rack.
- Serve warm, or let them cool completely before storing.
A Practical Preparation Tip
The oat mixture contains more liquid than ordinary muffin batter. Stir it frequently while dividing it among the cups; otherwise, the first portions may contain too much liquid and the final ones too many oats.
Cut the apple into small cubes so it softens during the relatively short baking time. Pieces measuring approximately ¼ inch work well. Larger chunks may remain firm and can cause the cups to break when removed from the pan.
Easy Variations
Add raisins, dried cranberries, or a handful of chopped dates with the apple. Pear can replace the apple, while pumpkin purée can be used instead of applesauce for an autumn version.
For a nut-free preparation, simply omit the walnuts or pecans. A tablespoon of sunflower seed butter can be served alongside the finished cups if desired. Use certified gluten-free rolled oats when preparing the recipe for someone who needs to avoid gluten, and check all other ingredient labels as well.
Storage and Reheating
Cool the Apple Cinnamon Baked Oatmeal Cups completely before storing them in an airtight container. Refrigerate for up to five days.
Reheat one cup in the microwave for approximately 30–45 seconds, or warm several portions in a 325°F (165°C) oven for 8–10 minutes. A teaspoon of milk spooned over each cup before reheating can provide a softer texture.
Freeze the cooled cups individually for up to two months. Once firm, transfer them to a freezer-safe container. Thaw overnight in the refrigerator or reheat gently from frozen, allowing additional time for the center to become hot.
9. Sausage and Cheddar Breakfast Muffins

Sausage and Cheddar Breakfast Muffins are hearty, savory baked muffins with crumbled breakfast sausage and cheese folded directly into the batter. The outside becomes golden and lightly crisp, while the center remains soft and studded with pieces of sausage, melted cheddar, and green onion.
These muffins are a convenient option when breakfast needs to be filling, portable, and easy to prepare in advance. They can be served warm with scrambled eggs or fresh tomatoes, but they are substantial enough to enjoy on their own. Their savory flavor also makes them suitable for brunch buffets, packed lunches, and afternoon snacks.
Servings: 12 muffins
Preparation time: 20 minutes
Cooking time: 18–22 minutes
Total time: Approximately 45 minutes
Ingredients
- 8 ounces breakfast sausage, casings removed if necessary
- 1¾ cups all-purpose flour
- 2 teaspoons baking powder
- ½ teaspoon baking soda
- ½ teaspoon garlic powder
- ¼ teaspoon salt
- ¼ teaspoon ground black pepper
- 1 large egg
- 1 cup buttermilk
- ⅓ cup unsalted butter, melted and slightly cooled
- 1 cup shredded sharp cheddar cheese
- ¼ cup thinly sliced green onions
- Cooking spray, softened butter, or 12 paper muffin liners
Instructions
- Preheat the oven to 375°F (190°C). Grease a standard 12-cup muffin tin or line it with paper liners.
- Place the sausage in a skillet over medium heat. Cook for 6–8 minutes, breaking it into small crumbles, until browned and completely cooked.
- Transfer the sausage to a plate lined with paper towel and allow it to cool. Remove as much excess grease as possible so the muffins do not become heavy or oily.
- In a large bowl, whisk together the flour, baking powder, baking soda, garlic powder, salt, and black pepper.
- In a separate bowl, whisk the egg, buttermilk, and melted butter until combined.
- Pour the wet ingredients into the dry ingredients. Stir gently until the batter is only partially combined.
- Reserve a small amount of cheddar and sausage for the tops. Add the remaining cheese, cooked sausage, and green onions to the batter. Fold gently just until no dry flour remains.
- Divide the batter evenly among the prepared muffin cups. They should be approximately three-quarters full.
- Sprinkle the reserved cheddar and sausage over the tops, pressing them very lightly into the batter.
- Bake for 18–22 minutes, until the muffins are golden and a toothpick inserted into the center comes out without wet batter.
- Let the muffins rest in the pan for 5 minutes before transferring them to a wire rack. Serve warm or allow them to cool completely before storing.
A Practical Preparation Tip
Let the cooked sausage cool before adding it to the batter. Hot sausage can begin melting the cheese and warming the egg mixture too early. Draining it thoroughly is equally important because excessive fat can collect around the bottom of the muffins.
Once the liquid and dry ingredients meet, mix as little as possible. A thick, slightly uneven batter is preferable to an entirely smooth one. Overmixing can make savory muffins tough.
Easy Variations
Use mild or spicy breakfast sausage according to your preference. Cooked turkey or chicken sausage can replace pork sausage, although leaner varieties may produce a slightly drier result.
Pepper Jack can replace some of the cheddar for extra heat. Finely diced roasted red pepper, jalapeño, or sautéed onion can also be added, but keep additional ingredients to approximately ½ cup in total so the muffins hold together properly.
If buttermilk is unavailable, place one tablespoon of lemon juice or white vinegar in a measuring cup, add enough milk to reach one cup, and let it stand for 5 minutes before using.
Storage and Reheating
Allow the Sausage and Cheddar Breakfast Muffins to cool completely before placing them in an airtight container. Refrigerate them within two hours and consume them within four days.
Reheat individual muffins in the microwave for approximately 20–30 seconds, or place several in a 325°F (165°C) oven for 8–10 minutes. Make sure the centers are hot before serving.
The muffins can be frozen for up to two months. Wrap them individually and store them in a freezer-safe container. Thaw overnight in the refrigerator or reheat gently from frozen, allowing additional time for the center.
A Note About the Images
The food images featured in this article were created with the assistance of artificial intelligence. Each image was carefully developed around the corresponding recipe’s ingredients, preparation method, textures, and expected finished appearance, then reviewed for consistency with the written instructions.
The images are intended to provide a realistic visual reference and serving inspiration rather than document a specific batch prepared for photography. Since ingredients, ovens, muffin tins, and cooking times can vary, your finished results may naturally differ slightly in color, shape, size, or texture. For the most reliable outcome, follow the measurements, visual cues, and preparation steps provided in each recipe.